A Beginner’s Guide to Using Ear Cameras Safely and Effectively

Strong 8k brings an ultra-HD IPTV experience to your living room and your pocket.
In recent years, ear cameras have grown in popularity as a tool for personal healthcare and hygiene. These small devices, equipped with tiny cameras and often accompanied by mobile apps, allow users to visualize the inner ear canal. Whether you’re curious about your ear health, suspect a blockage, or simply want to keep track of cleanliness, ear camera offer a convenient solution. However, as with any tool, it is essential to use them correctly to avoid potential harm. Here’s a comprehensive beginner’s guide to using ear cameras safely and effectively.
What Is an Ear Camera?
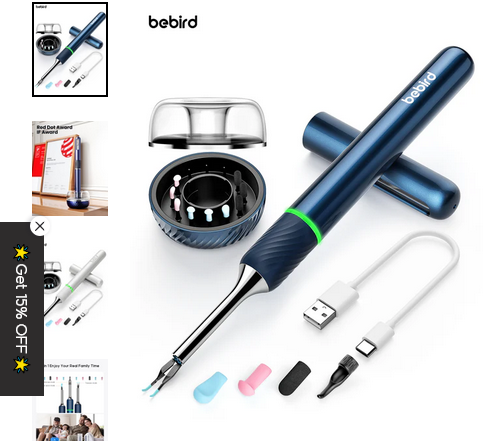
An ear camera, sometimes called an otoscope or endoscope, is a device designed to provide a clear view of the ear canal and eardrum. These cameras are typically connected to smartphones, tablets, or computers via Wi-Fi or USB. Many models come with LED lights to enhance visibility, and some include tools like earwax removal kits.
Why Use an Ear Camera?
Health Monitoring: Regular visual inspections can help you identify signs of ear infections, excessive wax buildup, or other abnormalities.
Cost-Effective: Using an ear camera can reduce the need for frequent visits to the doctor for minor concerns.
Hygiene Maintenance: Ear cameras help ensure proper cleaning practices by allowing you to see exactly what you’re doing.
Step-by-Step Guide to Using an Ear Camera
1. Choose the Right Device
Selecting a high-quality ear camera is crucial. Look for devices with:
High-Resolution Cameras: At least 1080p for clear visuals.
Adjustable LED Lights: For better visibility in the dark ear canal.
Compatibility: Ensure the camera works with your smartphone or computer.
Safe Design: Rounded, soft-tipped attachments reduce the risk of injury.
2. Prepare the Equipment
Before using the camera, clean it thoroughly with alcohol wipes or as instructed by the manufacturer. Ensure all attachments are securely in place. Install any necessary apps on your device and test the camera’s functionality.
3. Set Up a Comfortable Environment
Use the ear camera in a well-lit, quiet space where you can sit comfortably. Having a mirror or a friend to assist can make the process easier, especially for first-time users.
4. Start with External Inspection
Begin by examining the outer ear to ensure there are no visible injuries or irritations. This step is particularly important if you’re experiencing discomfort or pain.
5. Insert the Camera Gently
Hold the device steadily and slowly insert the camera into the ear canal. Avoid forcing it in—gentle movements are key. Watch the live feed on your connected device to guide your actions.
6. Inspect and Assess
Take your time to observe the ear canal and eardrum. Look for signs of:
Excessive earwax buildup.
Redness or swelling, which could indicate an infection.
Foreign objects that may need professional removal.
7. Use Tools Cautiously
If your camera comes with earwax removal tools, use them with extreme care. Avoid pushing wax deeper into the canal, as this can cause blockages or damage. If you’re unsure about removing wax safely, consult a healthcare professional.
Safety Tips
1. Don’t Overuse
While it’s tempting to frequently check your ears, overusing the camera can cause irritation. Limit inspections to once every few weeks unless advised otherwise by a doctor.
2. Avoid if You Have Ear Conditions
If you have a perforated eardrum, ear infection, or other medical conditions, avoid using an ear camera without consulting a healthcare professional.
3. Never Force the Camera
If you encounter resistance while inserting the device, stop immediately. Forcing the camera can lead to injuries or discomfort.
4. Keep It Clean
Disinfect the camera and its attachments before and after each use to prevent bacterial or fungal infections.
When to Seek Professional Help
Using an ear camera can be informative, but it’s not a substitute for professional medical advice. Seek a doctor’s guidance if you notice:
Persistent pain or discomfort.
Signs of infection, such as swelling, redness, or discharge.
Hearing loss or a feeling of fullness in the ear.
Benefits and Limitations
Benefits:
Empowerment through self-monitoring.
Cost savings on minor issues.
Improved hygiene practices.
Limitations:
Limited scope: Some issues may not be visible with an ear camera.
Risk of misuse: Incorrect handling can lead to injuries.
Conclusion
Ear cameras are a revolutionary tool for personal healthcare, offering an unprecedented look inside the ear canal. By following the steps and precautions outlined in this guide, you can safely and effectively use an ear camera to monitor your ear health. Remember, while these devices are helpful, they are not a replacement for professional medical care. Use them responsibly and consult a healthcare provider when in doubt. With proper usage, an ear camera can become an invaluable part of your self-care toolkit.
Note: IndiBlogHub features both user-submitted and editorial content. We do not verify third-party contributions. Read our Disclaimer and Privacy Policyfor details.


