Grease Be Gone: The Easy Way to Deep Clean Your Oven Naturally

Strong 8k brings an ultra-HD IPTV experience to your living room and your pocket.
When was the last time you peeked inside your oven and didn’t cringe? Between overflowing casseroles and crispy pizza drips, ovens take on quite a bit of wear and tear. The good news is that giving your oven a deep refresh doesn’t require toxic sprays or hours of elbow grease. If you’re wondering how to clean oven using simple methods and household staples, you’re in for a surprise—it’s easier than it sounds and way more satisfying than you'd think.
Why Regular Oven Cleaning Pays Off
Ignoring a messy oven leads to more than unpleasant odors—it can impact cooking performance, affect taste, and shorten the life of your appliance. Excess grime absorbs heat, causes smoke, and can even trigger your smoke alarm during normal use. Staying on top of oven hygiene not only improves your meals but also ensures your kitchen stays safe and efficient.
Everyday Ingredients, Powerful Results
You don’t need to invest in expensive or harsh products. The secret to a spotless oven lies in a few familiar ingredients:
Baking soda (your natural scrubbing agent)
Distilled vinegar (for a fizzy finish)
Warm water
Microfiber or old cloths
A non-abrasive scrub sponge
Rubber gloves (for easier handling)
An old plastic card or spatula for scraping
Dish soap (for cleaning racks)
Step 1: Empty and Protect
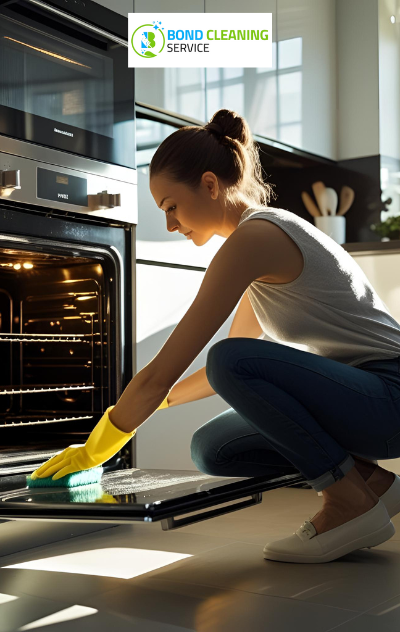
First things first—make sure your oven is turned off and completely cool. Remove all accessories inside, including racks, trays, and thermometers. Place a towel or sheet beneath the oven door to catch any drips or crumbs.
Step 2: Whip Up Your Cleaning Mix
Create a paste by mixing half a cup of baking soda with a few tablespoons of warm water. Adjust the consistency until it’s thick enough to stick to the oven walls. You can even add a few drops of essential oil like tea tree or lemon for a fresh scent.
Step 3: Spread the Magic Paste
Apply the paste generously across the oven interior, paying special attention to grimy corners, splatter marks, and greasy surfaces. Skip the heating elements. Let this sit for 8–12 hours or overnight for best results.
Step 4: Give Your Racks a Soak
Meanwhile, take your oven racks to the bathtub or laundry sink. Fill it with hot water and dishwashing liquid. Let the racks soak for a few hours to loosen grease, then scrub with a sponge or old toothbrush. Rinse and dry completely.
Step 5: Time to Wipe and Rinse
After the paste has worked its way into the grime, use a damp cloth to wipe it all away. Spray the inside of the oven with vinegar to help break down any leftover baking soda and make the interior sparkle. For hard-to-reach areas or caked-on debris, use a plastic scraper gently.
Step 6: Don’t Skip the Door Glass
The inside of your oven door glass often ends up foggy or stained. Mix equal parts vinegar and water in a spray bottle, spray it on, and scrub using a soft sponge. For stubborn spots, try the baking soda paste again—leave it for 15 minutes and wipe clean.
Step 7: Final Rinse and Reassemble
Once everything’s clean and dry, reinstall the racks and accessories. You can run the oven for 10 minutes at a low temperature to help eliminate any lingering moisture or vinegar scent. Your oven is now fresh, functional, and ready for your next bake.
Quick Tips to Keep It Clean Longer
Use baking trays under dishes to catch spills before they hit the oven floor.
Wipe after each use once the oven cools down—minor messes are easier to handle.
Steam between deep cleans by heating a bowl of lemon water to loosen grime.
Clean monthly if you cook frequently, or at least once every season.
Wrap-Up: Your Oven Deserves a Fresh Start
Cleaning your oven doesn’t have to be an intimidating task. With a little prep and a few pantry items, you can give it a thorough makeover that improves everything from safety to flavor. So roll up your sleeves and give your kitchen hero the deep clean it deserves—you might even enjoy the process!
Grease Be Gone: The Easy Way to Deep Clean Your Oven Naturally
When was the last time you peeked inside your oven and didn’t cringe? Between overflowing casseroles and crispy pizza drips, ovens take on quite a bit of wear and tear. The good news is that giving your oven a deep refresh doesn’t require toxic sprays or hours of elbow grease. If you’re wondering how to clean oven using simple methods and household staples, you’re in for a surprise—it’s easier than it sounds and way more satisfying than you'd think.
Why Regular Oven Cleaning Pays Off
Ignoring a messy oven leads to more than unpleasant odors—it can impact cooking performance, affect taste, and shorten the life of your appliance. Excess grime absorbs heat, causes smoke, and can even trigger your smoke alarm during normal use. Staying on top of oven hygiene not only improves your meals but also ensures your kitchen stays safe and efficient.
A cleaner oven also means better energy usage. When grime builds up on oven walls or heating elements, your appliance must work harder to reach and maintain temperature. Over time, this can spike your electricity bill and wear down essential components. Investing a little time in cleaning saves you money and trouble down the line.
Everyday Ingredients, Powerful Results
You don’t need to invest in expensive or harsh products. The secret to a spotless oven lies in a few familiar ingredients:
Baking soda (your natural scrubbing agent)
Distilled vinegar (for a fizzy finish)
Warm water
Microfiber or old cloths
A non-abrasive scrub sponge
Rubber gloves (for easier handling)
An old plastic card or spatula for scraping
Dish soap (for cleaning racks)
Optional: lemon juice or essential oils for fragrance
Step 1: Empty and Protect
First things first—make sure your oven is turned off and completely cool. Remove all accessories inside, including racks, trays, and thermometers. Place a towel or sheet beneath the oven door to catch any drips or crumbs. This also helps protect your flooring while you work.
Step 2: Whip Up Your Cleaning Mix
Create a paste by mixing half a cup of baking soda with a few tablespoons of warm water. Adjust the consistency until it’s thick enough to stick to the oven walls. You can even add a few drops of essential oil like tea tree or lemon for a fresh scent. This mixture is non-toxic, safe, and surprisingly effective against stubborn grease.
Step 3: Spread the Magic Paste
Apply the paste generously across the oven interior, paying special attention to grimy corners, splatter marks, and greasy surfaces. Skip the heating elements. Let this sit for 8–12 hours or overnight for best results. The longer it sits, the easier the grime will lift off.
Step 4: Give Your Racks a Soak
Meanwhile, take your oven racks to the bathtub or laundry sink. Fill it with hot water and dishwashing liquid. Add a little vinegar if they’re particularly greasy. Let them soak for a few hours, then scrub with a sponge or old toothbrush. Rinse and dry completely.
If your racks are heavily soiled, you can sprinkle baking soda on them directly and spray with vinegar before soaking. This extra step helps break down layers of residue, especially if they haven’t been cleaned in a while.
Step 5: Time to Wipe and Rinse
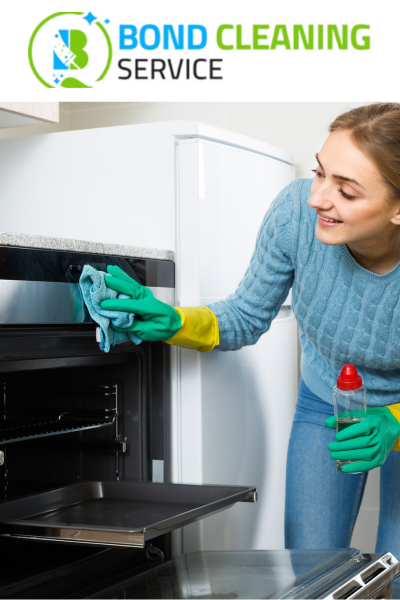
After the paste has worked its way into the grime, use a damp cloth to wipe it all away. Spray the inside of the oven with vinegar to help break down any leftover baking soda and make the interior sparkle. For hard-to-reach areas or caked-on debris, use a plastic scraper gently.
You may need to rinse your cloth a few times or use fresh towels for a thorough clean. Avoid using anything metallic that could damage the oven surface or leave scratches.
Step 6: Don’t Skip the Door Glass
The inside of your oven door glass often ends up foggy or stained. Mix equal parts vinegar and water in a spray bottle, spray it on, and scrub using a soft sponge. For stubborn spots, try the baking soda paste again—leave it for 15 minutes and wipe clean.
If your oven model allows, you can remove the inner glass panel for deeper cleaning. Always refer to the user manual before attempting this, and be cautious while handling glass.
Step 7: Final Rinse and Reassemble
Once everything’s clean and dry, reinstall the racks and accessories. You can run the oven for 10 minutes at a low temperature to help eliminate any lingering moisture or vinegar scent. Your oven is now fresh, functional, and ready for your next bake.
To keep the good results longer, consider placing a heat-resistant liner at the bottom of the oven (not directly on the element) to catch future spills. They’re inexpensive and reusable—making cleanup next time even easier.
Quick Tips to Keep It Clean Longer
Use baking trays under dishes to catch spills before they hit the oven floor.
Wipe after each use once the oven cools down—minor messes are easier to handle.
Steam between deep cleans by heating a bowl of lemon water to loosen grime.
Clean monthly if you cook frequently, or at least once every season.
Use oven-safe covers or lids on food prone to splattering.
Wrap-Up: Your Oven Deserves a Fresh Start
Cleaning your oven doesn’t have to be an intimidating task. With a little prep and a few pantry items, you can give it a thorough makeover that improves everything from safety to flavor. Plus, once you’ve done it once, you’ll see how manageable—and oddly satisfying—it can be.
So roll up your sleeves and show your oven some love. It’s not just about appearance—it’s about creating a cleaner, healthier, and more enjoyable cooking experience every time you turn it on.
Note: IndiBlogHub features both user-submitted and editorial content. We do not verify third-party contributions. Read our Disclaimer and Privacy Policyfor details.


