How Excavation Services Prepare Land for Hardscaping

Strong 8k brings an ultra-HD IPTV experience to your living room and your pocket.
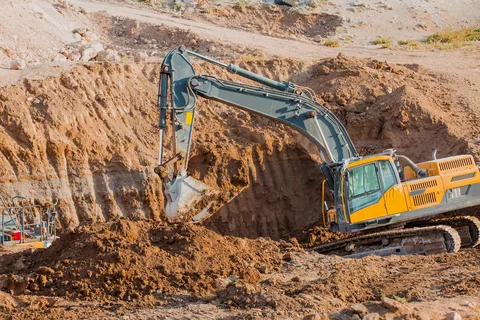
Proper site preparation is the backbone of every stable patio, retaining wall, or driveway. Excavation services ensure that the soil underneath new hardscape elements is graded, compacted, and engineered to withstand weight and weather for years to come. By understanding this process, property owners can plan budgets accurately and avoid settling, cracking, or drainage problems later.
This guide walks through each step an excavation crew takes before the first paver or block is placed. You’ll learn how professional excavation contractors analyze soil, remove unsuitable material, and build a solid sub‑base that keeps hardscapes level and safe.
Evaluating the Site Before Digging
Every project starts with a clear picture of existing conditions. Excavators perform tests and measurements that influence the depth, slope, and materials used in the base layer.
Soil Analysis and Bearing Capacity
The crew often digs small test holes and performs a Proctor compaction test or similar field density check. These measurements reveal:
- Moisture content that affects how soil will compact
- Load‑bearing strength needed to support heavy pavers or retaining walls
- Presence of expansive clay or organic layers that must be removed
Mapping Drainage Paths
Standing water can undermine a patio within a single season. Contractors identify high and low points, gutter outlets, and nearby slopes to plan swales, French drains, or perforated pipe runs that route water away from the finished surface.
Clearing and Rough Grading
With the plan approved, machinery moves in to strip vegetation, debris, and topsoil. This rough grade establishes the project’s basic shape.
Removing Unstable Layers
Excavators typically strip 4–8 inches of topsoil because roots and organic matter break down over time. In areas with fill dirt or construction rubble, crews dig deeper until they reach undisturbed subsoil that can be compacted reliably.
Establishing Sub‑Base Elevations
Using laser levels or GPS‑enabled equipment, operators create a consistent slope—often 1–2 percent—so rainfall drains naturally. Steeper gradients may be necessary for permeable paver systems or in heavy rainfall zones.
Building a Durable Base
After rough grading, the focus shifts to installing and compacting layers that keep the hardscape from shifting.
Aggregate Selection and Layer Thickness
Most patios and walkways rest on 4–8 inches of ¾‑inch crushed stone, while driveways may need 10–12 inches of larger aggregate. The table below compares three common sub‑base materials.
Compaction Equipment and Pass Counts
Vibratory plate compactors or trench rollers compress each lift of stone to 95 percent of the soil’s maximum dry density. Multiple passes—checked with a nuclear density gauge—are critical for preventing future settlement.
Integrating Drainage Elements
Even the strongest base fails if water cannot escape. Crews add features that protect both the hardscape and surrounding structures.
Sub‑Surface Pipe Systems
A perforated drain pipe wrapped in fabric may run beneath the base layer, collecting groundwater and channeling it toward daylight or a dry well. Proper outlet placement eliminates hydrostatic pressure behind retaining walls.
Geotextile and Geogrid
Permeable fabric prevents native clay from migrating into the stone base. Where walls exceed four feet, geogrid reinforcement interlocks with each course of block, transferring loads deeper into the soil and enhancing stability.
Fine Grading and Proof Rolling
With drainage installed, the team brings the sub‑base to its final elevation.
Laser Screed and Hand‑Tamping
Operators screed stone with laser‑guided blades for precision within ±⅛ inch. Crew members then hand‑tamp edges and tight corners to avoid soft pockets where pavers could rock or sink.
Proof Rolling for Quality Control
A small skid steer or loaded truck makes slow passes over the graded base. Any areas that deflect or rut indicate insufficient compaction and are corrected immediately—saving time compared to re‑lifting settled pavers later.
Safety and Environmental Considerations
Excavation involves heavy machinery, buried utilities, and potential erosion. Professional crews follow strict guidelines to protect people and the site.
Utility Locates and Protective Barriers
Before digging, contractors request public utility markings and use hand tools near gas or electrical lines. Fencing or barricades keep bystanders away from open trenches.
Erosion Control Measures
Silt fence, straw wattles, or erosion control blankets prevent sediment from washing into storm drains. Many municipalities require these measures before issuing final approval.
Common Questions
How deep should excavation go for a typical paver patio?
Most patios need excavation 6–10 inches below the finished grade—4–6 inches for the compacted stone base plus the thickness of bedding sand and pavers. Soil type and expected load determine the exact depth.
Can I reuse excavated soil elsewhere in my yard?
Clean, stone‑free subsoil is often suitable for minor grading away from structures, but it should never go back under the hardscape area, where uncompacted fill can settle.
Why is compaction testing important?
Field density tests verify that each lift meets design specifications. Skipping tests risks uneven settling, leading to uneven surfaces and water pooling.
Do all hardscapes need drainage pipe underneath?
Light‑duty patios on well‑draining sandy soil may not require pipe, but any project near clay soil, retaining walls, or basements benefits from a sub‑surface drain to relieve water pressure.
Conclusion
Professional landscaping contractor do far more than you know. They analyze site conditions, remove unsuitable soils, create proper slopes, and compact aggregate layers that support beautiful, long‑lasting hardscapes. By prioritizing drainage, compaction, and safety, professional crews lay the groundwork for patios, driveways, and retaining walls that stay level and strong.
Partnering with an experienced excavation team reduces the risk of future repairs and ensures that each layer meets engineering standards. The upfront investment in proper preparation pays off through decades of stable, attractive outdoor spaces.
FAQs
What equipment is most common for residential excavation? Mini excavators, skid steer loaders, and walk‑behind compactors handle digging, grading, and compaction in tight backyards without damaging existing landscaping.
How long does excavation and base preparation usually take? A standard 400‑square‑foot patio base can be excavated and compacted in two to three days, weather permitting, including soil removal, stone delivery, and density testing.
Does excavation require a permit? Many municipalities require permits for excavation deeper than a specific threshold or when altering drainage patterns. Check local regulations before scheduling work.
Can excavation be done in winter? Frozen ground complicates digging and compaction. Contractors often heat or remove frozen layers before placing stone, but severe cold can delay projects until spring.
How often should a compacted base be rechecked? Once the hardscape is installed, routine inspection of joints and surface leveling is enough. A properly compacted base should not need re‑testing unless heavy equipment or severe erosion affects the area.
Reviewer: Sophie Williams looked over this post and brought 7 years of field experience to her suggestions, helping ensure the content stays relevant to business owners and practical for everyday use.
Note: IndiBlogHub features both user-submitted and editorial content. We do not verify third-party contributions. Read our Disclaimer and Privacy Policyfor details.


