How to Make Silk Screen Stencils: A Beginner’s Guide to Screen Printing

Strong 8k brings an ultra-HD IPTV experience to your living room and your pocket.
Screen printing is perhaps the most rewarding and versatile means of producing custom images on clothes, posters, and any other surface. With a little practice and the proper equipment, you can easily create your own silk screen stencils at home. The following is a step-by-step tutorial on the basics of the silk screen DIY process, from material procurement to producing your own first print.
What Are Silk Screen Stencils?
A silk screen stencil is basically a mesh screen that has some areas blocked, so the ink can flow through in specific areas of the artwork. Original silk was used traditionally, which is why they're called "silk screen," but now polyester mesh is the norm because it's more durable. Stencils are used to print on T-shirts, posters, tote bags, wood, and even ceramics. They can be reused and thus are an economical tool for artists, small business proprietors, and crafty individuals.
Why Create Your Own Silk Screen Stencils?
Making your own stencils gives you complete control over your designs. Rather than using pre-designed graphics, you can execute your own creative ideas. Making your own stencils also saves money in contrast to hiring out printing projects. For a lot of creatives, the DIY silk screen process is as rewarding as the final product, providing both a useful skill and a creative outlet.
Materials You'll Need
To get started, you'll need the following materials:
- Screen printing frame – A wooden or aluminum frame covered with polyester mesh tightly stretched on it.
- Squeegee – To push ink evenly through the screen.
- Photo emulsion – Light-sensitive chemical that is used to make the stencil.
- Screen printing ink – Sold in a range of colors based on your project.
- Transparency film – To print your design onto.
- Light source – A 150-watt bulb or exposure unit works best for the photo emulsion process.
- Tape – For blocking off areas of the screen you don’t want to print.
- Cardboard or a flat printing surface – To hold your material steady during printing.
Optional materials are a pressure washer for washing the screen and gloves to prevent your hands from getting dirty.
Make Your Design
Begin by drawing your design on computer software or by hand. High-contrast black-and-white photographs are ideal for beginners. When your design is complete, print it onto transparency film. Keep in mind that the black will inhibit light and form the open areas of your stencil through which ink flows.
Photo Emulsion Coating on the Screen
In a dark space, use a squeegee to coat both sides of your screen lightly and evenly with a thin layer of photo emulsion. Allow the screen to dry completely in a dark, dry space. Do not expose the screen to direct sunlight or indoor bright light at this point, as it is highly sensitive to emulsion.
Exposing the Screen
When the emulsion is dry, put your transparency on the screen with the design towards the mesh. Expose it to your light source as per the instructions of the emulsion manufacturer, usually for 10–15 minutes. The light hardens the emulsion except where your design acts as a blockage.
Gently wash off the screen with water after exposing. The blocked areas of your design on the transparency will be washed away, leaving behind a transparent stencil in your screen.
Set Up for Printing
Dry the screen totally. Tape the edges of the screen and any other regions where you don't want the ink to flow through. Position the object you are printing on (e.g., shirt) on a smooth surface, with a sheet of cardboard in between to avoid ink bleeding through.
Add the Ink
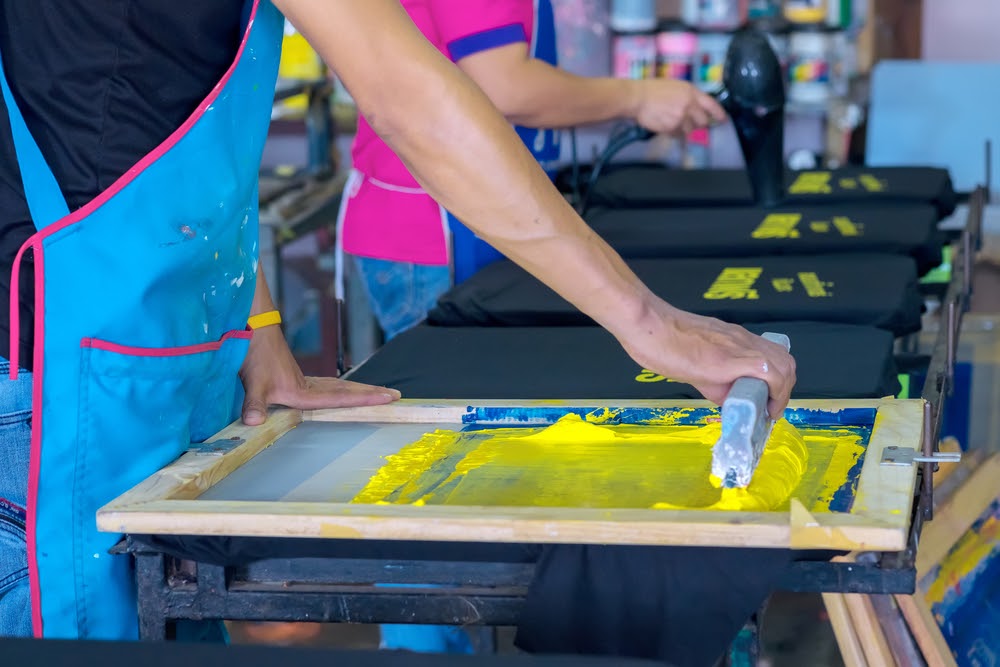
Pour a line of screen printing ink along the top of the screen. Hold the squeegee at 45 degrees and bring it down hard across the stencil, forcing the ink through the open spaces in the screen. Carefully lift the screen to expose your printed image. For dense, bold prints, repeat the second layer of ink.
Cure and Finish
Let your print dry fully. A few inks will need heat-setting, which can be accomplished with an iron or a heat press, depending upon the ink. After it has dried, your printed image is ready to be worn or hung.
Silk Screen DIY Project Tips for Success
- Practice makes perfect: Begin using easy designs and single-color prints before trying more intricate work.
- Use high-quality ink and emulsion: This ensures a smoother print and longer-lasting stencils.
- Clean your screen immediately: Leftover ink or emulsion can clog the mesh, making future printing difficult.
- Experiment with surfaces: Don’t limit yourself to fabric; try printing on wood, paper, or even glass.
Conclusion
Mastering the art of making silk screen stencils unlocks a universe of creative expression. Custom T-shirts, posters, and home decor are just a few examples of the endless possibilities available with the silk screen DIY process. Using the proper materials, patience, and practice, you can produce professional-quality prints from the comfort of your own home. Whether you're launching a small business or just looking for a new hobby, silk screen printing is an art that has limitless potential for creativity.
Note: IndiBlogHub features both user-submitted and editorial content. We do not verify third-party contributions. Read our Disclaimer and Privacy Policyfor details.


