How to Prep Your Surfaces for Sandblasting Services: A Step by Step Guide
-

- August 23rd, 2025
- 292 views

Get a free topical map and start building content authority today.
Sandblasting, also known as abrasive blasting, is a versatile and effective method for surface preparation, cleaning, and finishing. Whether you're removing rust, paint, or corrosion, or preparing a surface for a new coat of paint or protective coating, proper surface preparation is essential for achieving the best results. In this step-by-step guide, we will explore how to prepare your surfaces for sandblasting services, ensuring a successful and efficient operation.
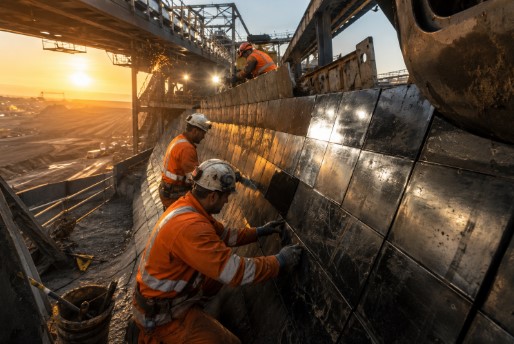
Step 1: Safety First
Before you begin any sandblasting project, safety is paramount. Ensure that you and your team have the necessary personal protective equipment (PPE), including goggles, ear protection, respirators, and appropriate clothing. Make sure the sandblasting equipment is in good working condition and that you are working in a well-ventilated area.
Step 2: Evaluate the Surface
Examine the surface you intend to sandblast. Identify the type of material, the thickness of the coating or contaminants to be removed, and any potential hazards (such as lead-based paint). This evaluation will help you select the appropriate abrasive material and determine the optimal pressure settings for your sandblasting equipment.
Step 3: Clear the Area
Clear the work area of any items that are not being sandblasted. Remove obstacles, debris, or any other objects that might interfere with the process. Cover nearby surfaces and objects with protective tarps or plastic sheeting to prevent them from being damaged or contaminated with abrasive material.
Step 4: Choose the Right Abrasive
Select the appropriate abrasive material for your specific application. Common abrasive materials include silica sand, aluminium oxide, garnet, steel shot, and glass beads. The choice of abrasive depends on factors such as the material being removed, the surface being treated, and the desired finish.
Step 5: Set Up Equipment
Prepare the sandblasting equipment by connecting the hose to the compressor and ensuring it is in good working order. Adjust the pressure and flow rate settings based on the evaluation of the surface. It's essential to use the right nozzle size and type for your specific application.
Step 6: Protect Surrounding Areas
To prevent abrasive material from scattering, it's crucial to create a containment area around the work surface. Depending on the size of the area and the type of sandblasting, this may involve using sandblasting curtains, enclosures, or shields to contain the abrasive material and protect nearby surfaces.
Step 7: Surface Cleaning
Before starting the sandblasting process, remove loose dirt, dust, and contaminants from the surface. You can use brushes, air blowers, or solvents to clean the area. It's essential to work with a clean surface to achieve optimal results.
Step 8: Safety Precautions
Double-check all safety precautions and ensure that all team members are aware of the risks and safety procedures. Sandblasting produces fine particles and can create hazards like dust, flying abrasive material, and noise. All team members should be trained on safety measures and follow proper protocols.
Step 9: Test the Equipment
Before proceeding with the full sandblasting process, it's a good practice to test the equipment and settings on a small, inconspicuous area of the surface. This test will help you verify that the chosen abrasive material, pressure settings, and nozzle type are appropriate for the job. It's an opportunity to fine-tune the equipment for optimal performance.
Step 10: Start Sandblasting
Once you have completed all the necessary preparations and tests, you can begin the sandblasting process. Hold the nozzle at the appropriate distance from the surface, typically 6 to 12 inches, and move it consistently to achieve even coverage. Ensure that the abrasive material is evenly applied to the surface.
Step 11: Monitor Progress
As you sandblast the surface, continuously monitor the progress to ensure you are achieving the desired results. Adjust the pressure, nozzle distance, and angle as needed to address any unevenness or stubborn spots.
Step 12: Cleanup and Disposal
Once the sandblasting process is complete, carefully clean the work area and dispose of the abrasive material and contaminants according to local regulations. Some abrasive materials may need special disposal procedures, especially if they contain hazardous materials like lead or toxic coatings.
Step 13: Post-Blast Inspection
After the surface has been sandblasted and cleaned, conduct a thorough inspection to ensure that all contaminants, old coatings, or rust have been successfully removed. Any remaining residues or imperfections should be addressed before proceeding with the next steps, such as painting or applying protective coatings.
Step 14: Surface Protection
To prevent the newly cleaned surface from rusting or corroding, it's essential to apply a protective coating as soon as possible. The choice of coating will depend on the specific surface and its intended use. Ensure that the coating adheres well to the cleaned surface for long-lasting protection.
Conclusion:
Proper surface preparation is a crucial aspect of any sandblasting project. By following these step-by-step guidelines, you can ensure that your surfaces are well-prepped for sandblasting, resulting in effective contaminant removal, an even finish, and a longer-lasting protective coating. Remember that safety measures, proper equipment maintenance, and an understanding of the specific needs of your project are all essential for a successful sandblasting operation. Whether you are consulting a sandblasting service provider or a zinc-nickel plating company, knowing how to prep your surfaces right will help in getting the desired results.