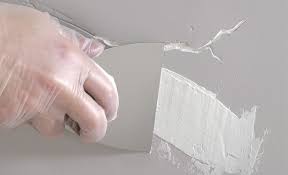
How to Repair Drywall Cracks Like a Pro

Strong 8k brings an ultra-HD IPTV experience to your living room and your pocket.
Drywall cracks are a common issue in homes and commercial spaces, often caused by settling foundations, humidity changes, or structural stress. Fortunately, you don’t need to be a seasoned contractor to fix them properly. With the right tools and technique, you can achieve a flawless finish on your own. If you're searching for expert guidance or professional help in Drywall Crack Repair Vancouver, this step-by-step guide will walk you through the process like a pro.
Why Do Drywall Cracks Happen?
Understanding the cause of drywall cracks helps prevent them from reappearing after repair. Common reasons include:
Foundation settling
Temperature and humidity fluctuations
Improper drywall installation
House movement or vibrations
Once you identify the source, you can better plan for a long-lasting repair.
Tools and Materials You’ll Need
Before getting started, gather the following tools and supplies:
Utility knife
Putty knife (4” and 6”)
Sandpaper (120–150 grit)
Drywall joint compound (pre-mixed or powder)
Drywall tape (paper or fiberglass mesh)
Primer and paint
Dust mask and drop cloths
Step 1: Prepare the Area
Clear the workspace and lay down a drop cloth to catch debris.
Use a utility knife to widen the crack slightly and remove any loose or crumbling drywall. This allows for better adhesion of joint compound.
Clean the surface using a dry brush or cloth to remove dust.
Step 2: Apply Drywall Tape
For hairline cracks, fiberglass mesh tape works well and adheres directly to the wall.
For larger cracks, use paper tape embedded in joint compound for stronger reinforcement.
Ensure the tape is centered over the crack and press it firmly into place.
Step 3: Apply Joint Compound
Using a 4” putty knife, apply the first coat of joint compound over the taped crack.
Feather the edges to blend into the surrounding wall.
Allow the compound to dry for at least 12–24 hours depending on the product and humidity.
Step 4: Sand and Apply Additional Coats
Lightly sand the dried compound with fine-grit sandpaper to smooth it out.
Apply a second (and if needed, third) thin coat using a 6” putty knife, feathering the edges farther out each time.
Allow each layer to dry fully and sand between coats.
Step 5: Prime and Paint
Once the final coat is dry and sanded smooth, apply a drywall primer to seal the patch.
Finish by painting over the repaired area to match the rest of the wall.
For best results, paint the entire wall or section to avoid visible patchwork.
Pro Tips for a Long-Lasting Repair
Always use thin, even coats of joint compound to avoid lumps and excess sanding.
Avoid over-sanding, which can weaken the repair.
Use a high-quality primer to prevent paint flashing.
Address moisture or structural issues before beginning the repair to prevent future cracking.
When to Call a Professional
If the crack is recurring, wider than 1/8 inch, or accompanied by signs of water damage or structural movement, it's best to consult a professional. For residents of British Columbia, expert Drywall Crack Repair Vancouver services ensure safe, seamless results that blend perfectly with your walls.
Final Thoughts
Repairing drywall cracks like a pro is entirely achievable with some basic tools, patience, and the right method. Whether you're handling a DIY patch or seeking professional help, knowing the process helps you make informed decisions. For durable, high-quality results, trust experienced specialists in Drywall Crack Repair Vancouver to restore your walls with precision and care.
Note: IndiBlogHub features both user-submitted and editorial content. We do not verify third-party contributions. Read our Disclaimer and Privacy Policyfor details.


