Fibonacci Retracement Trading Strategy: Step-by-Step Guide for Better Entries and Exits
-

- March 14th, 2026
- 489 views

Get a free topical map and start building content authority today.
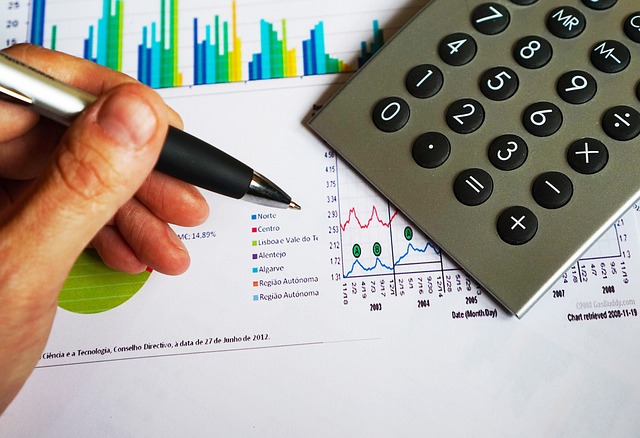
Using a Fibonacci retracement trading strategy can help identify higher-probability entry and exit zones by mapping retracement levels onto clear swing moves. This guide explains how to draw and apply Fibonacci retracements, how to combine levels with price action and indicators, and how to build repeatable trade rules.
Detected intent: Procedural
Primary keyword: "Fibonacci retracement trading strategy"
Secondary keywords: how to draw Fibonacci retracement; Fibonacci retracement levels for support and resistance; applying Fibonacci to trend trading
Core cluster questions (use for internal linking):
- How are Fibonacci retracement levels calculated and interpreted?
- Where to place stop losses when trading Fibonacci retracements?
- How to combine Fibonacci retracement with moving averages and trendlines?
- When do Fibonacci retracement levels fail and why?
- How to backtest a Fibonacci retracement-based entry method?
Fibonacci retracement trading strategy: what it is and why it helps
Fibonacci retracement is a technical tool that plots horizontal lines at common Fibonacci ratios—23.6%, 38.2%, 50%, 61.8%, and 78.6%—between a defined swing high and swing low. Traders use these levels as potential support and resistance zones to plan entries, stop placement, and profit targets. The usefulness comes from combining the levels with price context and confirmation rules rather than treating them as automatic buy/sell signals.
Step-by-step: how to draw Fibonacci retracement and apply it
1. Confirm the trend
Start on the timeframe relevant to the trading horizon (daily for swing trades, 15–60 min for intraday). Identify the dominant trend with higher highs/higher lows or moving average slope.
2. Identify the correct swing high and swing low
Choose a clear recent swing low and swing high that represent the full move to be measured. For an uptrend, draw Fibonacci from the swing low (start) to the swing high (end). For a downtrend, draw from swing high to swing low.
3. Plot levels and observe price reaction
Plot the standard levels: 23.6%, 38.2%, 50.0%, 61.8%, 78.6%. Watch how price reacts at these levels—look for rejection wicks, consolidation, or supportive candles as confirmation.
4. Use confirmation rules before entering
Combine a level with one or more confirmations: a reversal candlestick pattern, a trendline touch, confluence with a moving average, volume spike, or oscillator divergence.
5. Place stops and targets
Place stops beyond the next Fibonacci level or beyond the swing extreme, depending on risk tolerance. Set targets at the next level, the swing extreme, or use a risk-reward rule (e.g., target 2x risk).
CLEAR Fibonacci Checklist (named framework)
Use the CLEAR checklist before every Fibonacci-based trade to standardize decision-making:
- Confirm trend (higher timeframe alignment)
- Locate swings (define accurate start and end points)
- Establish levels (plot standard Fibonacci ratios)
- Add confluence (indicators, moving averages, trendlines)
- Risk-manage (stop, target, position size)
Practical example: EUR/USD swing trade scenario
Assume EUR/USD rallied from 1.0800 to 1.1100. Place Fibonacci from 1.0800 (low) to 1.1100 (high). Key retracement levels are: 23.6% = 1.1029, 38.2% = 1.0986, 50.0% = 1.0950, 61.8% = 1.0914. If price pulls back to the 61.8% area and a bullish engulfing candle forms while the 50-period moving average supports the move, an entry can be taken with a stop below the swing low at 1.0880 and a target near the prior high 1.1100. Position size should be set so the stop risk matches risk rules.
Practical tips: quick rules to apply now
- Use higher timeframe alignment: always check the next-higher timeframe trend before taking signals.
- Prefer confluence: take trades where a Fibonacci level lines up with a trendline, pivot, or moving average.
- Don't trade every touch: require a confirmation candle or indicator divergence before entry.
- Size to risk: position size based on the stop distance to keep monetary risk constant.
Common mistakes and trade-offs
Common mistakes
- Using arbitrary swings: inaccurate swing selection shifts levels and reduces validity.
- Treating levels as guaranteed turning points: they are zones of interest, not certainties.
- Over-relying on Fibonacci without confirmation: takes low-quality signals.
- Poor risk management: entering without a clear stop or position-sizing plan.
Trade-offs
Relying on Fibonacci increases focus on structural support and resistance, but it reduces speed of decision-making when market moves are fast. Narrow stops near Fibonacci levels give better reward-to-risk but increase stop-outs from noise; wider stops reduce false exits but increase capital at risk. Balancing stop placement with position sizing is the practical trade-off.
How to backtest and validate a Fibonacci approach
Backtest a fixed rule-set: define how swings are selected, what confirmations are required, stop placement, and target logic. Measure win rate, average win/loss, and maximum drawdown across relevant markets. Use sample sizes of several hundred trades if possible. For methodology references on technical indicator testing, consult established educational resources for best practices: Investopedia on Fibonacci retracement.
Indicators and tools that pair well with Fibonacci
Common pairings: moving averages (20/50/200), RSI or MACD for momentum confirmation, pivot points for confluence, and volume to confirm interest at levels. Combining tools should reduce false signals, not add conflicting rules.
Common questions (FAQ)
How to use Fibonacci retracement trading strategy to time entries?
Time entries by waiting for price to reach a Fibonacci level and then require a confirmation: a reversal candle pattern, divergence on an oscillator, a supporting moving average, or a trendline touch. Enter on the confirmation candle with a stop beyond the nearest swing or next Fibonacci level, and set targets at the next Fibonacci level or recent swing.
What are the most reliable Fibonacci levels?
38.2%, 50%, and 61.8% are commonly most watched. 61.8% is treated as a deeper retracement in trending markets. 23.6% and 78.6% are used less often but can be valuable in specific contexts.
Can Fibonacci retracement be used in all markets?
Yes. Fibonacci retracement is used across FX, equities, futures, and crypto. Its effectiveness depends on market structure, liquidity, and timeframe. Always validate on the specific market before live trading.
How should stops be placed when using Fibonacci retracements?
Stops typically go beyond the next Fibonacci level or beyond the swing high/low that defined the Fibonacci plot. The exact placement depends on volatility and risk tolerance; position-size so that monetary risk fits the trading plan.
How to combine Fibonacci retracement with moving averages and trendlines?
Look for confluence: if a Fibonacci level aligns with a moving average or a rising trendline, that zone carries more weight. Use cross-timeframe checks: a level that aligns on both the entry and higher timeframe is stronger.