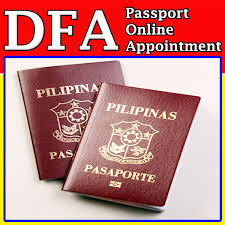
**Step-by-Step Guide to Scheduling a DFA Passport Appointment in the Philippines**

Strong 8k brings an ultra-HD IPTV experience to your living room and your pocket.
Scheduling a DFA (Department of Foreign Affairs) passport appointment in the Philippines is an essential process for applying for a new passport or renewing an existing one. With the online appointment system, the process has become more streamlined and accessible. Here’s a detailed guide to help you book your **DFA appointment** and navigate the process efficiently.
### **DFA Appointment: How to Schedule Your Passport Appointment**
The first step in applying for a passport in the Philippines is to schedule an appointment with the DFA. This guide will walk you through the entire process, from registering online to attending your appointment at the DFA office.
### Step 1: Visit the Official DFA Appointment Website
To start the process, you need to visit the official DFA Passport Appointment website. Make sure you’re on the legitimate website to avoid any scams or unauthorized services. Here is the link:
[https://www.passport.gov.ph/](https://www.passport.gov.ph/)
Once on the website, you’ll be prompted to log in or create a new account if you don’t already have one.
### Step 2: Register for an Account
If this is your first time applying for a passport, you will need to create an account. To do so, provide your:
- Full name
- Email address
- Date of birth
- Contact information
- Identification details (e.g., ID number)
Ensure your email is active, as important appointment updates will be sent to it.
### Step 3: Select the Type of Service
After logging in, you will be asked to select the type of passport service you need. The available options are:
- **New Passport Application**
- **Renewal of Passport**
- **Correction of Passport Details**
Choose the appropriate option based on your situation. If you're renewing your passport, you’ll need to provide details from your previous passport.
### Step 4: Choose Your DFA Branch and Appointment Date
Next, you’ll select the DFA branch where you want to submit your application. The DFA has multiple offices across the country, including:
- DFA NCR (National Capital Region)
- DFA Regional Consular Offices (for provincial applicants)
- DFA Satellite Offices
After selecting your preferred location, choose an available date and time for your appointment. Be sure to book your appointment early, especially during busy periods.
### Step 5: Confirm Your Appointment and Pay the Fee
Once you’ve chosen a date and location, review the details of your appointment. If everything is correct, confirm your appointment. After confirmation, you will be directed to a payment page.
- You can pay through online banking, payment centers, or credit/debit cards.
- The cost depends on the type of service, such as regular processing or expedited processing.
### Step 6: Receive Appointment Confirmation
After successfully making your payment, you will receive an appointment confirmation via email. This confirmation will include the date, time, and location of your appointment. Make sure to print a copy or save it on your phone to present at the DFA office on the day of your appointment.
### Step 7: Prepare the Required Documents
Before heading to your appointment, gather all the necessary documents based on the type of application. Typical documents include:
- **For New Applicants**: Birth certificate, valid ID, proof of citizenship, and any additional documents requested by the DFA.
- **For Passport Renewal**: Your expired or soon-to-expire passport, a valid ID, and a completed application form.
- **For Corrections**: Any original documents that prove the correction needed (e.g., affidavit, supporting IDs).
Check the DFA website for any specific requirements related to your case.
### Step 8: Attend Your Appointment
On the day of your appointment, make sure to arrive at the DFA office on time. Bring the following:
- Appointment confirmation (printed or digital)
- Original copies of the required documents
- Payment receipt (if applicable)
Once you arrive at the DFA office, your documents will be reviewed, and your biometric data (photo, fingerprints) will be captured.
### Conclusion
Scheduling your **DFA appointment** for a passport is straightforward when you follow these simple steps. By ensuring you have all necessary documents and book your appointment early, you can avoid delays and ensure a smooth process. Keep an eye on the DFA website for any updates and always double-check your appointment details.
Note: IndiBlogHub features both user-submitted and editorial content. We do not verify third-party contributions. Read our Disclaimer and Privacy Policyfor details.


