A Complete Guide to Converting Apple Mail to Outlook

Strong 8k brings an ultra-HD IPTV experience to your living room and your pocket.
In a fast-paced digital environment, professionals and businesses frequently switch platforms to keep pace with their changing needs. A common shift is moving data from Apple Mail to Microsoft Outlook, driven by Outlook's integration with Microsoft 365, improved email management, and enterprise-level features. However, making the switch isn't as straightforward as dragging and dropping files. It involves understanding file formats, choosing the right method, and maintaining email integrity during the transition.
This article explains how to easily convert Apple Mail (Mac Mail) to Outlook - whether you're a tech-savvy individual or a business looking for a safe migration path.
Understanding the Differences: Apple Mail vs. Outlook
Before diving into the conversion process, it's important to understand how Apple Mail and Outlook differ at their core:
Apple Mail, the default client for macOS, uses the MBOX file format to store messages.
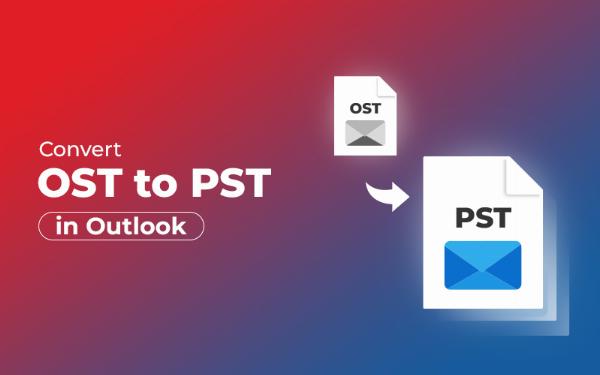
Outlook for Windows uses PST (Personal Storage Table) files to store emails, contacts, calendars, tasks, and other items.
This structural incompatibility means you can't import Apple Mail files directly into Outlook without conversion.
Why users switch to Outlook:
• Cross-platform compatibility (Windows, Mac, Web, & Android)
• Built-in calendar, task, and contact management
• Better integration with Microsoft 365 tools
• Advanced security and filtering features
Manual Conversion from MAC mail to PST for Windows Outlook
If you’re only dealing with a small volume of emails and have access to both Mac and Windows systems, you can try a manual workaround. Here's a step-by-step guide to exporting Apple Mail to PST.
Step 1: Export Mailbox from Apple Mail for Backup (optional)
1. Open Apple Mail.
2. Select the mailbox or folder to export.
3. Right-click and choose Export Mailbox.
4. Save it as a .mbox file.
Step 2: Enable IMAP in Gmail
1. Log in to your Gmail account in a web browser.
2. Go to Settings (gear icon) > See all settings.
3. Open the Forwarding and POP/IMAP tab.
4. In the IMAP access section, select Enable IMAP.
5. Click Save Changes at the bottom.
Step 3: Add Gmail in Apple Mail
1. Open Apple Mail on your Mac.
2. Go to Mail > Add Account from the top menu.
3. Choose Google from the list.
4. Sign in with your Gmail credentials. (use the App password in the Password field)
5. Allow the necessary permissions.
6. Select the apps you want to use with the account (Mail, Contacts, Calendars, etc.).
7. Click Done.
Step 4: Apple Mail Syncs with Gmail
Your Gmail inbox and folders will now appear in Apple Mail.
Any changes you make (delete, move, send) will sync with Gmail in real time via IMAP.
Drawbacks of the Manual Method
• There is no time limit for large-volume data, it may take weeks.
• This method is fraught with data loss or formatting issues which not everyone can afford.
• Users can only transfer emails through this method. There are other manual steps for contacts or calendars.
• There is no concrete evidence of maintaining data structure.
Automated Conversion: MBOX Converter Tool
Manual methods may work in simple cases, but they fail in complex migrations - especially involving multiple mailboxes, corporate emails or structured folders. This is where MBOX to PST converter tools come in handy.
These tools are designed to:
Load MBOX files from Apple Mail/Gmail/Thunderbird etc.
Convert them to PST and various other file formats
Retain folder hierarchy, metadata, attachments, and HTML formatting
One such professional tool is the MailsDaddy MBOX to PST Converter, known for its reliability and ease of use.
Steps to Convert MBOX to PST from MAC mail
1. Install and launch the Apple Mail to Outlook Converter
2. Click Add File > Load your Apple Mail (MBOX) files.
3. Preview is an optional choice. Directly click on the Export button to initiate batch migration.
4. Select PST as the export format.
5. Select the Single or Separate PST option for all MBOX files
6. Choose a destination and click Export.
Pro Tip: If you’re not sure where Apple Mail stores your messages, go to:
~/Library/Mail/V9/ (V9 may vary based on macOS version)
Look for .mbox folders.
Conclusion
Migrating from Apple Mail to Outlook may seem scary, but with the right approach, it's totally manageable. If you're technically inclined and have the time to spare, you can do the conversion manually through Gmail or another online email service. But for those who value speed, accuracy, and data integrity - especially at the corporate level - an automatic MBOX to PST converter like MailsDaddy is the best option.
Whether you're switching for work, collaboration, or productivity, a clean transition ensures that your emails continue to serve you without disruption.
Note: IndiBlogHub features both user-submitted and editorial content. We do not verify third-party contributions. Read our Disclaimer and Privacy Policyfor details.


