Professional Storytelling Photography: Find a Photographer Who Tells Your Unique Story
-
- March 01st, 2026
- 246 views
Professional storytelling photography turns images into a narrative that reflects personality, values, and purpose. This guide explains how to evaluate photographers, what to expect from a story-driven shoot, and how to brief a creative team so results match the message.
- Who this helps: entrepreneurs, couples, creators, and organizations seeking visual narratives.
- What to expect: a clear brief, a STORY framework to align shots, and trade-offs between time, style, and budget.
- Detected intent: Commercial Investigation
What professional storytelling photography is and why it matters
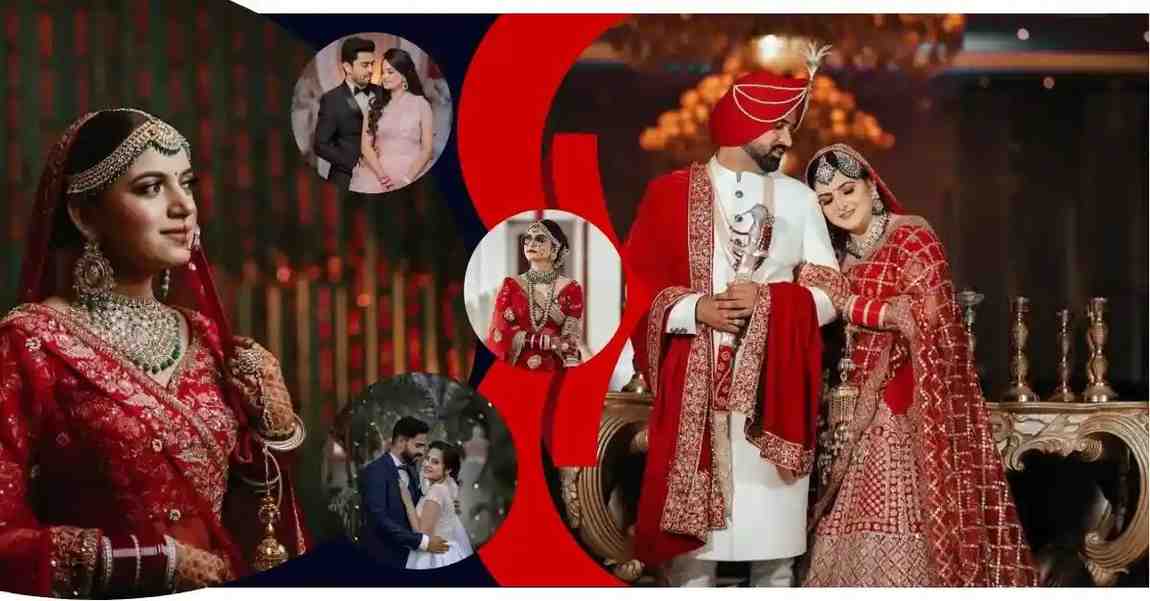
Professional storytelling photography uses composition, lighting, sequence, and context to communicate a narrative rather than just capture a moment. It blends portrait, lifestyle, editorial, and brand photography techniques to create images that support a message—whether for a personal brand, product launch, wedding day, or editorial feature. Related terms include visual narrative, lifestyle photography, editorial portrait, brand photography, and story-driven portrait photographer.
professional storytelling photography: a practical framework
Use the STORY framework to plan shoots and evaluate photographers. This named model helps turn abstract goals into actionable decisions.
STORY framework (Situation • Theme • Tone • Roles • Yield)
- Situation — Define the setting, audience, and deliverables (website, social, print).
- Theme — Choose the narrative idea: growth, heritage, craft, or lifestyle.
- Tone — Decide mood and color palette: candid and warm, editorial and cool, or bright and airy.
- Roles — List key people, props, and locations that appear in the story.
- Yield — Specify final assets, file types, and usage rights (web, print, advertisement).
Checklist: shoot-ready brief
- Objective: primary message and target audience.
- Deliverables: number of final images, formats, and aspect ratios.
- Style references: 6–12 example photos for tone and composition.
- Logistics: location, schedule, wardrobe, permits, and talent.
- Legal: model releases and licensing terms.
How to choose between photographers and services
Comparing photographers focuses on style alignment, workflow, and business terms. Use these criteria when evaluating portfolios and proposals:
- Portfolio fit: Look for consistent storytelling across different shoots, not just isolated technical shots.
- Process clarity: Ask for a sample timeline from pre-production through post-processing.
- Deliverables: Confirm the number of edited images, retouching level, and raw-file access if needed.
- Licensing: Clarify usage rights—commercial usage typically costs more than personal or editorial use.
Trade-offs and common mistakes
Trade-offs are inevitable. Choosing a lower hourly rate may reduce time spent on concept development and editing. Selecting the trendiest visual style can date the content faster. Common mistakes include insufficient briefs, ignoring usage rights, and choosing a photographer based solely on price.
Pricing, packages, and what affects cost
Costs vary by experience, location, staffing (assistant, stylist), gear rental, and retouching. Wedding and commercial projects typically include multi-person teams and higher licensing fees. For credible guidance on professional standards and industry practices, consider resources from the Professional Photographers of America (PPA).
Common pricing models
- Hourly/day rate for on-location shoots.
- Package pricing for events or brand sessions (includes number of edited images).
- Licensing fees for commercial use calculated by reach and duration.
Real-world example: a bakery brand shoot
Scenario: A neighborhood bakery needs images for a new website and seasonal menus. Using the STORY framework, the brief specifies "Warm, handcrafted, community-focused" as the theme. The photographer plans a morning shoot for natural light, sequences that show dough preparation, customer interactions, and finished goods, then delivers 30 edited images sized for web and print. The client purchases a limited commercial license for local advertising.
Practical tips to get better results
- Prepare a shot list with priority levels (must-have, nice-to-have, experimental).
- Share visual references and explain what specifically matters about each example.
- Schedule the shoot during the best natural light for the chosen tone; golden hour or overcast can change mood dramatically.
- Book a short pre-shoot call to confirm logistics and creative intent; a 15–30 minute alignment cuts reshoots and confusion.
- Budget for retouching separately if flawless product or complexion work is required.
Core cluster questions
- How does a story-driven portrait photographer structure a brand shoot?
- What should a photography brief include for a lifestyle session?
- How many edited images are typical for a half-day brand photoshoot?
- What licensing terms are standard for commercial photography use?
- How to evaluate a photographer’s portfolio for narrative consistency?
FAQ
What is professional storytelling photography and how does it differ from standard portrait work?
Professional storytelling photography prioritizes narrative and sequence over isolated portraits. Instead of a single posed image, story-driven work considers context, environment, and a series of frames that together convey a message or experience.
How to find a story-driven portrait photographer for a brand project?
Search portfolios for thematic consistency, request case studies, and ask how photographers approach concept development, staging, and post-production. Compare sample timelines and licensing terms before committing.
How many images should a typical half-day shoot deliver?
Expect 30–60 final edited images for a half-day brand or lifestyle shoot, but numbers vary—confirm deliverables in the contract.
What are the most common mistakes clients make when commissioning a storytelling shoot?
Skipping a clear brief, overlooking usage rights, failing to set a mood reference, and ignoring scheduling around optimal light are top mistakes. Use the checklist above to avoid these pitfalls.
How long does it take to get final images after the shoot?
Turnaround depends on the photographer’s workflow and the amount of retouching. Two–4 weeks is typical for full editing; rush options may be available at a premium.