How deep should I plant a blueberry bush in a pot?
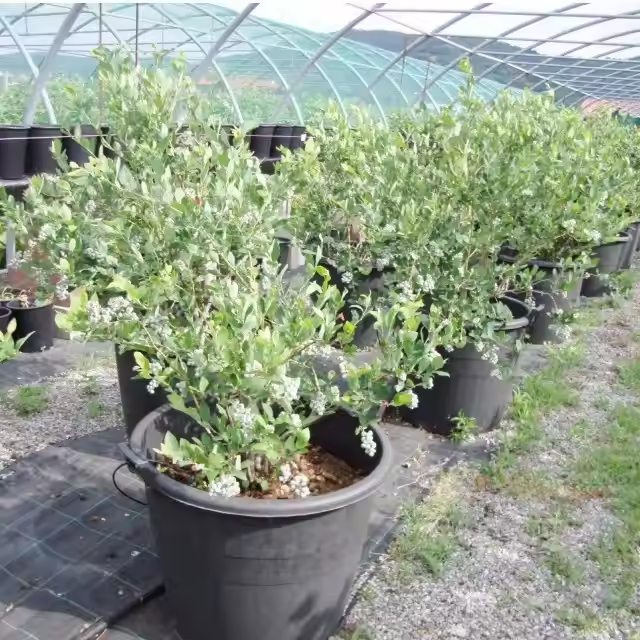
The allure of plump, sun-warmed blueberries harvested steps from your kitchen door is undeniable. Container gardening unlocks this potential for patios, balconies, and urban dwellers. Yet, nestled within the seemingly simple question, "How deep should I plant a blueberry bush in a pot?" lies a profound inquiry into the very essence of plant vitality. Planting depth isn't merely a measurement; it's the foundational decision that orchestrates a complex symphony of root respiration, moisture equilibrium, microbial life, and ultimately, the plant's will to thrive. Achieving that perfect depth transcends a single number; it demands a deep understanding of the blueberry's unique nature, the intricate physics of container ecology, and the subtle art of horticultural intuition. Let us embark on a detailed exploration of this critical dimension.
I. The Blueberry's Delicate Anatomy: Why Depth Matters More Than You Think
Blueberries (Vaccinium spp.) are not like robust tomatoes or forgiving herbs. They are denizens of acidic, well-aerated, forest-edge soils, possessing a root system that is surprisingly shallow and exceptionally fine. Unlike plants that plunge deep taproots seeking groundwater, blueberries evolved a dense network of fibrous, hair-like roots spreading horizontally just below the surface, adept at capturing moisture and nutrients from the decaying organic matter of their native woodland floors. This evolutionary strategy makes them simultaneously vulnerable and demanding in a container environment.
The Peril of Suffocation: Those delicate feeder roots are the blueberry's lifeline. They demand constant, easy access to oxygen. Planting too deeply buries these roots in soil zones where air circulation is naturally poorer, especially as the soil settles and compacts over time. Oxygen starvation sets in rapidly, leading to root rot (often caused by ubiquitous pathogens like Phytophthora), stunted growth, leaf chlorosis (yellowing), and ultimately, plant death. The initial wilting might be mistaken for drought, but watering a suffocating root system only accelerates its demise.
The Crown's Sacred Zone: At the base of the blueberry bush, where the stems emerge from the root mass, lies the crown. This junction is a critical meristematic region, teeming with cells responsible for generating new shoots and roots. Burying the crown is akin to burying the plant's brain. It creates a dark, damp environment perfect for fungal diseases to invade and rot this vital tissue. Crown rot is frequently fatal and notoriously difficult to treat once established.
The Stability Conundrum: Conversely, planting too shallowly exposes the upper roots and potentially parts of the crown to harsh drying winds and sun, desiccating them. It also fails to anchor the plant securely. A shallow root ball in a tall pot becomes a lever arm; a gust of wind or the weight of foliage and fruit can easily topple the entire plant, damaging roots and stems. Stability is paramount for a perennial shrub expected to bear fruit for years.
Thus, the "correct" depth becomes a precise balancing act: deep enough to ensure stability and protect the vital upper roots from desiccation, yet shallow enough to keep the crown perfectly exposed and the majority of the fibrous root system within the oxygen-rich upper layers of the potting mix.
II. The Perfect Planting Depth: A Process, Not Just a Position
Forget the notion of a single, universal depth measurement. Achieving the ideal planting level is a dynamic process that begins long before the plant touches the soil and continues through the final soil settlement.
The Pre-Planting Ritual: Root Revelation and Pot Preparation
Gently Liberate the Roots: Carefully remove the blueberry bush from its nursery pot. Resist the urge to yank it out by the stems. Squeeze the pot, tip it sideways, and gently coax the root ball out. Observe its condition. Are roots circling densely (pot-bound)? Are they healthy and white-tipped, or brown and mushy?
The Root Ball Autopsy: This step is crucial, yet often skipped. Place the root ball on a stable surface. With your fingers (never a knife unless absolutely necessary due to severe matting), gently tease apart the outer layer of roots. Don't rip or tear aggressively. The goal is to loosen the tightly wound peripheral roots and encourage them to grow outward into the new potting mix, rather than continuing to circle. Pay particular attention to the top of the root ball. Gently brush away or loosen the topmost layer of soil and fine roots to clearly identify the point where the main structural roots flare out slightly from the crown. This root flare is your critical landmark. It must be visible at the soil surface after planting.
The Drainage Imperative: While preparing the roots, ensure your chosen pot is ready. Drainage holes are non-negotiable. Cover them with a single layer of porous landscape fabric or a broken pottery shard (curved side up) to prevent soil washout while ensuring unimpeded water escape. Never use gravel or rocks in the bottom – this creates a perched water table, worsening drainage. Add a small amount of your pre-moistened acidic potting mix to the pot's base.
Positioning the Crown: The Heart of the Matter
Setting the Stage: Place the blueberry bush, with its roots gently loosened, into the center of the pot. Hold it steady at the critical height: Position the plant so that the top of its original root ball (specifically, where the root flare is evident) sits approximately 1 to 1.5 inches (2.5 to 3.8 cm) ABOVE the final intended soil level of the pot. This is the counterintuitive key. Why above?
Accounting for Settlement: As you add soil and water the plant for the first time, the loose, fresh potting mix will inevitably settle. If you plant the root ball flush with the intended final soil level, settlement will drag the crown and root flare below that level – too deep. Starting high compensates for this settlement.
The Root Flare Mandate: Your guiding star is that root flare. After settlement and final mulching, the very top of this flare must be just visible at the soil surface, like the shoulders of a swimmer breaking the water. It should not be buried, nor should the structural roots immediately emanating from it be exposed high and dry.
Backfilling with Care: Creating the Ideal Root Zone
Acidity is Everything: Use only a potting mix specifically formulated for acid-loving plants (like rhododendrons, azaleas, camellias) or explicitly for blueberries. Standard potting soil is almost always too alkaline and lacks the necessary structure and nutrient profile. These mixes typically contain a high percentage of Canadian sphagnum peat moss (for acidity and moisture retention), composted pine bark (for structure, aeration, and slow acidification), and often perlite or pumice (for drainage and aeration). Pre-moisten the mix slightly so it's damp but not soggy – think the consistency of a wrung-out sponge.
Gentle Consolidation: Begin filling the space around the root ball with your pre-moistened acidic mix. Add it in stages, gently firming it with your fingers as you go. Avoid stomping or heavy pressing with a tool, which compacts the soil and destroys the vital air pockets. The goal is to eliminate large air pockets without crushing the delicate soil structure. Ensure the plant remains upright and centered, maintaining its crucial "high" position relative to the pot's rim.
The Final Soil Level: Continue adding soil until it reaches the point where the top of the original root ball is covered by about 1/2 inch (1.3 cm) of fresh mix. Remember, you started with the root flare 1-1.5 inches above the final level. After backfilling and settlement, this should leave the root flare just at or slightly above the final soil surface. The final soil level itself should ideally sit 1-2 inches (2.5-5 cm) below the rim of the pot. This "lip" is essential for watering – it acts as a reservoir to hold water, allowing it to percolate down into the root zone rather than spilling uselessly over the sides.
The Mulch Mantle: Protecting the Critical Zone
Non-Negotiable Coverage: Immediately after planting and initial watering (see below), apply a generous layer of acidic mulch. This is not optional for potted blueberries. Suitable materials include:
Pine Needles: Ideal. They decompose slowly, acidify the soil, and create an airy structure.
Chipped Pine Bark: Excellent for moisture retention and soil acidification.
Well-Rotted Oak Leaf Mold: Acidic and rich in organic matter.
Peat Moss: Can be used but tends to form a crust if not mixed with chunkier material; best combined with bark or needles.
Depth and Placement: Apply a layer 2-3 inches (5-7.5 cm) deep. Crucially, keep the mulch pulled back slightly from the very base of the stems. Create a small, mulch-free donut hole around the crown itself – about an inch or two in diameter. This prevents constant moisture contact with the crown, significantly reducing rot risk. The mulch should cover the soil surface where the fine feeder roots are actively growing, protecting them from temperature extremes (both summer heat and winter cold), conserving precious moisture, suppressing weeds (which compete fiercely in pots), and continually breaking down to feed soil microbes and gently acidify the mix.
The Initial Hydration: Settling and Soaking
Deep and Slow: Water the newly planted bush thoroughly and deeply. Use rainwater or distilled water if your tap water is hard (alkaline); blueberries despise lime. Water slowly, allowing the moisture to soak in gradually. Don't just wet the surface; continue until water flows freely out of the drainage holes at the bottom. This achieves several things: it settles the soil around the roots (eliminating air pockets), ensures the entire root ball makes good contact with the new moist soil, and initiates the capillary action that draws water upward.
Observing Settlement: Pay attention as you water. You will likely see the soil level drop slightly as air pockets collapse and the mix consolidates. This is normal and precisely why you planted high. If significant settling occurs, you may need to add a tiny bit more potting mix, but be vigilant not to cover the crown. It's generally better to err on the side of slightly less soil than to bury the crown.
III. The Container: The Stage Dictates the Performance
The pot you choose profoundly influences the moisture and oxygen dynamics around the roots, and thus, indirectly impacts the ideal planting depth considerations.
Material Matters:
Plastic (Including Grow Bags): Lightweight, affordable, retains moisture well. Depth Consideration: Excellent moisture retention means less frequent watering but increases the risk of waterlogging if overwatered. Planting slightly higher (closer to the 1.5" above final level) can be prudent to maximize aeration near the crown. Grow bags offer superior air-pruning of roots but dry out very quickly; vigilance on moisture is key, and the planting depth principles remain paramount.
Glazed Ceramic: Beautiful, heavy (provides stability), retains moisture reasonably well. Depth Consideration: Similar to plastic regarding moisture, but heavier weight offers better stability for top-heavy bushes. Ensure excellent drainage holes.
Unglazed Terracotta: Classic, porous. Depth Consideration: The porosity allows excellent air exchange through the walls, beneficial for roots. However, it causes the soil to dry out much faster, especially in sun and wind. This increases the risk of the upper root zone drying out. Planting depth accuracy is critical to keep roots moist but not waterlogged, and mulching becomes even more essential. Be prepared for very frequent watering in warm weather.
Wood (Cedar, Redwood): Naturally insulating, good air exchange, durable if rot-resistant. Depth Consideration: Generally provides a good balance of moisture retention and aeration. Principles remain standard. Ensure drainage holes and consider lining with landscape fabric if concerned about soil loss.
Size is Paramount:
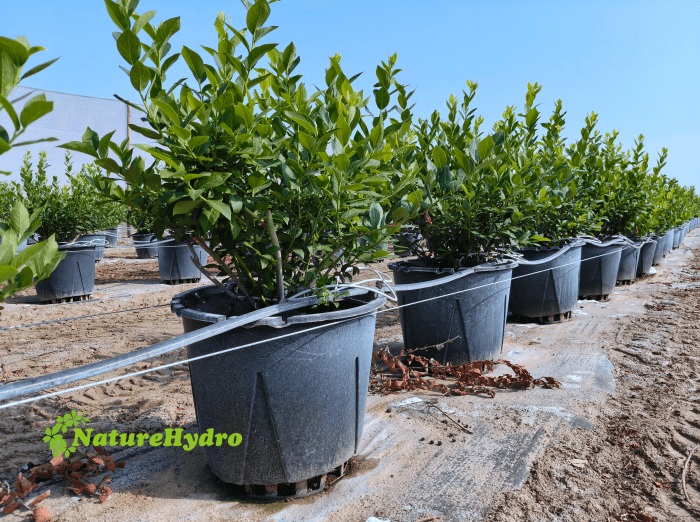
Start Right: For a typical 1-2 year old nursery blueberry bush, a pot holding at least 5 gallons (approx. 19 liters) of soil is the absolute minimum starting point. 16-20 inches (40-50 cm) in diameter is a good target. Blueberries need room for their shallow, spreading root systems.
Think Long-Term: Blueberries are long-lived perennials. A mature bush in a container will likely need a final home in a 20-24 inch (50-60 cm) diameter pot or half-barrel (15+ gallons/57+ liters). Starting too small necessitates stressful repotting too soon and restricts root development, impacting vigor and fruiting. Choosing a sufficiently large pot from the outset gives roots space to expand for several years and provides a larger buffer against moisture and temperature fluctuations.
Depth vs. Width: While depth is important for root volume, blueberries prioritize horizontal spread over deep diving. A pot that is wider than it is deep is often more beneficial than a very deep, narrow one, as it accommodates their natural growth habit. Ensure adequate depth (at least 12-16 inches / 30-40 cm) for stability and moisture reserve, but prioritize width.
IV. Beyond Planting: Sustaining the Ideal Depth Environment
Planting correctly is just the first act. Maintaining the conditions that make that depth successful is an ongoing commitment.
Watering Wisdom: This is the most critical and frequent task. The goal is consistently moist, never soggy and never bone-dry soil. Stick your finger 2 inches (5 cm) down into the soil (under the mulch). If it feels dry at that depth, water thoroughly until it runs out the bottom. In hot, windy weather, this could be daily for terracotta or small pots. In cooler weather, it might be weekly. Rainwater is best. Overwatering kills more potted blueberries than anything else. Good drainage and correct planting depth give you a buffer, but vigilance is key.
Mulch Maintenance: Mulch decomposes. Replenish the layer annually, typically in spring or fall, maintaining that 2-3 inch depth and keeping it away from the crown. This continuous replenishment feeds the soil, maintains acidity, conserves moisture, and insulates roots.
Acidity Monitoring: Blueberries demand acidic soil (pH 4.5-5.5). Potting mixes acidified with peat will gradually lose acidity as the peat decomposes and minerals leach out. Test the soil pH annually (use a kit designed for container soils). If the pH creeps above 5.5, amend with:
Elemental Sulfur: Follow package directions carefully based on pot size and current pH. It acts slowly.
Acidifying Fertilizers: Formulations for azaleas, camellias, or blueberries often contain sulfur coatings or ammonium forms of nitrogen that acidify.
Continued Use of Acidic Mulch: Pine needles and bark help maintain acidity.
Nutritional Needs: Use fertilizers formulated specifically for acid-loving plants or blueberries. Apply according to package directions, usually starting in early spring as growth begins and stopping by mid-summer to avoid promoting late, tender growth susceptible to winter damage. Container plants rely entirely on you for nutrients, as they cannot seek them out in the ground. Avoid over-fertilizing, which can burn roots and damage plants.
Repotting Rhythms: Even in large pots, blueberries will eventually become rootbound. Signs include roots circling densely at the surface or emerging from drainage holes, stunted growth despite feeding, and water running straight through the pot without soaking in. Repotting is best done in late winter or very early spring, before bud break. When repotting:
Move to a pot only 2-4 inches larger in diameter.
Refresh all the potting mix with new, acidic blend.
Repeat the exact same planting depth procedure: root tease, root flare positioning 1-1.5" above final level, careful backfilling, mulch application. Handle the root ball gently but firmly.
Winter Considerations: In cold climates (zones where winter temps drop below 10°F / -12°C), potted blueberries are vulnerable because their roots lack the insulating ground cover. Protect them:
Grouping: Cluster pots together in a sheltered location (against a house wall, out of prevailing wind).
Insulation: Wrap the pot itself with layers of bubble wrap, burlap stuffed with leaves, or specialized pot insulation sleeves. The goal is to protect the roots from freeze-thaw cycles and extreme cold.
Mulch Pile: Pile extra mulch (straw, shredded leaves) high around the base of the plant, covering the pot's soil surface thickly. Ensure the crown itself isn't smothered.
Snow Cover: Snow is an excellent insulator. If possible, position pots where snow naturally accumulates.
Avoid Heated Garages: Blueberries need winter dormancy. A consistently cold (but not extreme) location like an unheated garage, shed, or against a north-facing wall is better than a warm space that interrupts dormancy.
V. The Consequences of Depth Deviation: A Cautionary Tale
Understanding the "why" behind the correct depth is reinforced by seeing what happens when it goes wrong:
Too Deep (The Silent Killer):
Crown Rot: Persistent dampness around the buried crown invites fungal pathogens. Stems turn brown and mushy at the base, growth stops, leaves wilt and die back, often starting on one side. Frequently fatal.
Root Suffocation: Lack of oxygen in the deeper, wetter soil zones causes fine roots to die. The plant shows classic drought symptoms (wilting, leaf scorch) despite adequate soil moisture because the dead roots cannot take up water. Secondary root rot pathogens move in.
Reduced Vigor and Yield: Even if not immediately fatal, the plant struggles. Growth is slow, leaves may be smaller and paler, flower bud set is poor, and fruit production is significantly diminished. The plant becomes chronically stressed and susceptible to pests and diseases.
Too Shallow:
Root Desiccation: Upper roots dry out rapidly, especially in sun and wind or in porous pots like terracotta. This damages the most active feeder roots.
Crown Exposure and Damage: The crown and upper root flare are exposed to drying elements, physical damage from gardening tools, or winter cold/freeze-thaw cycles, leading to tissue damage and dieback.
Instability: The root ball isn't adequately anchored. The plant wobbles in the wind, damaging roots and potentially snapping stems. Fruit-laden branches exacerbate this.
Reduced Nutrient Uptake: Damage to the surface roots directly impacts the plant's ability to absorb water and nutrients effectively.
Conclusion: Depth as a Dialogue with Nature
Planting a blueberry bush in a pot to the correct depth is not a rote measurement, but the initiation of a profound dialogue between the gardener and the intricate biology of this remarkable plant. It is an act of understanding and respect for the blueberry's shallow, fibrous roots and its abhorrence of suffocation. It requires foresight to anticipate soil settlement, diligence in preparing the root ball, precision in positioning the crown, and commitment to maintaining the acidic, well-aerated, moist-but-not-wet environment that the chosen depth facilitates.
By mastering this depth – keeping the crown proud and breathing, the fine roots cradled in a moist, acidic, oxygen-rich blanket of soil and mulch – you create the essential foundation upon which years of vigorous growth and abundant harvests depend. It transforms the container from a constraint into a carefully managed ecosystem where the unique needs of the blueberry are met, allowing this woodland treasure to thrive on your patio, balcony, or doorstep, rewarding you with the incomparable taste of sun-ripened blueberries, season after season. The depth you choose today echoes through the life of your plant; choose wisely, plant carefully, and nurture diligently.
Naturehydro Bluleberry Grow Solution
Note: IndiBlogHub features both user-submitted and editorial content. We do not verify third-party contributions. Read our Disclaimer and Privacy Policyfor details.


