How to Install a Waterproof Cable Junction Box for Outdoor Use?

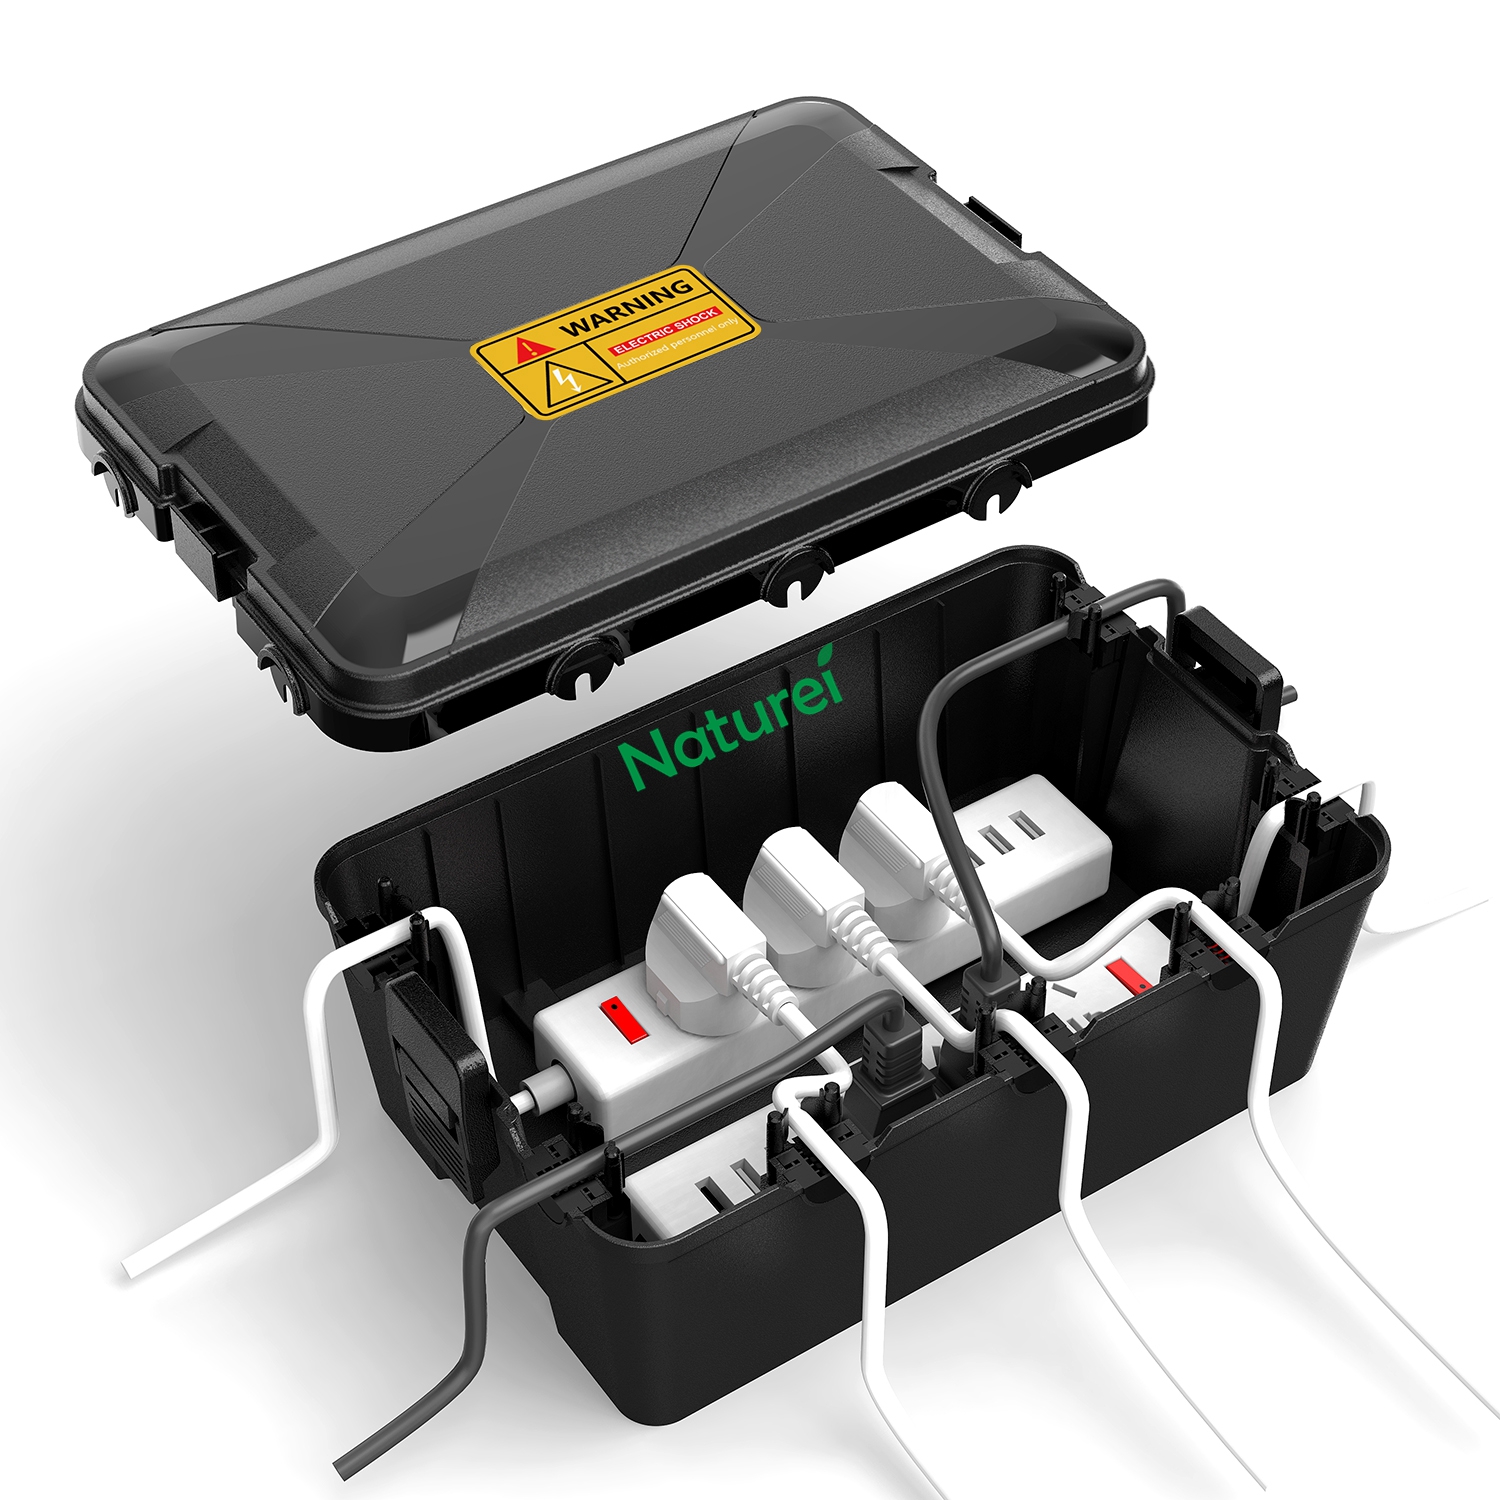
Outdoor electrical installations are increasingly common, whether for powering garden lights, pool equipment, or other external devices. A weatherproof cable junction box is essential to protect these connections from moisture, dirt, and environmental elements. Proper installation of a weatherproof box for extension cords ensures safety, durability, and optimal functionality.
In this guide, we will walk through the steps to install a waterproof cable junction box for outdoor use, while also addressing common concerns about selecting and utilizing the right components. Key considerations include choosing a reliable extension cord with a box, ensuring correct placement, and sealing the junction box effectively. Let's dive into the details.
Why Choose a Weatherproof Cable Junction Box?
Outdoor electrical setups face unique challenges, including exposure to rain, humidity, extreme temperatures, and dust. A weatherproof extension cord connection box is designed to shield sensitive wiring and connections from these threats. Key benefits include:
Safety: Prevents electrical short circuits and fires caused by moisture ingress.
Durability: Protects connections from corrosion, extending the lifespan of your equipment.
Flexibility: Accommodates different types of cords, including an extension cord junction box for temporary or semi-permanent setups.
Compliance: Meets regulatory standards for outdoor electrical installations.
Tools and Materials Needed
Before starting the installation, gather the following tools and materials:
A weatherproof extension cord connection box
Outdoor-rated extension cord with box or standard extension cords
Cable clamps or grommets
Screwdriver (flathead or Phillips)
Drill and bits (if mounting is required)
Silicone sealant or gasket material
Wire strippers and connectors
Mounting screws and anchors
Voltage tester (for safety checks)
Step-by-Step Installation Process
1. Choose the Right Location
Select a spot that is easily accessible but protected from direct water flow, such as under an eave or within a sheltered area. Avoid low-lying spots prone to flooding.
2. Select a Suitable Junction Box
Ensure the junction box is labeled as weatherproof or outdoor-rated. The box should accommodate the number of cables you plan to connect and include gaskets or seals for waterproofing.
3. Turn Off Power
Before starting any electrical work, switch off power to the circuit you'll be working on. Use a voltage tester to confirm there is no live current.
4. Prepare the Junction Box
Remove the cover of the weatherproof box for the extension cord.
Drill entry points if necessary, using the pre-marked templates on the box.
Attach cable clamps or grommets to seal entry holes and prevent water ingress.
5. Prepare the Cables
Cut and strip the ends of each cable to expose enough wire for connection.
If using an extension cord junction box, ensure the cord is rated for outdoor use and has sufficient length for the intended application.
6. Connect the Wires
Match the wire colors (black to black, white to white, green to green or bare).
Use wire nuts or terminal blocks to secure the connections.
Double-check all connections for tightness and accuracy.
7. Seal the Junction Box
Apply silicone sealant around the edges of the box and cable entry points.
Secure the cover tightly using the provided screws, ensuring the gasket compresses evenly for a watertight seal.
8. Mount the Box
If the junction box is not freestanding, mount it to a wall, post, or other support using screws and anchors.
Ensure it is level and securely attached.
9. Test the Installation
Restore power to the circuit.
Test the connected devices to ensure they function correctly.
Inspect the box for any gaps or leaks during operation.
Tips for Effective Installation
Use Outdoor-Rated Components: Always select extension cords and junction boxes labeled for outdoor use.
Maintain Proper Drainage: If the box includes a drain hole, ensure it is unobstructed.
Check Local Codes: Some areas have specific requirements for outdoor electrical installations. Verify compliance with local regulations.
Inspect Regularly: Periodically check the junction box for wear, damage, or signs of water ingress.
Common Mistakes to Avoid
Skipping the Sealant: Neglecting to seal entry points can lead to water ingress and electrical failure.
Using Indoor Cables: Non-weatherproof cables deteriorate quickly in outdoor conditions, posing safety risks.
Improper Wire Connections: Loose or incorrect connections can cause malfunctions or hazards.
Overcrowding the Box: Using a box that’s too small for the number of wires increases the risk of overheating or damage.
Benefits of Using a Weatherproof Junction Box
Protection Against Elements: Safeguards electrical components from water, dust, and extreme temperatures.
Enhanced Safety: Reduces the risk of short circuits, electric shocks, and fire.
Longevity: Ensures connections last longer without frequent repairs or replacements.
Versatility: Accommodates various setups, from temporary holiday lighting to permanent outdoor wiring.
Conclusion
Installing a waterproof cable junction box for outdoor use is a straightforward process that significantly enhances the safety and durability of outdoor electrical connections. With the right tools, materials, and precautions, you can create a secure and weatherproof setup for your outdoor needs.
By choosing the appropriate extension cord with a box and following the steps outlined above, you can ensure your electrical installations remain safe and functional in all weather conditions. Whether you're powering garden lights, operating outdoor appliances, or setting up seasonal decorations, a well-installed weatherproof box for extension cords is a valuable investment.
Note: IndiBlogHub features both user-submitted and editorial content. We do not verify third-party contributions. Read our Disclaimer and Privacy Policyfor details.


