How to Install Rain Gutters: An 8-Step DIY Guide

Strong 8k brings an ultra-HD IPTV experience to your living room and your pocket.
Installing gutters is one of the most effective ways to protect your home from water damage. A properly installed drainage system redirects rainwater away from your foundation, siding, and landscaping. Whether you're replacing old equipment or starting fresh, knowing how to install them correctly can save you time, money, and future repairs.
If you're a homeowner in Norwood, MA, and considering a gutter installation project, this simple 8-step guide can help you complete it like a pro
Step 1: Measure and Plan Your Gutters Layout
The first step in installing gutters is mapping out your drainage system. In Norwood, MA, homeowners should measure the roofline where the system will be mounted, noting downspout locations and overall length. Planning a gentle slope—around 1/4 inch per 10 feet—ensures water drains efficiently. It’s also important to decide on the best downspout locations to direct water safely away from the foundation. Proper planning helps make the installation smoother and ensures a longer-lasting gutter system.
Step 2: Choose the Right Materials
There are several types of gutters, including aluminum, vinyl, steel, and copper. Aluminum is lightweight, rust-resistant, and one of the most popular materials for residential gutter installation. Vinyl is also affordable and easy to install, though less durable.
You’ll also need accessories like hangers, brackets, downspouts, end caps, sealant, and fasteners. If you're looking for a clean, leak-resistant setup, seamless gutter installation may be a good option—although it’s typically done by professionals.
Step 3: Cut and Prepare the Channels
Using your measurements, mark and cut the gutter sections to fit your home. Use a hacksaw or tin snips to make clean cuts. If you're working with aluminum, wear gloves to avoid sharp edges.
Dry-fit each section on the ground before lifting it into place. This helps identify any adjustments before securing the gutters permanently.
Step 4: Install the Mounting Brackets
Secure brackets or hangers to the fascia board, ensuring they're evenly spaced—no more than 36 inches apart. These brackets hold the gutters in place, so it’s important they’re installed securely and follow the slope you planned in step one.
Use a chalk line or level to maintain proper alignment and drainage slope across the entire system.
Step 5: Attach the Gutters
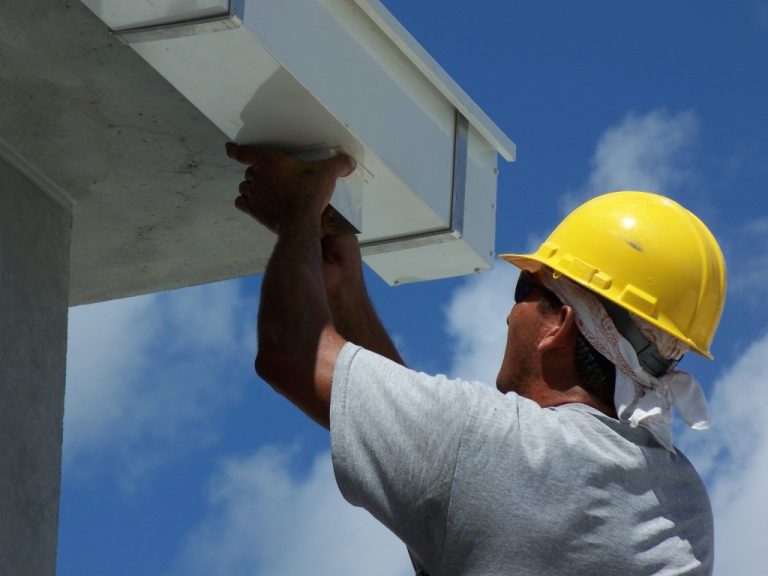
Now that the brackets are installed, you can begin mounting the gutters. Lift each section into place and fasten it using screws or rivets. Apply exterior-grade sealant at seams and joints to prevent leaks.
Take your time during this step to ensure the gutters are level and securely attached. Improper alignment can lead to water overflow or long-term damage.
Step 6: Install Downspouts and Elbows
Attach the drop outlets where the gutters will connect to the downspouts. Then, install the elbows and vertical pipes to direct water away from the home. Use straps to anchor the downspouts to the wall and extend them a few feet from the foundation.
Step 7: Perform a Water Flow Test
After the installation is complete, test your gutters by running water through them using a garden hose. Check for leaks, proper drainage, and any sagging sections. Reseal joints as needed and tighten any loose connections.
Step 8: Final Inspection and Maintenance Tips
Once testing is complete, do a final walkaround to inspect the entire system. Make sure all brackets are tight, downspouts are clear, and there are no visible gaps.
It’s a good idea to clean your gutters at least twice a year, especially in fall and spring, to prevent clogs and overflow. Adding leaf guards can reduce debris buildup and extend the life of your system.
Why Proper Gutter Installation Matters
In climates with frequent rain or snowfall, a reliable system is a must. Poor drainage can lead to costly damage like basement leaks, mold, or even foundation issues. Well-installed gutters help manage runoff, preserve landscaping, and maintain the structural integrity of your home.
For those who prefer expert help, companies like Roof Tops offer professional gutter replacement services and custom solutions that suit the style and layout of any home.
Conclusion
Installing gutters is a practical and cost-effective way to safeguard your home. Whether you're doing a full upgrade or replacing worn-out sections, following these 8 steps can ensure a smooth and lasting installation. If you feel unsure at any point, consulting a professional can help you avoid mistakes and achieve a cleaner finish.
With the right materials, tools, and planning, your gutter installation project can be a smart long-term investment in your home’s durability and value.
FAQs
1. How long does it take to install gutters on an average home?
Typically 6–10 hours, depending on size and complexity.
2. What’s the benefit of seamless gutter systems?
They have fewer joints, which reduces leaks and maintenance.
3. Can I install new gutters without removing the old ones?
It's best to remove old ones to ensure proper alignment and fit.
4. How often should I clean my gutters?
At least twice per year—or more often if surrounded by trees.
5. What are signs I need new gutters?
Cracks, rust spots, sagging, and frequent overflows are clear indicators.
Note: IndiBlogHub features both user-submitted and editorial content. We do not verify third-party contributions. Read our Disclaimer and Privacy Policyfor details.


