How to Make a Lanyard Mockup: A Step-by-Step Guide

Strong 8k brings an ultra-HD IPTV experience to your living room and your pocket.
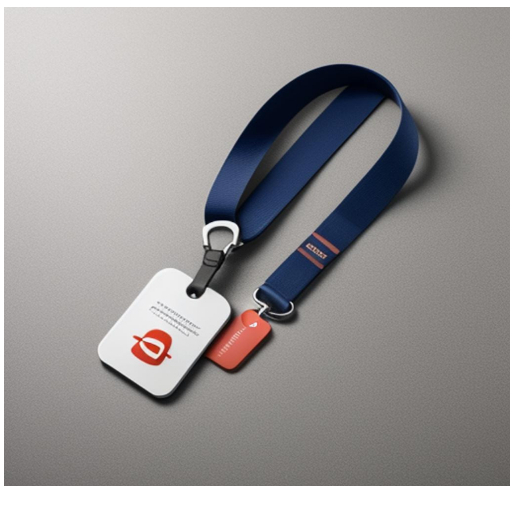
Lanyards are more than just functional accessories; they’re powerful branding tools. Whether used in corporate events, trade shows, schools, or offices, they help display your logo or message prominently. To ensure your design stands out, creating a lanyard mockup is an essential step. It helps visualize your ideas, fix any design flaws, and present a professional concept to clients or stakeholders.
This comprehensive guide will walk you through creating a lanyard mockup, from choosing tools to finalizing your design, whether you’re a beginner or an experienced designer.
Why Create a Lanyard Mockup?
A lanyard mockup is a digital representation of your design applied to a lanyard. It offers several benefits:
Visualizing Your Design: See how your logo, text, or pattern will appear on a real lanyard.
Saving Resources: Spot errors and make adjustments before committing to production.
Professional Presentation: Impress clients and stakeholders with polished, realistic visuals.
With a mockup, you can confidently move forward with your project, knowing your design is ready for production.
Step 1: Gather the Tools You’ll Need
To create a lanyard mockup, you’ll need the following tools:
Design Software: Adobe Photoshop, Illustrator, or online platforms like Mockey, Smartmockups, or Placeit. Tools like Mockey are user-friendly and perfect for beginners.
Lanyard Templates: Download customizable mockup templates from websites like Mockey, Freepik, or GraphicRiver.
Design Elements: Prepare your logo, brand colors, patterns, and any text you want to include on the lanyard.
Having the right tools and resources at hand will make the process much smoother.
Step 2: Choose a Lanyard Mockup Template
Using a pre-made mockup template is the easiest way to create a lanyard mockup. These templates are customizable and save you time compared to starting from scratch.
Online Tools: Mockey and other platforms allow you to upload your design and automatically generate a mockup. These tools are intuitive and ideal for quick results.
PSD Templates for Photoshop: For more control, use PSD files with editable smart objects. These let you tweak colors, shadows, and other elements for a realistic result.
Choose a template that closely matches your needs, whether it’s a flat design or a 3D perspective.
Step 3: Prepare Your Lanyard Design
Before placing your design onto the mockup template, prepare the artwork:
Create a Flat Design: Ensure your artwork matches standard lanyard dimensions (36 inches long and 0.75 inches wide).
Incorporate Branding: Include logos, slogans, and other elements consistent with your brand guidelines.
Use High-Resolution Graphics: High-quality images ensure your mockup looks professional and crisp.
If you’re using patterns or detailed designs, make sure they’re aligned correctly to avoid distortion.
Step 4: Add Your Design to the Template
Using Mockey or Online Tools
Upload your lanyard design file to Mockey.
Select a lanyard mockup template.
Adjust the size, position, and orientation of your design to fit the template.
Preview the mockup and download the final image in high resolution.
Using Photoshop
Open your chosen PSD template in Photoshop.
Locate the smart object layer labeled “Place Your Design Here.”
Double-click the smart object to open it.
Drag and drop your design into the smart object, resize as needed, and save.
Return to the main file to see the updated mockup.
Both methods are straightforward, but online tools like Mockey simplify the process for non-designers.
Step 5: Customize the Mockup
Once your design is added, personalize the mockup to suit your needs:
Adjust Colors: Modify the base lanyard color to match your branding.
Refine Shadows and Highlights: Enhance realism by tweaking shadows, highlights, and textures.
Choose Backgrounds: Use plain backgrounds for a clean look or add context with an office or event setting.
These small touches can elevate your mockup, making it look polished and professional.
Step 6: Review and Export
Before sharing or presenting your mockup, take a moment to review:
Check Alignment: Ensure all elements are properly placed and legible.
Test Scalability: Your design should look great at different sizes.
Export in High Quality: Save your mockup as a PNG, JPEG, or PDF to maintain quality across platforms.
A thorough review will help you catch any errors before finalizing the mockup.
Pro Tips for Stunning Lanyard Mockups
Stick to Simplicity: Avoid overcrowding the design with too many elements.
Maintain Consistency: Follow your brand’s guidelines for colors, fonts, and styles.
Showcase in Realistic Contexts: Use lifestyle mockups to demonstrate how the lanyard will look in use.
These tips can help you create a mockup that is both functional and visually appealing.
Where Can You Use Lanyard Mockups?
Lanyard mockups are versatile and serve multiple purposes:
Client Presentations: Showcase your concepts in a polished format.
Marketing Materials: Add mockups to brochures or social media campaigns.
E-Commerce Listings: Display realistic visuals for online stores.
A well-crafted mockup adds value to any project, making it easier to communicate your vision.
Conclusion
Creating a lanyard mockup is a vital step in the design process. It not only helps you visualize your ideas but also ensures your final product aligns with expectations. Whether you choose an online tool like Mockey or dive into Photoshop, the process is straightforward and rewarding.
With a high-quality lanyard mockup, you can confidently present your designs, impress clients, and bring your creative vision to life. Get started today and elevate your branding with professional mockups!
Note: IndiBlogHub features both user-submitted and editorial content. We do not verify third-party contributions. Read our Disclaimer and Privacy Policyfor details.


