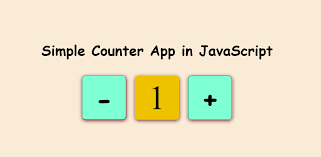
Master JavaScript Basics: How to Build a Simple Counter

Strong 8k brings an ultra-HD IPTV experience to your living room and your pocket.
JavaScript is one of the most versatile programming languages used for web development. Whether you’re a beginner or looking to revisit the basics, building a simple counter is an excellent way to practice key concepts such as DOM manipulation, event handling, and state management. In fsiblog website, we’ll walk you through the process of creating a functional and interactive counter using JavaScript.
Why Build a Counter?
Building a counter may seem simple, but it provides a solid foundation for understanding essential JavaScript principles. Here’s what you’ll learn:
DOM Manipulation: Accessing and modifying HTML elements.
Event Handling: Responding to user interactions like button clicks.
State Management: Tracking and updating the value of a variable.
Setting Up Your Project
Before we dive into coding, create a basic project structure:
Create a new folder and name it counter-project.
Inside the folder, create three files:
index.html
style.css
script.js
Step 1: Write the HTML Structure
The HTML file provides the structure of your counter. Add the following code to index.html:
html
Copy code
Simple Counter
0
Explanation:
h1: Displays the title of the page.
span: Displays the current counter value.
Buttons: Increment and decrement buttons allow the user to adjust the counter value.
id Attributes: These are used to uniquely identify elements for JavaScript interaction.
Step 2: Style the Counter with CSS
Let’s add some basic styles to make the counter visually appealing. Add the following to style.css:
css
Copy code
body {
font-family: Arial, sans-serif;
text-align: center;
background-color: #f4f4f9;
margin: 0;
padding: 20px;
}
.container {
margin-top: 50px;
padding: 20px;
background: #fff;
border-radius: 8px;
box-shadow: 0 4px 8px rgba(0, 0, 0, 0.2);
display: inline-block;
}
h1 {
color: #333;
margin-bottom: 20px;
}
.counter {
display: flex;
align-items: center;
justify-content: center;
}
button {
font-size: 20px;
padding: 10px 20px;
margin: 0 10px;
background-color: #007bff;
color: white;
border: none;
border-radius: 4px;
cursor: pointer;
outline: none;
transition: background-color 0.3s ease;
}
button:hover {
background-color: #0056b3;
}
#value {
font-size: 24px;
font-weight: bold;
min-width: 50px;
text-align: center;
}
Explanation:
The .container class centers the counter on the page and adds a shadow for a modern look.
The buttons have a clean and responsive design with hover effects.
The #value ID styles the counter’s current value, ensuring it’s prominently displayed.
Step 3: Add JavaScript to Make the Counter Functional
Now, let’s add interactivity to the counter using JavaScript. Open script.js and add the following code:
javascript
Copy code
// Select elements
const decrementButton = document.getElementById("decrement");
const incrementButton = document.getElementById("increment");
const valueElement = document.getElementById("value");
// Initialize counter value
let counterValue = 0;
// Function to update the display
function updateDisplay() {
valueElement.textContent = counterValue;
}
// Event listeners for buttons
decrementButton.addEventListener("click", () => {
counterValue--;
updateDisplay();
});
incrementButton.addEventListener("click", () => {
counterValue++;
updateDisplay();
});
Explanation:
Selecting Elements:
Use getElementById to select the buttons and the value display.
Initializing the Counter:
The counterValue variable keeps track of the current count.
Updating the Display:
The updateDisplay function updates the displayed value whenever the counter changes.
Event Listeners:
Attach click event listeners to the buttons.
The decrement button reduces the counter value, while the increment button increases it.
Step 4: Enhancing the Counter
Adding a Reset Button
You can add a reset button to set the counter back to zero. Update the HTML:
html
Copy code
Add the following JavaScript:
javascript
Copy code
const resetButton = document.getElementById("reset");
resetButton.addEventListener("click", () => {
counterValue = 0;
updateDisplay();
});
Adding Limits
If you want to prevent the counter from going below zero or above a specific limit, modify the event listeners:
javascript
Copy code
decrementButton.addEventListener("click", () => {
if (counterValue > 0) {
counterValue--;
updateDisplay();
}
});
incrementButton.addEventListener("click", () => {
if (counterValue
counterValue++;
updateDisplay();
}
});
Step 5: Testing the Counter
After implementing the counter, open index.html in your browser. Test the following functionalities:
Incrementing the counter.
Decrementing the counter.
Resetting the counter.
Ensuring limits (if added) work as expected.
Conclusion
Congratulations! You’ve successfully built a simple counter using HTML, CSS, and JavaScript. This project is an excellent way to understand the basics of DOM manipulation, event handling, and updating the user interface dynamically.
You can further enhance this counter by:
Adding animations.
Making the buttons more interactive with sound or color changes.
Storing the counter value in the browser’s local storage.
Note: IndiBlogHub features both user-submitted and editorial content. We do not verify third-party contributions. Read our Disclaimer and Privacy Policyfor details.


