Mastering the Art of Digitizing for Embroidery

Digitizing for embroidery is an essential skill for anyone involved in the embroidery process, whether for commercial purposes or personal projects. It refers to the technique of converting a design or artwork into a format that can be read and executed by an embroidery machine. Proper digitization ensures that intricate designs are translated accurately into thread on fabric, providing crisp, high-quality results. In this article, we’ll dive into the fundamentals of digitizing for embroidery, its importance, the tools required, and answers to some frequently asked questions.
What is Digitizing for Embroidery?
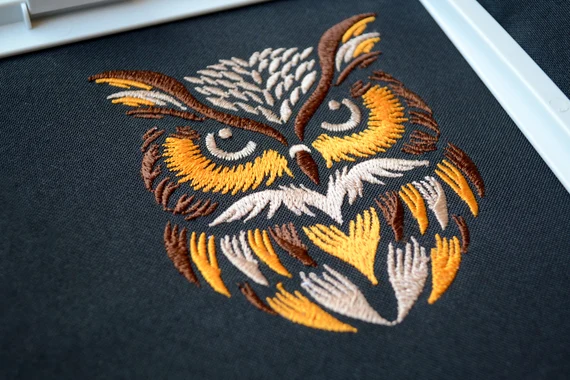
Embroidery digitizing is the process of converting an image, logo, or artwork into a set of instructions that an embroidery machine can follow to produce the design on fabric. This involves transforming a visual design into a file format that is understood by the embroidery machine, guiding it to stitch the design accurately. The digital file includes instructions about stitch type, stitch density, the color sequence, and the stitching order.
The main goal of digitizing for embroidery is to ensure that the design looks as intended once embroidered. This step is crucial, as a simple image or drawing on a computer screen cannot be directly translated into stitches by the embroidery machine without proper digitization.
Why is Digitizing for Embroidery Crucial?
Design Precision: Digitizing ensures that the design is faithfully recreated on fabric, with proper alignment and stitch quality. Without effective digitization, you risk misalignments, poor-quality stitching, or inaccurate color placement.
Machine Compatibility: Embroidery machines are designed to follow specific file formats and stitch instructions. Digitizing transforms your artwork into machine-readable code, allowing the machine to follow the path and produce the design accurately.
Thread and Fabric Optimization: Digitizing helps ensure that the right stitch type, density, and direction are applied to the fabric. This ensures thread is used efficiently and prevents issues such as fabric puckering or thread breakage.
Consistency: With proper digitizing, a design can be repeated with consistency, whether on different fabric types, sizes, or products. This is especially important for businesses that require large runs of embroidered designs.
The Step-by-Step Process of Digitizing for Embroidery
Choose the Design: The first step is to select the image or logo that you want to digitize. Whether it's a logo, an illustration, or a custom graphic, ensure the design is of high resolution and clarity. Complex or detailed designs may need simplification to work well in embroidery.
Convert the Design to a Vector Format: Embroidery designs should ideally be in vector format (e.g., .SVG, .EPS, .AI) because these files are based on mathematical paths and can be scaled without losing quality. Raster images (e.g., JPEG, PNG) are not ideal because they are pixel-based and might lose resolution when scaled.
Digitizing with Embroidery Software: Once the design is in vector format, you will need embroidery software to convert it into stitches. Popular digitizing software includes:
Wilcom Embroidery Studio
Hatch Embroidery Software
CorelDRAW (with embroidery plugins)
TruEmbroidery
Using these tools, you can choose the appropriate stitch types (e.g., satin stitch, fill stitch, or running stitch), adjust stitch density, and set the stitch direction. The software also allows you to define color changes and stitch sequences.
Set Stitch Paths and Order: The software helps determine the optimal stitching order. This is critical because stitching from the wrong order can lead to unnecessary thread changes and additional time-consuming operations. The order of stitching should consider underlay stitches, outline stitches, and any necessary layering.
Preview and Adjustments: After digitizing the design, most software provides a preview feature that simulates how the design will look once embroidered. At this stage, adjustments can be made to the stitch types, directions, or densities to optimize the outcome.
Save the File in an Embroidery-Compatible Format: Once satisfied with the design, save it in a file format that the embroidery machine can read. Common file formats include:
DST (for Tajima machines)
PES (for Brother machines)
EXP (for commercial-grade machines)
Test Run: Before finalizing the design, it's important to do a test stitching on fabric. This allows you to check for any issues with the stitch density, color changes, or overall quality. Adjustments are made after reviewing the test result, and the design is then ready for production.
Tools Needed for Embroidery Digitizing
Embroidery Software: A high-quality embroidery digitizing software is essential for creating professional designs. Popular software options include Wilcom, Hatch, and CorelDRAW, all of which offer comprehensive tools for stitching management and design customization.
Graphics Tablet: Many digitizers prefer to use a tablet to freehand trace or modify designs. A graphics tablet makes it easier to add intricate details and adjust designs accurately.
Embroidery Machine: The embroidery machine reads the final digitized file and stitches the design on the fabric. It’s important to ensure that the machine supports the file format you've created.
Conclusion
Digitizing for embroidery is a critical step in ensuring that your designs are translated onto fabric accurately and with high-quality results. By understanding the digitizing process, using the right tools, and practicing your skills, you can create embroidery designs that stand out and meet your specific needs. Whether you're working on a business logo, custom apparel, or personal projects, mastering digitizing will help you achieve professional-grade embroidered designs.
FAQs on Digitizing for Embroidery
1. What are the most common file formats for embroidery designs?
Common embroidery file formats include:
DST: Most widely supported, used for commercial machines.
PES: Often used for Brother and Babylock embroidery machines.
EXP: Used for commercial machines like Melco and Bernina. Ensure that you save your design in the right format for your embroidery machine.
2. Can I digitize my own designs?
Yes, anyone can learn to digitize designs with the right tools and software. While it requires skill and practice, digitizing your own designs is achievable, and many people start with simple logos or text before progressing to more intricate designs.
3. How long does it take to digitize a design?
The time required to digitize a design depends on its complexity. Simple designs may take as little as 30 minutes, while more detailed logos or artwork can take several hours. Testing and adjustments also add to the time.
4. Can I use photographs for embroidery digitizing?
Yes, photographs can be digitized, but they need to be simplified first. Detailed images like photographs are usually converted into vector art and then modified to fit within the limitations of embroidery, such as reducing the number of colors and simplifying complex shapes.
5. What are the common problems when digitizing for embroidery?
Common problems include incorrect stitch density (leading to loose or tight stitches), thread breakage, color bleeding, and fabric puckering. Most of these issues can be avoided by properly adjusting the design during the digitizing process and performing test stitches before finalizing the design.
6. How do I prevent thread breakage in embroidery?
Thread breakage is often caused by improper tension, poor stitch density, or using the wrong type of thread for the fabric. Ensure the tension settings on the machine are correct and use the appropriate needle and thread for the fabric type. Digitizing with the right stitch density also helps minimize this issue.
Note: IndiBlogHub features both user-submitted and editorial content. We do not verify third-party contributions. Read our Disclaimer and Privacy Policyfor details.


