Practical Drone Photography for Beginners: Aerial Videography Guide
-

- March 24th, 2026
- 158 views

FREE SEO Topical Map Generator: Find Your Next Content Ideas
Introduction
This practical guide explains core techniques and safety practices for drone photography for beginners who want reliable aerial videography results. The focus is on repeatable flight prep, camera settings, and simple shot techniques that produce smooth, usable footage while staying legal and safe.
- Follow a simple checklist before every flight.
- Use manual exposure, smooth gimbal control, and correct shutter speed for cinematic motion blur.
- Plan shots, check rules, and fly conservatively—especially near people and infrastructure.
Drone photography for beginners: core concepts
Beginner aerial videography relies on understanding three technical areas: flight basics (altitude, speed, orientation), camera control (shutter speed, ISO, frame rate), and shot composition (movement, subject placement, light). Related terms to know: gimbal stabilization, ND filters, bitrate, hyperlapse, waypoint flight, geofencing, and telemetry.
FLY-PREP checklist (named framework)
Use the FLY-PREP checklist before every shoot to avoid common errors and save time on site.
- File check: Firmware, SD cards formatted, batteries charged.
- Legal check: Local restrictions, airspace class, permits required (reference local aviation authority rules).
- Yield plan: Identify landing zones and emergency return path.
- Plan shots: Storyboard key moves—pulls, reveals, or tracking shots.
- Review settings: Frame rate, shutter, white balance, ND filter.
- Environment: Wind, light direction, obstacles.
- Practice: Run a short hover and gimbal sweep before recording.
Practical step-by-step setup
1. Preflight and legal checks
Always check local regulations and NOTAMs. For example, in the United States consult official guidance from the Federal Aviation Administration for rules on registration and airspace: https://www.faa.gov/uas/. Confirm whether a waiver or permission is needed for the planned location.
2. Camera and exposure settings
- Frame rate: 24–30 fps for cinematic look; 48–60 fps for slow-motion options.
- Shutter speed: Use the 180-degree rule — shutter speed ≈ 2× frame rate (e.g., 1/50s for 24 fps).
- ISO: Keep as low as possible to minimize noise; raise only when light is insufficient.
- ND filters: Use to maintain correct shutter speed in bright light while using low ISO and desired aperture.
- White balance: Set manually to avoid color shifts during a shot.
3. Flight and shot technique
- Smooth control: Use gentle stick inputs; small, steady movements read as professional shots.
- Speed control: Slow constant speed for tracking shots; accelerate gently for reveal shots.
- Gimbal: Lock pitch for horizon-stable shots or move gradually for tilts.
Real-world scenario
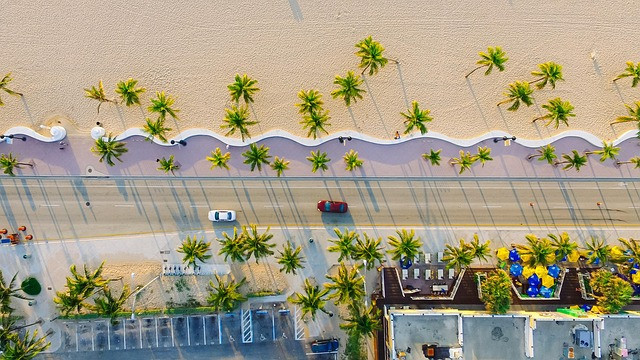
Scenario: Shooting a 30-second coastal reveal for a tourism clip. Plan a low, slow approach from the water line toward a cliff-top viewpoint, maintaining a consistent 3–4 m/s velocity. Use 24 fps with 1/50s shutter, ND8 filter for midday sun, and a gimbal tilt from 20° down to horizon level. Execute two passes—one for safety and one for recording—using the FLY-PREP checklist to confirm battery, clearance, and landing zone.
Practical tips
- Record in the camera's highest bitrate or in RAW/LOG if available; color grading eats small compression errors quickly.
- Log flights and shots: keep a short notebook of settings and maneuvers—helps reproduce good results later.
- Use waypoint or orbit modes for repeatable motion when multiple takes or match cuts are needed.
- Bring extra batteries and a portable charger; most shoots fail due to lack of runtime, not skills.
Trade-offs and common mistakes
Trade-offs
- Higher frame rates vs. motion blur: More fps allows slow motion but demands higher shutter speed or exposure adjustments, which can increase noise.
- ND filters vs. autofocus: Strong ND reduces light and can affect autofocus performance—test before critical shots.
- Manual settings vs. convenience: Manual exposure yields consistent results but requires more attention during changing light.
Common mistakes
- Flying too fast for the terrain—results in jitter and missed framing.
- Relying on auto exposure—causes sudden shifts during reveals or changes in scene brightness.
- Skipping preflight checks—software updates, low battery, or full memory cards cause preventable failures.
Post-flight workflow basics
Immediately download footage and back it up. Transcode high-bitrate codecs for editing, then apply basic stabilization only when necessary to avoid crop and artifacts. Use color profiles or LUTs sparingly and reference scopes (histogram/waveform) when adjusting exposure and color.
Safety and legal reminders
Always respect privacy and avoid flying over crowds. Keep visual line of sight where required and maintain safe distances from airports and controlled airspace. When operating commercially, verify certification and insurance requirements for the jurisdiction.
FAQ: What is drone photography for beginners?
Drone photography for beginners refers to the foundational skills, safety checks, and camera techniques tailored to new pilots who want to produce steady, cinematic aerial video without advanced gear or experience.
How should shutter speed and frame rate be set for aerial video?
Use the 180-degree shutter rule: set shutter speed to roughly double the frame rate (e.g., 1/50s for 24 fps) and adjust ND filters or ISO to maintain exposure.
What safety checks should be on a drone flight planning checklist?
Key checks: batteries, firmware, SD card space, local airspace rules, weather (wind/gusts), emergency landing options, and clear communication with on-site crew.
How can beginners stabilize footage without heavy post-processing?
Shoot with a functioning gimbal, use slow smooth flight movements, select an appropriate shutter speed, and maintain steady altitude—these reduce the need for heavy digital stabilization.
What are top aerial videography tips for beginners?
Plan shots, practice slow control inputs, use manual exposure with ND filters, perform preflight safety checks, and always record more footage than expected to allow editing flexibility.