 Content Gap Analysis – Find What Competitors Are Missing!
How to Optimize Designs for Embroidery Digitizing Services
Written by zdigitizinga » Updated on: June 17th, 2025

Embroidery digitizing services have become an essential part of the textile and fashion industries, allowing businesses and individuals to transform digital designs into beautiful embroidered pieces. However, not all designs translate well into embroidery. To achieve the best results, it's crucial to optimize your designs specifically for embroidery digitizing. This involves understanding the unique requirements of the embroidery process and making adjustments to ensure your design looks as good on fabric as it does on the screen.
In this blog, we will explore how to optimize your designs for embroidery digitizing services, covering everything from design simplicity and color selection to the importance of understanding stitch types and fabric choice. By following these tips, you can ensure that your designs are ready for a smooth transition from concept to creation.
Why Optimizing Designs is Crucial for Embroidery Digitizing
Embroidery is a tactile art form that relies on thread and fabric rather than ink and paper. This means that certain design elements, such as fine lines, gradients, and small text, can be challenging to replicate accurately in embroidery. Optimizing your designs for embroidery digitizing helps to:
Ensure Design Clarity: Simple, bold designs translate better into embroidery, maintaining clarity and impact.
Prevent Stitching Issues: Optimization reduces the risk of thread breaks, puckering, and other common embroidery problems.
Save Time and Money: Well-optimized designs are easier to digitize, reducing the time and cost involved in the digitizing process.
Enhance Durability: Properly optimized designs will endure better through washing and wearing, ensuring longevity.
1. Start with a Simple and Clean Design
Why Simplicity Matters
Embroidery works best with simple, clean designs. Intricate details and complex patterns can become lost or muddled when converted into stitches. Therefore, when creating a design for digitizing embroidery service, start with a simple concept that can be easily translated into thread.
Key Tips for Simplicity
Avoid Tiny Details: Small details and fine lines may not show up well in embroidery. Simplify these elements or remove them altogether.
Use Bold Lines: Bold, clear lines are easier for the embroidery machine to follow and result in a more polished final product.
Minimize Text: Small text can be difficult to embroider legibly. Stick to larger, simple fonts or avoid text where possible.
2. Choose the Right Colors
Understanding Color Limitations
Embroidery uses threads, not ink, which means there are limitations on color blending and shading. Unlike digital printing, where you can use a virtually unlimited color palette, embroidery is constrained by the availability of thread colors and the nature of the medium.
Optimizing Your Color Palette
Limit the Number of Colors: Most embroidery machines are limited in the number of thread colors they can use at once. Aim to keep your design to a maximum of 4-6 colors.
Use Solid Colors: Gradients and shading do not translate well into embroidery. Instead, use solid colors that contrast well with each other.
Consider Fabric Color: The color of the fabric will affect how the thread colors appear. Choose thread colors that stand out against the fabric background.
3. Understand the Role of Stitch Types
Common Stitch Types
Embroidery digitizing services convert your design into a series of stitches that an embroidery machine can execute. Different stitch types are used to achieve various effects, and understanding these can help you design more effectively.
Satin Stitches: Used for borders and text, satin stitches create a smooth, shiny finish.
Fill Stitches: Used to cover larger areas, fill stitches are less dense than satin stitches and create a textured surface.
Running Stitches: Used for outlining and detail work, running stitches are a series of small, straight stitches.
Designing with Stitches in Mind
Avoid Overlapping Elements: Overlapping designs can lead to excessive stitch density, causing fabric puckering or thread breaks.
Keep Stitch Density in Check: High stitch density can make the fabric stiff and uncomfortable. Balance your design to avoid overly dense areas.
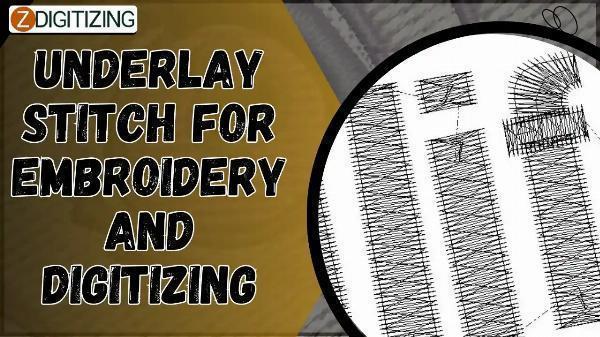
Plan for Underlay Stitches: Underlay stitches provide a foundation for your design, helping to stabilize the fabric and improve the final appearance.
4. Consider Fabric Type and Texture
Fabric Impact on Design
The fabric you choose for your embroidery will significantly impact how the design looks and how it should be digitized. Different fabrics behave differently under the needle, so it’s essential to consider the characteristics of your fabric when optimizing your design.
Adapting Your Design for Fabric
Adjust for Fabric Stretch: Stretchy fabrics like knits or spandex can cause distortion in your design. Use underlay stitches and consider reducing stitch density to accommodate the fabric’s movement.
Account for Texture: Heavily textured fabrics, such as corduroy or fleece, can obscure fine details. Simplify your design and use thicker, more visible stitches.
Choose Stabilizers Wisely: The right stabilizer can make a big difference in the final appearance of your embroidery. Work with your digitizing service provider to select the appropriate stabilizer for your fabric and design.
5. Test and Refine Your Design
Importance of Testing
Before committing to a full production run, it’s crucial to test your design. A test stitch allows you to see how your design translates from the screen to the fabric and identify any potential issues.
What to Look for in Testing
Check for Clarity: Ensure that all elements of the design are clear and recognizable.
Evaluate Stitch Quality: Look for issues such as thread breaks, puckering, or uneven stitching.
Make Necessary Adjustments: Based on your test results, make adjustments to your design and digitization file to improve the final outcome.
6. Collaborate with Your Embroidery Digitizing Service Provider
Why Collaboration is Key
Your embroidery digitizing service provider plays a crucial role in translating your design into a high-quality embroidered product. Collaborating closely with them can help ensure that your design is optimized for the best results.
Effective Collaboration Tips
Share Detailed Design Information: Provide your digitizing service provider with all relevant details, including the intended fabric, size, and any specific requirements.
Request Expert Feedback: Your provider can offer valuable insights into how to adjust your design for better results. Be open to their suggestions.
Review Samples: Always request a sample or proof before final production to ensure that the design meets your expectations.
7. Consider the Final Application of the Design
Designing with Purpose
The final application of your embroidered design should influence how you optimize it. Whether the design is for a corporate logo, a personalized gift, or event merchandise, each use case may require different design considerations.
Tailoring Your Design for Application
Corporate Logos: Ensure that the design maintains brand integrity and clarity at various sizes.
Personalized Gifts: Consider adding unique elements like monograms or names that enhance the personalization aspect.
Event Merchandise: Keep the design bold and impactful to maximize visibility and appeal.
Conclusion
Optimizing designs for embroidery digitizing services is a critical step in achieving high-quality embroidered products. By focusing on simplicity, understanding color limitations, and working closely with your digitizing service provider, you can ensure that your designs translate beautifully into embroidery. Whether you’re creating corporate logos, personalized gifts, or event merchandise, following these optimization tips will help you achieve the best possible results.
FAQs About Optimizing Designs for Embroidery Digitizing Services
Why is it important to optimize designs for embroidery digitizing services?
Optimizing designs ensures that they translate well from digital format to embroidered fabric, maintaining clarity, durability, and visual appeal.
What design elements should I avoid for embroidery?
Avoid fine details, small text, gradients, and overly complex patterns. These elements can be difficult to reproduce accurately in embroidery.
How many colors should I use in my embroidery design?
Aim to limit your design to 4-6 solid colors. This helps ensure clarity and prevents complications during the digitizing and embroidery processes.
Can any design be used for embroidery?
Not all designs are suitable for embroidery. Simple, bold designs with clear lines and solid colors work best. Designs may need to be adjusted or simplified for optimal results.
How can I test my design before full production?
Request a sample stitch-out from your digitizing services for embroidery provider. This allows you to see how the design will look on fabric and make any necessary adjustments.
What role does fabric choice play in embroidery design optimization?
Fabric choice affects how the design will appear and behave under the needle. Different fabrics may require adjustments to stitch density, design complexity, and stabilization.
How can I ensure the best results from my embroidery digitizing service provider?
Collaborate closely with your provider, sharing detailed design information and being open to their feedback. Reviewing samples before full production also helps ensure quality results.
Note: IndiBlogHub features both user-submitted and editorial content. We do not verify third-party contributions. Read our Disclaimer and Privacy Policyfor details.
Copyright © 2019-2025 IndiBlogHub.com. All rights reserved. Hosted on DigitalOcean for fast, reliable performance.


