How Do You Sand and Seal Pavers? A Complete Step-by-Step Guide
-

- September 04th, 2026
- 36 views

FREE SEO Topical Map Generator: Find Your Next Content Ideas
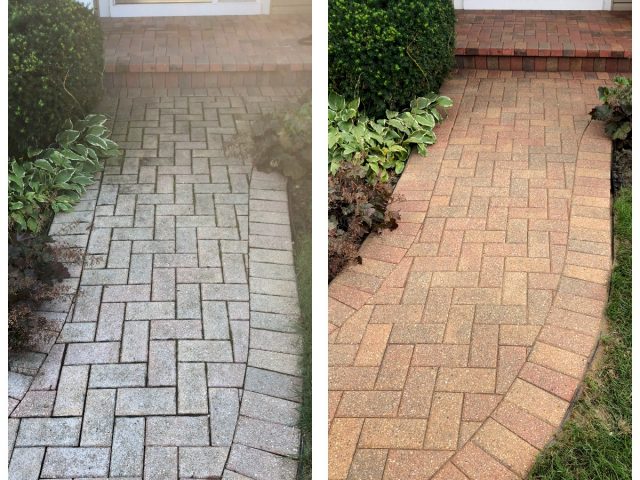
Pavers are a popular choice for patios, walkways, pool decks, driveways, and outdoor living areas because they can add both function and visual appeal to a property. However, even well-installed pavers can develop loose joint sand, weeds, stains, fading, and surface wear over time. Sanding and sealing pavers is one way to refresh the appearance while helping stabilize the joints and protect the surface.
But how do you sand and seal pavers correctly? The process involves much more than sweeping sand across the surface and spraying sealer. Proper cleaning, joint preparation, compaction, water activation, drying, and sealer application all affect the final result.
This guide explains the paver sanding and sealing process, including how to apply polymeric sand to pavers, how to seal pavers after sanding, how to choose a suitable sealer, and the mistakes homeowners should avoid.
What Is Paver Sanding and Sealing?
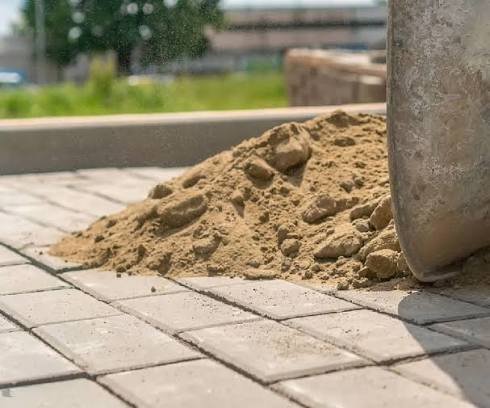
Paver sanding involves filling the spaces between individual pavers with suitable jointing material. For many paver installations, polymeric sand is used because its binding agents help the sand harden after proper activation with water.
Sealing is a separate step in which a compatible protective coating is applied to the paver surface. Depending on the product, a sealer may enhance color, provide a particular finish, and help protect against moisture and stains.
The two processes have different purposes:
- Sealer: Helps protect the paver surface.
- Cleaning: Removes dirt, stains, efflorescence, and contaminants.
- Compaction: Helps consolidate joint sand.
- Proper curing: Gives the materials time to perform as intended.
Because products differ, always follow the latest technical instructions supplied by the manufacturer.
How Do You Sand and Seal Pavers?
A successful project generally follows this sequence:
- Inspect the pavers.
- Remove weeds and damaged joint material.
- Clean the paver surface.
- Allow the surface to dry.
- Install polymeric sand.
- Compact the sand into the joints.
- Remove excess sand.
- Activate the sand with water according to the product instructions.
- Allow the joints to cure.
- Clean the surface again if required.
- Test the selected sealer.
- Apply the sealer evenly.
- Allow the sealer to cure before traffic.
Skipping preparation can lead to haze, uneven appearance, weak joints, or poor sealer adhesion.
Step 1: Inspect the Paver Surface
Before adding new sand or sealer, examine the entire area.
Look for:
- Loose or rocking pavers
- Missing joint sand
- Weeds or grass
- Ant activity
- Oil and grease stains
- Dirt and organic buildup
- Efflorescence
- Existing sealer
- Areas with poor drainage
If pavers have significantly settled or shifted, sanding and sealing alone may not solve the problem. Those areas may need to be repaired or re-leveled first.
Step 2: Clean the Pavers Thoroughly
Cleaning is one of the most important parts of the process.
Remove dirt, leaves, weeds, moss, stains, and other contaminants before installing new joint sand. If an old coating is present, determine whether it is compatible with the new sealer. Unknown coatings may need to be removed.
Manufacturers emphasize that inadequate cleaning can produce an uneven finish or interfere with sealer adhesion.
Avoid using aggressive cleaning methods without considering the paver material and joint condition. Excessive pressure can remove joint material or damage the surface.
Step 3: Remove Contaminated Joint Material
If the existing sand is badly deteriorated or contaminated, remove it before installing new polymeric sand.
Do not simply cover poor-quality existing joint material with a thin layer of new sand. Polymeric sand requires adequate joint depth to perform properly. For example, Techniseal's product guidance specifies minimum joint-depth requirements depending on the product.
When removing old material, take care not to disturb the bedding layer beneath the pavers.
Step 4: Make Sure the Surface Is Completely Dry
Dry conditions are essential when installing many polymeric sands.
Moisture can cause the material to activate prematurely and make it difficult to properly fill and consolidate the joints. Manufacturer requirements vary, so check the specific product before beginning.
A reliable weather window is particularly important in areas that experience sudden rain or high humidity.
Step 5: How to Apply Polymeric Sand to Pavers
Spread the appropriate polymeric sand over the paver surface and use a stiff-bristle broom to sweep it into the joints.
Work in manageable sections instead of moving large amounts of sand across the entire surface.
The goal is to completely fill the joints.
Compact the Sand
After sweeping, use an appropriate plate compactor to consolidate the sand.
Depending on the paver and equipment, a protective rubber pad may be recommended. Compact in multiple directions when appropriate, then add more sand and repeat the process.
Alliance Gator's current installation instructions similarly recommend filling the joints, vibrating the material into place, adding more where needed, and compacting again to reduce air gaps and voids.
Remove Excess Sand
Once the joints are properly filled, carefully sweep the remaining sand from the paver surface.
A leaf blower can help remove fine residue, but use it carefully so that you do not blow sand out of the joints.
Many polymeric sand products specify keeping the finished sand level slightly below the top of the pavers or below the chamfer. For example, Techniseal specifies approximately 1/8 inch below the paver surface or chamfer for one of its products.
Step 6: Activate the Polymeric Sand
Water activates the binding agents in polymeric sand.
Use the spray pattern recommended by the manufacturer rather than blasting the joints with a strong stream. The objective is to saturate the joint material without washing it away.
For example, Techniseal's instructions recommend using a shower setting and watering manageable sections while avoiding runoff.
Alliance Gator also provides product-specific watering instructions and warns against allowing polymeric sand to wash out of the joints.
This is one reason professional installation can be beneficial: proper activation requires enough water to reach the joint depth without creating excessive runoff.
Step 7: Allow the Sand to Cure
Don't immediately seal the pavers after installing polymeric sand.
The required waiting period depends heavily on the specific sand and sealer combination. Some manufacturers specify at least 48 hours under suitable conditions, while other systems recommend substantially longer curing periods.
For example, Techniseal's product guide recommends waiting at least 30 days after polymeric sand installation before cleaning and sealing for its products, while Alliance Gator products can have different minimum requirements.
This is an important point: there is no single universal waiting time for every paver project. Always use the current instructions for the exact products being installed.
Step 8: Clean Before Sealing
Once the sand has sufficiently cured, clean the surface again if required by the sealer manufacturer.
This can remove remaining dust, efflorescence, stains, and other contaminants that could interfere with adhesion.
Some manufacturers specifically recommend efflorescence cleaning before sealing.
Allow the pavers and joints to dry completely before applying sealer.
Step 9: How to Seal Pavers After Sanding
Before sealing the entire area, test the product in a small, inconspicuous location.
This helps you evaluate:
- Color enhancement
- Gloss level
- Surface appearance
- Compatibility
- Absorption
- Potential whitening or haze
Both Technical and Alliance Gator recommend testing products on a small hidden area before full application.
Apply the sealer according to its technical instructions. Some products are sprayed and then back-rolled, while others have different application requirements.
Avoid puddling or excessive product buildup. More sealer does not necessarily mean better protection.
Best Sealer for Concrete Pavers: What Should You Choose?
The best sealer for concrete pavers depends on the type of paver, desired appearance, existing coating, exposure, and manufacturer's recommendations.
Sealer type |
Typical appearance |
Consideration |
Natural-look |
Minimal visual change |
Good when you want a more natural appearance |
Satin finish |
Moderate enhancement |
Adds some visual enhancement without a very glossy look |
Wet-look |
Strong color enhancement |
Can make pavers appear richer or darker |
High-gloss |
Pronounced shine |
Suitable when a decorative glossy appearance is desired |
Some current products are specifically formulated for dry-cast concrete pavers, while others are intended for particular surfaces or previously sealed areas. Always verify compatibility before purchasing.
Common Sanding and Sealing Mistakes
Using regular sand when polymeric sand is required
Ordinary loose sand does not provide the same joint-stabilizing characteristics as polymeric sand.
Skipping compaction
Simply sweeping sand into the joints may leave voids. Proper consolidation helps fill the available joint depth.
Leaving sand on the paver surface
Excess polymeric sand left on the surface can contribute to haze when activated.
Applying too much water
Excessive water pressure or runoff can displace jointing material.
Sealing damp pavers
Moisture can interfere with the appearance and performance of some sealers. Some products specifically require the pavers and jointing sand to be completely dry.
Sealing too soon
The sand needs adequate time to harden, and the paver surface must meet the sealer manufacturer's conditions.
Ignoring existing coatings
A new sealer may not bond properly to an unknown or incompatible old coating.
When Is Professional Paver Sand and Seal Worth It?
A DIY project may be suitable for a small, straightforward patio, but professional service can make sense when the surface is large or has existing problems.
Consider professional assistance if:
- Pavers are uneven or shifting.
- Joint sand is badly deteriorated.
- There are extensive stains.
- An old sealer is present.
- You are unsure which polymeric sand to use.
- You are unsure which sealer is compatible.
- The project involves a large driveway or patio..
- You have limited equipment for compaction and cleaning.
Professional preparation can help identify problems before they become trapped beneath a new finish.

Ron Hodges Inc. Sand & Seal Service
For homeowners in Winter Springs and surrounding Central Florida communities who prefer professional assistance, Ron Hodges Inc. is a local concrete and paver contractor offering sand and seal services designed to help refresh paver surfaces, stabilize joints, and improve their finished appearance. A professional team can handle important parts of the process, including preparation, joint sanding, cleaning, and sealer application, helping homeowners avoid common DIY mistakes. Anyone interested in the service can visit the Ron Hodges Inc. website at ronhodgesinc.com to learn more about its sand and seal service and contact the company directly to discuss their paver project, service needs, and scheduling.
Paver Sanding and Sealing Maintenance Tips
After the work is complete, regular maintenance can help preserve the finished surface.
Keep the surface clean
Remove leaves, dirt, and organic debris regularly.
Address weeds early
Don't allow weeds to establish deep roots in the joints.
Clean spills quickly
Oil, grease, food, and other substances are easier to remove when treated promptly.
Watch the joints
Inspect the sand after heavy rain or periods of intense use. If joints begin to erode, address the problem before the pavers start moving.
Follow the sealer manufacturer's maintenance recommendations
Different sealers have different cleaning and recoating requirements.
Frequently Asked Questions
How do you sand and seal pavers?
Clean the pavers, remove unsuitable joint material, install and compact polymeric sand, activate it according to the manufacturer's instructions, allow it to cure, clean the surface, and then apply a compatible sealer under appropriate weather conditions.
How long should polymeric sand sit before sealing?
There is no universal timeframe. Some products specify 48 hours under particular conditions, while other manufacturers recommend waiting 30 days before cleaning and sealing. Always follow the current instructions for the specific products being used.
Can you seal pavers immediately after adding sand?
Generally, you should not assume they are ready immediately. The polymeric sand must properly harden and the paver surface must meet the sealer manufacturer's dryness and weather requirements.
Does sealing pavers prevent weeds?
Properly installed polymeric sand can help inhibit weed growth, but no surface treatment should be considered a guarantee against all future weeds. Proper installation and maintenance remain important.
Does paver sealer change the color?
Some sealers are designed to enhance or deepen color, while natural-look products are designed to minimize visual changes. Always test the product in a hidden area first.
Can you sand and seal pavers after rain?
It depends on the product and surface conditions. Pavers and joints generally need to meet specific dryness requirements before polymeric sand or sealer is installed. If the surface is damp, it is usually better to wait until the required conditions are restored.
Final Thoughts
How do you sand and seal pavers? The answer starts with preparation. Clean the surface thoroughly, remove deteriorated joint material, use the appropriate polymeric sand, compact it properly, activate it carefully, and allow adequate curing time. Once the surface is clean and dry, select a compatible sealer and apply it according to the manufacturer's instructions.
The most important thing is not to rush the project. Proper joint preparation, drying conditions, product compatibility, and application technique all influence the final result. For homeowners who want a professional finish without handling the entire process themselves, a qualified paver contractor can provide the equipment, experience, and product knowledge needed to complete the job properly.