A Techie, Blogger & Entrepreneur by heart. Rahul Gupta is founder of IndiBlogHub.com platform and build multiple streams of income via Blogging.
Written by Rahul Gupta » Updated on: July 06th, 2025

In this post, you will learn how to use Google Keywords Planner for effective keyword research with our step-by-step guide. Discover the best practices for finding and selecting the right keywords to improve your website's search engine optimization (SEO) and drive more traffic to your site. Start leveraging the power of Google Keywords Planner today and take your keyword research to the next level.
Keyword research is one of the important parts of ranking a blog post or website. Content is King no doubt but without proper keyword research, it becomes very difficult to rank a keyword. Firing blindly at a target will not always work. You need to be smart and target the right set of keywords if you want to rank fast in Google. There are various Keywords Planners available in the market. Some of our Favourite keyword research tools are KWfinder, Semscoop, and last but not least Google Keywords Planner. Yes, Google KW planner occupies a place in our list of favorite Keyword research tools. One of the reasons that we love Google keywords planner is that it is a product of Google and Google dominates the search and who would know the game of search better than Google. The best thing about this keyword planner is that it is free of cost and you do not have to pay anything to use. If used correctly it can bring wonderful results for your blog or website.
The best thing about Google keyword planner tools is that it is free of cost and you do not have to pay anything from your pocket to use it. Google gives complete access to its users without any limitation or restriction. There is no limitation of search in this tool unlike other tools like the Combo plan of Flikover. Flikover offers a nice set of keywords research tools like Semscoop, Semsrush and also the Ahrefs. Though Ahrefs is mainly for backlinks you can do keywords research too. The drawback with Flikover tools is that they keep a limitation on the search and offers a limited number of search per day per user.
The next best thing about Google keyword planner is that it is very easy to use. the user interface is so simple that even I'll a man can understand the basics of Google keyword planner if he spends some time understanding it.
Google keyword planner provides you the most accurate data about your keywords. Google dominates the search and no one can do it better than Google. We have used various other keyword research tools which are quite popular in the market but we have noticed a great difference in the keyword difficulty and search volumes of all those tools for the same keywords. This particular thing makes us think as what are the actual search volume and keyword difficulties of doors keywords. Google shows accurate data and you can rely upon it. We have already worked on a lot of keywords after doing keyword research with Google KW planner. We have got superb results and have ranked a lot of keywords which have brought up a lot of profit for us
Top Indian blogger, Amit Agarwal of Labnol.org also focuses more on using Google Keywords Planner and he himself use it for his blog
1. Open Google Keywords Planner on Google
2. It will ask you for Sign In ( if you already have a Google Ads account). Sign and move on to the Google Keywords Planner Tool.

3. You will observe a search bar in the middle of the page. Type your search query or keywords ideas you have in your mind. The best thing would be to make an excel sheet of keyword ideas you have in your mind.
4. Type your first keyword idea in the search bar and click on the blue button.
5. Let us see this by an example. Now, we have taken " best SEO tools" as our first keyword idea. Now when we typed this keyword in the search bar we noticed that it opened up a long list of keyword ideas.


6. Now the table shows different keywords ideas with different columns. Let us understand all the columns one by one.
a) Keyword ( by relevance): This is the first column and it shows the different possible keyword ideas. You have to choose a focus keyword and a few related keywords from this list.
b) Avg. Monthly searches: Next column is the average monthly searches which shows the overall monthly search volume for that keyword. It can be between 0 to 100, 100 to 1K , 1K to10K or 10K to 100K. ( K stands for 1000 ). You should go for the keyword which has high volume or medium volume ( we will also check the Keyword difficulty in the next step).
c) Competition: Third column is the keyword difficulty and competition for those keywords. There are three types of options available to a user:
These are the best keywords to go for as the competition is very low the chances of ranking in Google increases. These may be easy to target if we use the correct strategy. The budget to be used in ranking low-competition keywords will be less as compared to the high and medium-competition keywords.
These keywords may be a bit difficult to target. They may need more budget for targeting. You can choose a medium keyword idea if you can not find a good low-competition keyword idea.
High Competition keywords are hard to target and require a very high budget for the same. Mostly agencies who have a complete setup work on these keywords.
There are 2 more columns but they are useful only for those who run an ad campaign via Google Adwords.
7. Select on focus keyword from it and use it in your title, meta, and post body. Don't overuse and avoid keyword stuffing. Go for the natural use of those keywords. You can add a few related keywords in the body of the post.
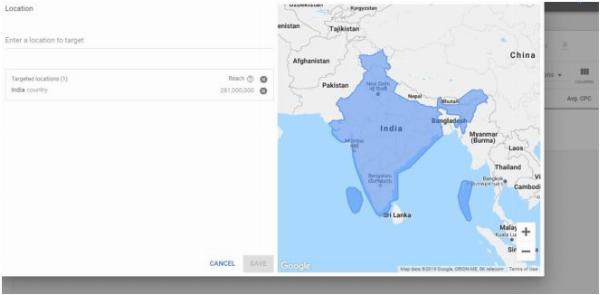
The search volume and Keyword difficulty may vary in different locations. Somewhere the search may be high, somewhere it may be easy to target a keyword while sometimes the same keyword can be of high competition in other location depending upon the searches of it. You can change the location when you are searching for more than one location. Professionals target locations which have high CPC. Like if you are looking for high CPC then you can go for US.
You can change the location to US and choose the right set of keywords. To change the location, click on the left column of your page. Click on the targeted location button with a plus sign.

Now when you have a list of profitable and the right keywords, it's time to use them wisely. Don't make the keyword density more than 2 to 5 %. Keep your keywords in that range. Use them only where they look natural and do not make the article look spammy. If your blog is new and you do not have that much authority, we would suggest you to go for long tail keywords. Long tail keywords are targeted keywords and it is easy to rank them.
So, this was all about the Google keywords planner tool. We explained how to use the Google Keyword Planner. Hope you understood it. There are many other tools available in Google Adwords, you can explore them too. If you have any query regarding the Google KW planner tool, please ask us in the comments section below. Stay tuned with Indibloghub for more such informative articles and tutorials. Happy Blogging!

A Techie, Blogger & Entrepreneur by heart. Rahul Gupta is founder of IndiBlogHub.com platform and build multiple streams of income via Blogging.
© 2019-2025 IndiBlogHub.com. All rights reserved. Hosted on DigitalOcean for fast, reliable performance.