Cheap Flooring Tiles: Smart, Stylish, Low-Cost Options for Every Room
-

- May 03rd, 2026
- 599 views

Get a free topical map and start building content authority today.
Finding durable, attractive flooring on a tight budget is possible with the right choices. This practical guide explains how to evaluate cheap flooring tiles, compare common materials, and plan affordable tile installation without sacrificing performance. Intent: Informational
- cheap flooring tiles can be both low-cost and long-lasting when the right material and installation method are chosen.
- Prioritize substrate preparation, water resistance, wear rating and correct adhesive for best results.
- Use the TILE selection checklist to compare Type, Installation, Look, and Longevity before buying.
Cheap flooring tiles: a practical guide
Cheap flooring tiles come in many forms—ceramic, porcelain, vinyl, and peel-and-stick are common low-cost choices. Choosing among them requires weighing budget tile options against durability, water resistance, and the room's traffic level. This section lays out the fundamentals to help pick materials that hold up to daily use.
How affordable tile materials compare
Ceramic
Ceramic tiles are frequently the least expensive durable tile. They're suitable for low- to moderate-traffic areas. Unglazed ceramic can be porous, so a glazed finish or proper sealant is important in moisture-prone rooms.
Porcelain
Porcelain tiles cost more than basic ceramic but offer superior density and water resistance. For budget buyers, thin-porcelain or small-format porcelain can balance cost and performance. Look for PEI ratings (wear resistance) when comparing options.
Vinyl and luxury vinyl tile (LVT)
Vinyl tiles and planks often provide the best combination of low cost, easy installation, and water resistance. They are available in peel-and-stick or click-lock formats. Vinyl can mimic wood or stone at a fraction of the price.
Peel-and-stick tiles
Peel-and-stick options are extremely affordable and fast to install, but they rely on the quality of the subfloor and adhesive. Best used in low-moisture areas or as a temporary upgrade for rentals.
How to choose: TILE selection checklist
Use the named framework below—the TILE selection checklist—to evaluate cheap flooring tiles before purchase.
- Type: Ceramic, porcelain, vinyl, or peel-and-stick. Match material to room use.
- Installation: DIY-friendly (peel-and-stick, click-lock) vs. professional (thinset mortar or cementitious backer). Consider labor costs.
- Look: Size, color, grout width, and texture. Small grout lines make an inexpensive tile appear more refined.
- Endurance (Longevity): PEI rating, water resistance, warranty, and maintenance requirements.
Budget tile options and practical planning
Estimate quantities and costs
Measure square footage and add 5–10% for cuts and waste. For example: renovating a 300 sq ft apartment kitchen and hallway might require about 330 sq ft of tile. If ceramic tile costs $1.50 per sq ft and installation materials add $0.50, material cost will be roughly $660, plus labor if not DIY.
Substrate and prep
One common mistake is underestimating subfloor repair. Uneven or damaged substrate causes tile failure regardless of tile cost. For moisture-prone areas, include a moisture barrier or cement backer board in the budget.
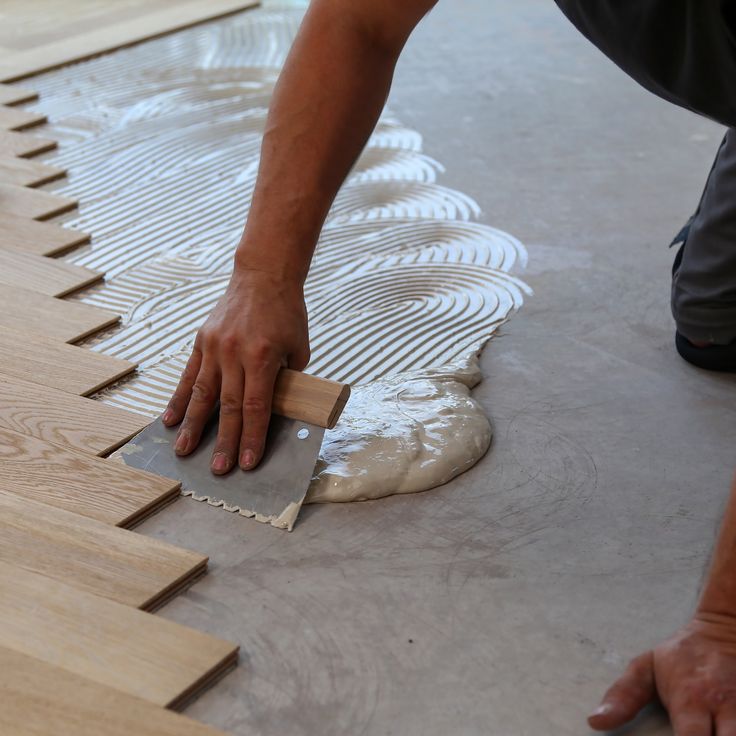
Affordable tile installation: options and tips
Installation drives a large part of the total cost. Affordable tile installation approaches:
- DIY peel-and-stick or click-lock installations for renters or short-term budgets.
- Hiring a tile setter for wet areas or large-format porcelain to ensure flatness and correct grout application.
- Hybrid approach: have a pro do substrate work and critical wet-area installs; install field areas as a DIY project.
Practical tips for installation and durability
- Acclimate tile and vinyl to room temperature for 48 hours before installation.
- Use a leveling system for large-format tiles to avoid lippage (uneven edges).
- Select the right adhesive or thinset for the material and substrate — manufacturer specs matter.
- Seal grout lines on porous tiles to improve stain resistance and longevity.
- Test a small area for adhesion before committing to large peel-and-stick installations.
Trade-offs and common mistakes
Choosing based only on lowest upfront cost leads to several trade-offs:
- Durability vs. price: Very cheap tiles can chip or crack sooner, increasing lifetime cost.
- Appearance vs. maintenance: Some low-cost tiles show grout stains or wear faster and require regular sealing.
- DIY vs. professional labor: Saving on labor might cost more later if mistakes require rework.
Common mistakes to avoid:
- Skipping substrate preparation or moisture control.
- Mismatching tiles and adhesives (e.g., using a standard mastic where a polymer-modified thinset is required).
- Ignoring PEI and water-absorption ratings when selecting tiles for bathrooms or entryways.
Real-world example: renovating a rental kitchen on a budget
Scenario: A 300 sq ft rental kitchen and entry. Goal: Durable, attractive floor under $1,200 including materials and minimal labor.
- Option chosen: 12x12 glazed ceramic at $1.25/sq ft = $375 for tile (330 sq ft including 10% waste = $412.50).
- Materials: thinset, grout, spacers, underlayment approx. $200.
- Labor: contractor hired for substrate prep and wet-area install estimated at $400 (field install by tenant DIY later or scheduled during turnover).
- Total approximate cost: $1,012.50. A mid-range vinyl alternative could reduce labor and material cost but change aesthetic and resale durability.
Core cluster questions
- How do ceramic and porcelain tiles differ in price and durability?
- What are the cheapest tile options for a bathroom remodel?
- How much does it cost to install tile per square foot on a budget?
- Are peel-and-stick tiles a good long-term solution for rentals?
- What maintenance extends the life of affordable tile floors?
Standards and safety considerations
When selecting tiles, refer to industry standards for testing and installation guidance. For technical standards and installation best practices, consult organizations such as the Tile Council of North America (TCNA) for guidelines on movement joints, substrate prep, and recommended installation methods: Tile Council of North America.
Final checklist before buying cheap flooring tiles
- Complete the TILE selection checklist for each tile sample.
- Measure carefully and add 5–10% waste.
- Check PEI, water absorption, and manufacturer installation instructions.
- Decide which tasks will be DIY and which require a pro.
- Confirm warranty and return policy; buy a little extra tile for future repairs.
FAQs
Are cheap flooring tiles durable enough for high-traffic rooms?
Durability depends on material and rating. Low-cost porcelain or high-quality vinyl with the right PEI/wear rating can handle high traffic. Ceramic tiles with a low PEI rating are best for low-traffic areas. Prioritize moisture resistance and correct installation to maximize lifespan.
How do cheap flooring tiles compare to laminate or hardwood in cost?
Cheap tiles typically cost less per square foot than hardwood and can be similar to or slightly higher than basic laminate, depending on material and installation. Vinyl often undercuts both tile and laminate in total installed cost and offers better water resistance.
Can peel-and-stick tiles work for a kitchen renovation?
Peel-and-stick tiles are a fast, low-cost option for kitchens with a level, clean subfloor. They perform best in low-moisture, low-heat areas and may not last as long as glued-down or thinset-installed tiles in very high-traffic kitchens.
How to maintain cheap flooring tiles to extend life?
Regular sweeping, using pH-neutral cleaners, resealing grout annually on porous tiles, and fixing loose tiles promptly will keep inexpensive floors looking good longer.
Where to start when planning an affordable tile project?
Begin with accurate measurements, use the TILE selection checklist to compare options, and get at least one quote for professional installation to compare against DIY costs.