DVR Troubleshooting Guide: What to Check When CCTV Cameras Stop Recording
-
- September 09th, 2026
- 1,704 views
A CCTV system is designed to provide continuous or scheduled video recording, but recording problems can occur for several reasons. When cameras suddenly stop recording, the cause may not always be a defective camera. Power interruptions, storage problems, disconnected cables, incorrect recording schedules, system settings, or DVR hardware issues can all affect recording performance.
Understanding the basic troubleshooting process can help property owners and security personnel identify common problems before calling a technician. A systematic approach is especially useful because replacing equipment unnecessarily can increase costs without solving the actual issue.
Whether the system is installed in a home, office, retail store, warehouse, factory, or other commercial property, recording should be checked regularly to confirm that the surveillance system is functioning as expected.
Start With the DVR Power Supply
The first step is to confirm that the DVR is receiving power.
Check whether the power indicator is illuminated and whether the system responds when connected to a monitor. If the DVR does not turn on, inspect the power adapter, power cable, electrical outlet, and backup power equipment.
Power fluctuations can sometimes cause the recorder to restart or shut down unexpectedly. In areas where electricity interruptions are common, an appropriate backup power solution can help reduce recording interruptions.

Do not immediately assume that the DVR has failed. A damaged adapter, loose power connection, or faulty electrical outlet can produce similar symptoms.
Check Whether the Cameras Are Displaying Live Video
If the DVR powers on, check the live camera view.
If all cameras show normally but no footage is being recorded, the problem may be related to storage or recording settings.
If only one camera has stopped displaying video, inspect that camera's power connection, cable, connector, and channel configuration.
If several cameras stop working simultaneously, investigate shared components such as the power supply, cable infrastructure, or DVR inputs.
This simple distinction can significantly narrow down the potential cause.
Inspect Camera Connections
Loose or damaged connections can interrupt video transmission between the camera and recorder.
Check the connectors at both ends of the cable. Look for loose fittings, corrosion, physical damage, or signs of moisture.
For systems using long cable runs, inspect the cable route for crushing, cuts, excessive bending, or other physical damage.
Poor connections may cause intermittent video rather than complete failure, so occasional image loss should not be ignored.
Examine the Storage Drive
Storage problems are among the most common causes of CCTV recording failures.
A DVR requires a compatible hard drive to store recorded footage. If the drive is damaged, disconnected, full, or not properly recognized, the recorder may stop saving new video.
Open the storage information section in the DVR interface and check whether the drive is detected.
If the system reports a storage error, follow the manufacturer's recommended procedure for diagnosing the drive.
Never format a storage drive containing important footage unless the recordings have been backed up or are no longer required.
Check Available Storage Capacity
A full hard drive can also affect recording.
Many DVRs use loop recording, which automatically overwrites older footage when storage capacity is reached. However, this feature may be disabled or configured differently depending on the system.
Review the recording and storage settings to determine how the DVR handles a full drive.
If the system is expected to retain footage for a longer period, additional storage capacity may be necessary.
Retention requirements should be determined according to the property's security needs.
Review the Recording Schedule
A DVR may be functioning correctly while recording only during specific periods.
Check the recording schedule to confirm that the required channels are configured for continuous recording, scheduled recording, or motion-based recording as intended.
Accidental changes to schedules can result in missing footage.
For example, a camera may be configured to record only during business hours when continuous recording is actually required.
Review each channel individually if necessary to confirm that the correct recording mode is enabled.
Check Motion Detection Settings
If the system uses motion-based recording, incorrect sensitivity or detection-area settings may prevent expected footage from being captured.
A camera may be displaying live video but not recording because the DVR does not detect sufficient movement.
Review the motion detection settings and verify that the required area is included in the detection zone.
Avoid setting sensitivity excessively high because this can create unnecessary recordings from small movements, shadows, insects, or environmental changes.
The objective is to balance reliable event detection with efficient storage usage.
Inspect the Date and Time
Incorrect date or time settings can make recorded footage difficult to locate.
Check the DVR's system clock and time zone configuration.
A wrong date may make it appear that footage is missing when the recordings are actually stored under an unexpected timestamp.
Accurate time settings are particularly important for security investigations because recorded events need to correspond with the actual time they occurred.
Where supported, automatic time synchronization can help maintain consistent timestamps.
Review DVR Recording Status
Most modern DVR systems provide information about the recording status of each channel.
Look for indicators showing whether a channel is actively recording.
If a channel is not recording, review its individual configuration.
Different channels may have different schedules, recording modes, resolution settings, or storage assignments.
Understanding the status indicators provided by the specific recorder can make troubleshooting considerably easier.
Check Camera Compatibility
Not every camera is necessarily compatible with every recorder.
Older DVR systems may support specific analog video standards or resolutions, while newer cameras may require different technologies.
When adding or replacing cameras, verify that the recorder supports the camera's signal type and resolution.
A compatibility problem may result in missing video, unstable images, or a channel that cannot be configured correctly.
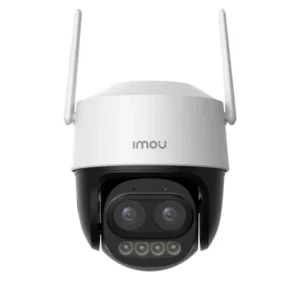
When reviewing CCTV camera options, users should consider compatibility with the existing recorder before purchasing replacement equipment.
Inspect the DVR Channel Configuration
A camera may be connected physically but assigned incorrectly within the DVR settings.
Check whether the camera appears on the correct channel and whether the corresponding input has been enabled.
If a camera was recently replaced, its signal type may also need to be configured correctly.
Changes to channel configuration should be documented so future troubleshooting is easier.
Check the Power Supply for Cameras
Cameras require stable power to operate continuously.
If the camera power supply is overloaded, damaged, or unstable, multiple cameras may experience intermittent failures.
Check whether the power supply has sufficient capacity for all connected cameras.
Nighttime can sometimes reveal power-related problems because cameras may activate infrared illumination, increasing their power requirements.
If cameras work during the day but repeatedly disconnect after dark, investigate the power supply and cable voltage conditions.
Consider Cable Distance
Long cable runs can contribute to signal and power problems.
The farther a camera is installed from the DVR or power source, the more important cable selection and installation quality become.
Poor-quality cable, excessive distance, interference, and damaged connectors can reduce reliability.
If a particular camera frequently loses video while nearby cameras operate normally, compare its cable length and installation route with the functioning channels.
Check Network and Remote Viewing
Remote viewing problems do not always mean that recording has stopped.
A DVR can continue recording locally even when internet access is unavailable.
If the cameras display correctly on a local monitor but cannot be viewed through a mobile application, check the network connection, router, internet service, and remote-access configuration.
Separate local recording problems from remote-viewing problems before changing system settings.
Restart the DVR Carefully
A controlled restart can sometimes resolve temporary software or communication issues.
Before restarting, confirm whether important footage needs to be preserved.
Use the system's normal shutdown or restart option rather than immediately disconnecting power.
Frequent unexpected restarts, however, should not be ignored. They may indicate power instability, overheating, storage problems, or hardware faults.
Check for Overheating
DVRs generate heat during continuous operation.
Poor ventilation, blocked air vents, dust accumulation, or high ambient temperatures can cause the recorder to operate unreliably.
Ensure that the DVR is installed in a well-ventilated location and that its cooling openings are not obstructed.
If the recorder becomes unusually hot or repeatedly shuts down, professional inspection may be necessary.
Review DVR Storage and System Health
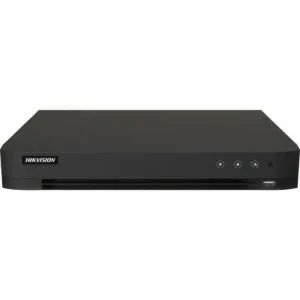
For users comparing DVRs in Pakistan, storage capacity and system reliability should be considered alongside channel count and recording resolution.
A recorder should be capable of supporting the number of cameras, recording settings, storage requirements, and expected retention period.
System health information can also help identify storage errors or hardware conditions before they result in significant footage loss.
When to Contact a Professional
Some problems require professional diagnosis.
If the DVR repeatedly fails to recognize a known-good storage drive, several channels fail despite functioning cameras and cables, or the recorder shuts down unexpectedly, technical inspection may be required.
Electrical faults should also be handled carefully.
Avoid opening power supplies or attempting internal electrical repairs without appropriate expertise.
Professional installation and maintenance can help protect both the equipment and the recorded footage.
Preventing Future Recording Problems
Regular maintenance is one of the best ways to prevent unexpected recording failures.
Check camera views periodically, confirm that recording is active, review storage health, and verify the date and time.
Inspect outdoor cables and connectors for environmental damage.
Review recording schedules after making configuration changes.
Important footage should also be backed up when required rather than relying exclusively on the DVR's internal storage.
For larger installations, maintenance logs can help identify recurring problems and document repairs.
Choosing the Right DVR for Your Requirements
Recording requirements should be considered before purchasing a new recorder.
For a smaller installation, an appropriately sized recorder may be sufficient. Larger properties may require additional channels and greater storage capacity.
Recording systems may require different levels of capacity depending on the size of the property and the number of areas being monitored. Selecting the appropriate recorder can also simplify future system management.
The 8-channel DVR price may differ between models based on recording technology, storage compatibility, connectivity, and supported surveillance features.
A properly matched recorder can help maintain consistent recording performance while providing sufficient capacity for the intended installation. Selecting equipment based on the complete surveillance plan can reduce compatibility and capacity problems later.