Complete Kedarkantha Trek Guide: Routes, Difficulty, Packing & Itinerary
-

- March 19th, 2026
- 525 views

👉 Best IPTV Services 2026 – 10,000+ Channels, 4K Quality – Start Free Trial Now
Informational
The Kedarkantha trek guide below explains routes, difficulty, packing, and real-world planning for a safe and enjoyable Himalayan trek. The Kedarkantha trek guide is ideal for hikers seeking a classic winter snow-trek or a scenic summer walk through pine forests and alpine meadows in Uttarakhand.
- Location: Sankri (Uttarkashi district), entry via Govind Wildlife Sanctuary
- Duration: Commonly 4–6 days round-trip from Sankri
- Max altitude: ~3,800 m (Kedarkantha peak)
- Difficulty: Moderate — see sections on acclimatization and Kedarkantha trek difficulty
- Best time: December–March for snow; April–June and September–November for snow-free climbs
Kedarkantha trek guide: overview and key facts
The Kedarkantha trek guide covers practical route choices, daily itinerary options, gear priorities, and safety advice. This trek sits in the Govind Wildlife Sanctuary near Sankri village and is known for accessible trails, good campsite sites, and panoramic Himalayan views. Consider permits, weather windows, and altitude preparation before booking camp or guide services.
Why this trek: what to expect
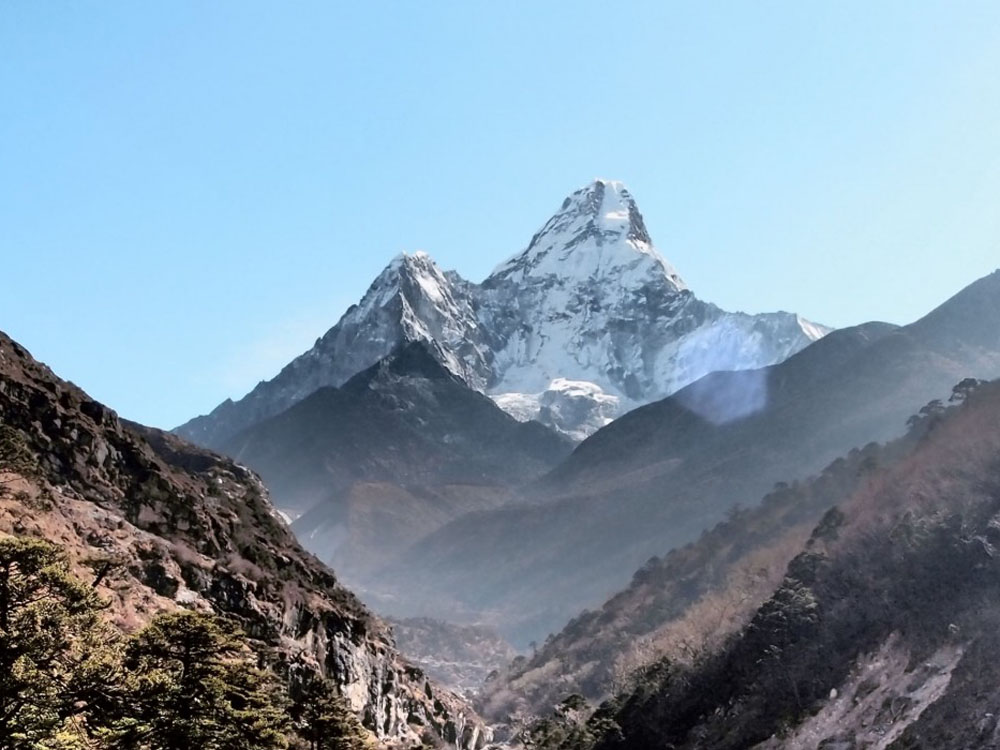
Expect pine forests, gradual altitude gain, open meadows (meadows called 'bugyals') and a final ridge with expansive views of Bandarpoonch, Black Peak and other Garhwal summits. The route is popular for winter snow-trekking and for beginner-to-intermediate trekkers looking for strong views without technical climbing.
Kedarkantha trek difficulty
Difficulty is moderate. Typical daily gains are 400–700 m and trail surfaces are non-technical (no fixed ropes required). The main risks are altitude-related symptoms, hypothermia in winter, and sudden weather changes. A conservative fitness baseline: regular cardio, multiple 6–8 km hikes with a loaded pack, and stair or hill repeats in training.
Permits, regulations and safety
Permits for Govind Wildlife Sanctuary and local entry are commonly required; local authorities or registered operators handle these. For high-altitude safety guidance, consult national or regional mountaineering bodies for best practices — for example the Indian Mountaineering Foundation provides safety standards and training resources for Himalayan treks and climbs: Indian Mountaineering Foundation.
Sample 6-day Kedarkantha trek itinerary (real-world scenario)
This scenario shows a practical route used by many small guided groups and self-organized trekkers starting from Sankri:
- Day 0: Arrive Sankri (1,950 m) — final supplies and acclimatize
- Day 1: Sankri to Juda Ka Talab to Kedarkantha Base Camp (~9 km; 2,800–3,000 m; 5–6 hours)
- Day 2: Base Camp to Kedarkantha Summit and back to Base (3–5 hours to summit; 3,800 m peak; return to camp)
- Day 3: Base Camp to Juda Ka Talab to Sankri return (descent day; 4–6 hours)
- Day 4: Buffer/contingency day for weather or acclimatization; depart Sankri
This scenario assumes winter or early spring conditions; in snow-free months the route time can shorten. Adjust daily plan for pace, fitness, and group needs.
KEDAR checklist: a practical packing and planning framework
A simple checklist framework (KEDAR) helps avoid last-minute omissions:
- K—Knowledge: Route maps, weather forecast, permits, emergency numbers
- E—Equipment: Layering system, insulated jacket, waterproof shell, crampons (winter), trekking poles, headlamp
- D—Diet & Drugs: High-energy snacks, electrolyte mixes, personal medications, altitude sickness meds (if advised)
- A—Acclimatization: Plan gradual gain, rest days, and hydration; know AMS signs
- R—Route & Rescue plan: Local guide contact, nearest hospital options (Uttarkashi), extra days for delays
Practical tips for the Kedarkantha trek
- Start early each day to avoid afternoon weather and to take advantage of firmer snow in winter.
- Use a layering system: base layer (moisture-wicking), mid layer for insulation, and a breathable waterproof outer shell.
- Carry a compact first-aid kit and learn to recognize early signs of acute mountain sickness (headache, nausea, dizziness).
- Keep daily altitude gain conservative and include at least one buffer day in the schedule for weather or slow acclimatization.
Core cluster questions
- How difficult is the Kedarkantha trek?
- What is the best time to do the Kedarkantha trek?
- How many days does the Kedarkantha trek typically take?
- What essential gear is needed for Kedarkantha in winter?
- Is Kedarkantha suitable for first-time trekkers?
Common mistakes and trade-offs when planning
Common mistakes
- Underestimating altitude: treating it like a low-elevation hike can lead to AMS risks. Always plan for acclimatization.
- Poor footwear: using lightweight trail runners in deep snow increases blister and injury risk — choose boots that match seasonal conditions.
- Overpacking: packing too much weight slows the group and increases fatigue — use the KEDAR checklist to prioritize essentials.
- Skipping contingency days: bad weather or slow groups need buffer time; squeezing itinerary too tightly causes risky decisions.
Trade-offs
Choosing a faster schedule reduces time on the trail but increases daily strain and altitude gain, which can elevate AMS risk. Hiring a guide adds cost but improves local logistics and emergency handling; self-supported treks can be cheaper but demand more planning and navigation skills.
Logistics: getting there, guides, and permits
Common access is via Dehradun → Uttarkashi → Sankri. Local guesthouses in Sankri serve as base for final permits and gear checks. Guides and porters are available in village hubs; ensure any hired operator follows local regulations and has a written emergency plan.
Gear and essentials (season-specific notes)
Summer/monsoon: waterproof shell, gaiters, insect repellent. Winter: insulated boots, crampons or microspikes, thermal layers, high-SPF lip protection, and knowledge of snow travel. Navigation tools such as a GPS device or offline maps are recommended; trail markings exist but can be hidden by snow.
Safety and health
Monitor hydration and symptoms closely; descend if moderate-to-severe AMS symptoms develop. Use a local clinic or Uttarkashi hospital for evacuation planning; carry enough cash for transport and emergency costs in remote areas. For general safety best practices and training resources, reference national mountaineering bodies and local forest department guidance.
Wrap-up and next steps
Use the KEDAR checklist to prepare, plan conservatively for altitude, and choose the season that matches desired experience (snow versus clear views). Book transport to Sankri early in busy months and include contingency days. With planning, the Kedarkantha trek is an achievable Himalayan adventure for many trekkers.
Is the Kedarkantha trek guide suitable for first-time trekkers?
Yes—many beginners complete Kedarkantha with proper preparation, a conservative pace, and a buffer day for acclimatization. Consider a guided group for navigation and logistics if unfamiliar with Himalayan trekking.
How difficult is the Kedarkantha trek?
The trek is moderate: non-technical but physically demanding at altitude. Regular aerobic training, stair routines, and practice hikes with a loaded pack are effective preparation strategies.
What is the best time to do the Kedarkantha trek?
For snow scenery: December–March. For clear daytime weather and fewer hazards: April–June and September–November. Monsoon months bring trail slipperiness and leeches at lower elevations.
What should be on a basic Kedarkantha packing checklist?
Layers (base, mid, shell), insulated jacket, trekking boots, emergency first-aid, water purification, headlamp, trekking poles, crampons in winter, and a small repair kit. Use the KEDAR checklist above to confirm items.
Can weather or permits change the itinerary last minute?
Yes. Weather, wildlife sanctuary rules, or local conditions can require adjustments. Always include a buffer day and maintain flexible travel arrangements for safe decision-making.