Kedarkantha Trek: Complete Planning Guide, Itinerary, and Safety Checklist
-

- March 07th, 2026
- 640 views

👉 Best IPTV Services 2026 – 10,000+ Channels, 4K Quality – Start Free Trial Now
Kedarkantha trek at a glance
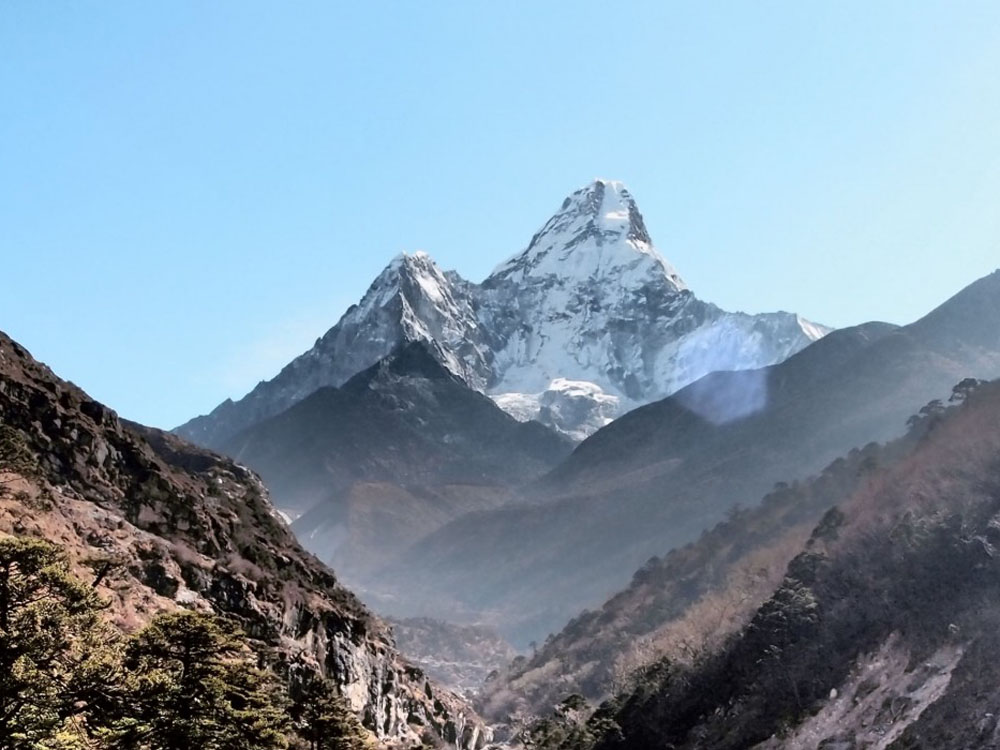
The Kedarkantha trek is one of the most accessible snow treks in India, famous for clear winter skies, reliable snowfall and panoramic views of the Garhwal Himalaya. This Kedarkantha trek guide covers planning, a sample 4-day itinerary, difficulty, required permits, equipment, and safety best practices to help hikers prepare with confidence.
- Duration: 3–5 days typical from Sankri (base village).
- Best time: December–March for snow; April–May for green meadows.
- Difficulty: Moderate — trail is well-marked, altitude ~3,800 m at summit.
- Permits: Local forest/park permits and local camping permissions required; check Uttarakhand tourism advisories.
- Framework included: TRAILS checklist for preparation.
- Detected intent: Informational
Why choose the Kedarkantha trek
Clear trails, panoramic 360° views and manageable altitude gain make Kedarkantha a popular choice for first-time winter trekkers and small groups. The trek starts from Sankri in Uttarkashi district and runs through subalpine meadows and rhododendron forests inside the Govind Pashu Vihar National Park area. The trail is also a good introduction to winter camping, snow navigation and high-altitude basics.
Planning essentials for the Kedarkantha trek
Permits and regulations
Local permits are required in many Uttarakhand protected areas. Confirm current rules with official Uttarakhand tourism resources before travel. For up-to-date permit and entry requirements, consult the state tourism site: Uttarakhand Tourism.
Difficulty and fitness
Expect a moderate challenge: altitude reaches about 3,800 meters at Kedarkantha peak, with daily walking of 4–7 hours on mixed snow and trail. The primary factors are cold-weather exposure, basic snow traction needs, and consistent uphill sections. Incorporate aerobic conditioning, hill repeats, and stair workouts 4–6 weeks before departure.
Kedarkantha trek itinerary (sample 4-day plan)
Day 0 — Arrival and transfer
Arrive Dehradun/Jaipur/Delhi, transfer to Sankri by public or private vehicle; overnight in guesthouse.
Day 1 — Sankri to Juda Ka Talab / Tarkola (trek start)
6–7 km walk, 4–5 hours. Gentle ascent through forest to the campsite near Juda Ka Talab or Tarkola. Camp, check gear, short acclimatization walk.
Day 2 — Base to Kedarkantha Summit
Summit push early morning: 6–8 hours roundtrip from camp. Recent snowfall adds time for post-holing or route-finding; return to camp and descend to Sankri or stay one more night depending on plan.
Day 3 — Return to Sankri and transfer
Descend to Sankri and travel back to city or next destination.
Packing and preparedness: TRAILS checklist
Use the named TRAILS checklist for winter trek readiness.
- Training: 4–6 weeks of cardio + hill training.
- Route knowledge: offline maps, route notes, local guide contacts.
- Altitude plan: sleep low, hydrate, watch for AMS symptoms.
- Insulation: down jacket, thermal base layers, insulated boots.
- Logistics: permits, transport bookings, cash for villages.
- Safety gear: crampons, ice axe (if icy), first-aid, headlamp.
Practical tips
- Book Sankri transfers and basic guesthouse stays in advance during peak winter weekends.
- Carry layered clothing tailored for sub-zero nights — night temps can drop sharply.
- Use gaiters, trekking poles and microspikes/crampons when trails are icy.
- Test gear on a shorter snow hike before attempting a full winter summit push.
- Stay flexible: weather can force a change in sequence; prioritize safety over schedule.
Common mistakes and trade-offs
Choosing speed over acclimatization is the most common error — summit attempts on the first full day increase risk of altitude sickness and poor decision-making. Another frequent mistake is underestimating cold-weather logistics: a lighter pack saves effort but increases exposure risk if extra insulation or shelter is lacking.
Trade-offs to consider:
- Comfort vs. speed: carrying a tent and full camping kit increases weight but provides shelter; using guesthouses reduces weight and simplifies logistics.
- Solo vs. guided: solo travel offers flexibility and lower cost but requires stronger route-finding skills and self-rescue planning; hiring a local guide adds cost but improves safety and local support.
Real-world example scenario
Scenario: a fit solo hiker traveling from Dehradun plans a 4-day winter trek. Day 0 takes an evening bus to Sankri and checks permit requirements at the village office. Day 1 is a measured approach to Juda Ka Talab to test gear. Day 2 starts pre-dawn for summit; using microspikes and poles, the hiker reaches the summit in steady but slower time due to fresh snow, descends to camp and spends a warm night. Day 3 returns to Sankri and takes a mid-morning bus back. The hiker used the TRAILS checklist to confirm gear, permitted route and emergency contact numbers before leaving.
Safety, rescue and emergency planning
High-risk indicators
Monitor for headache, nausea, dizziness or disorientation — signs of acute mountain sickness (AMS). In cold conditions, watch for frostbite signs (loss of sensation, pale skin on fingers/toes) and hypothermia (slow speech, confusion, slurred movements).
Emergency steps
If AMS or severe hypothermia occurs, descend immediately and seek medical support. Carry a basic first-aid kit, an emergency bivy, and a charged phone or satellite beacon. Local guides and Sankri-based operators are familiar with helicopter evacuation protocols when necessary.
Core cluster questions
- How many days does the Kedarkantha trek take?
- What is the Kedarkantha trek difficulty for beginners?
- What permits are needed for trekking in Sankri and Govind area?
- How should one prepare a winter packing list for Himalayan snow treks?
- Where are the nearest medical and rescue services for the Kedarkantha route?
FAQs
How difficult is the Kedarkantha trek?
The Kedarkantha trek is rated moderate. It is suitable for reasonably fit walkers with preparatory training. Snow and cold add technical demands: basic traction devices and winter camping skills are recommended when trekking between December and March.
When is the best time to do the Kedarkantha trek?
Best time depends on preference: December–March for reliable snow and winter scenery; April–May or September–October for meadows and milder weather. Avoid the monsoon (June–August) due to slippery trails and permitted closures.
What gear is essential for a winter Kedarkantha trek?
Essential items: insulated down jacket, thermal base layers, waterproof shell, insulated trekking boots, crampons or microspikes, trekking poles, warm sleeping bag rated for sub-zero, waterproof backpack cover, headlamp and a compact first-aid kit.
Do travelers need permits for the Kedarkantha trek?
Yes, local permits and entry approvals are often required in Uttarakhand protected areas; check the Uttarakhand Tourism advisory before travel for current rules and designated permit offices.
How to minimize risk of altitude sickness on the Kedarkantha trek?
Minimize risk by ascending gradually, staying well-hydrated, avoiding alcohol before and during the trek, and allowing time for short acclimatization hikes. If symptoms of AMS appear, descend immediately and seek medical help.