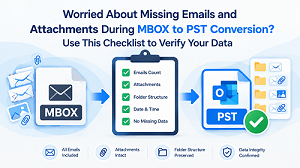
Worried About Missing Emails and Attachments During MBOX to PST Conversion? Use This Checklist to Verify Your Data
-

- Published Updated
- 2,194 views
Introduction
When you convert MBOX files to PST, you can easily retrieve email data through Outlook. But the conversion is just one phase of the process. For many users, the main issue is what happens to actual mailbox data. Were all the emails moved? Is there still an attachment available? Were the original folders still in order?
These concerns are especially relevant in case of archived emails, corporate correspondence or large mailboxes. Instead of taking a converted PST at face value, run the output through a basic verification process.
MBOX to PST Conversion Validation Checklist
1. Check Original MBOX Files
Locate all the MBOX files that are a part of the conversion and examine the converted PST. If email is saved in more than one MBOX file, verify that all relevant source files were processed.
Create a simple log of:
- MBOX file names
- Source files count
- Folders in mailbox
- Estimated Email Volume
- Important folders or archives
This gives you a reference point to validate the final PST.
2. Check Total Email Count
One of the easiest ways to detect potential data loss is by comparing the number of emails in the source MBOX files and the converted PST.
The numbers don't have to be exactly right every time, as different email systems can count messages differently. But there is an unexplained difference that needs to be investigated.
Pay special attention to:
- Messages in inbox
- Items removed
- Previous messages
- Custom folders
- Older email archives
☐ 3. Review email attachments
Attachments can be harder to see than messages that are missing. It can be visible in Outlook but the attachment (document, image, spreadsheet, PDF) is not available.
Open some sample emails from different folders and see if their attachments can be seen or stored.
Look for common sorts of attachments such as:
- PDF Files
- Word docs
- Excel sheets
- Pictures
- ZIP files
- TXT files
If attachments are vital to your work, do additional checks on important messages, not just the message count.
☐ 4. Confirm Folder Structure
Changing from one email storage format to another can lead to a disorganised email library. Compare the original MBOX folder structure with the generated PST file.
Check for the presence of important folders and subfolders such as:
- Inbox
- Sent
- Drafts
- Trash or Deleted Items
- Archives
- Custom folders
- Nested folders
You should end up with data that is fairly well organised and easy to navigate after a good email migration.
☐ 5. Review Sender, Recipient, and Date Data
Open emails from different periods and view basic message details. Check the sender, recipients, subject, sent date and received date.
This is especially helpful when converting older email archives as metadata can be used by users to search and categorise and to place the context of individual messages.
☐ 6. Open Emails from Various Time Periods
Don’t just look at your latest emails. Choose messages from various dates and folders.
For example, check out:
- Latest emails
- Emails several years old
- Letters from important correspondents
- Emails with attachments
- Saved messages in custom folders
This sampling approach can help prove that some parts of the mailbox were not transformed as expected.
☐ 7. Verify the Converted PST Files
Once converted, you can open the PST with Microsoft Outlook and explore its folders. The file opens correctly and emails can be selected, displayed, searched and navigated without any unexpected issues.
A PST that exists on your PC is not always a validated PST. Its content should be inspected before discarding the original MBOX data.
☐ 8. Find key emails
Search for a few known emails from the original mailbox using Outlook’s search. Search by topic, sender names, dates or key words.
This additionally verifies that the converted messages are not only present, but also retrievable using conventional email retrieval methods.
9. Check for Unusual Duplicates
When reviewing the converted PST, watch for duplicates of the same message. Duplicates can make a mailbox more difficult to handle and skew your perception of the amount of data converted.
If there are duplicates, try to determine if they were created from the original MBOX data or created during migration.
☐ 10. Keep Original MBOX Files After Conversion
Do not destroy the source MBOX files immediately after making a PST. Save them securely until you’ve checked the converted data and are happy with the outcome.
That gives you a fall back in case you later find missing messages, attachments or folders.
Choosing the Best MBOX To PST Migration Method
Manual conversion can be challenging if you are trying to convert several MBOX files, massive archives, attachments or large folder structures. Using a specialist converter can make the process easier, providing a more systematic manner to convert MBOX data to PST format.
However, if users want a specific tool for this activity, they can choose WholeClear MBOX to PST Converter to convert MBOX mailbox data into PST, making the resulting Outlook compatible data easy to manage.
But whichever conversion method you pick, validation should be an integral part of the process. A conversion is not finished until you have tested the resulting PST.
Last Check Before Deleting Original MBOX Data
Before deleting or transferring your source files make sure that:
☐ All essential MBOX files were completed.
☐ Email counts were verified.
☐ Important mail is present.
☐ Attachments open properly.
☐ Folders and subfolders are available.
☐ The sender and receiver information is correct.
☐ Dates and subjects on emails remain.
☐ The PST file opens correctly in Outlook.
☐ Important emails can be located using search.
☐ Unexpected duplicates have been checked.
☐ The original MBOX files have been backed up.
Conclusions
The fact that a PST file was created doesn’t mean that it was a good MBOX to PST conversion. The actual test is whether your key emails, attachments, folders and message metadata remain available and usable afterward.
This
checklist gives you a realistic approach to verify the converted mailbox before
you put any trust in it or delete your original MBOX data. A few minutes of
post-conversion checking can save you a lot of trouble trying to find missing
or unexpected data before it's too late to recover.
You Can Visit Here: