Easy Nail Art Designs for Beginners at Home: A Step-by-Step Starter Guide
-

- March 25th, 2026
- 240 views

FREE SEO Topical Map Generator: Find Your Next Content Ideas
Simple techniques make professional-looking nail art achievable without leaving home. This guide covers practical nail art designs for beginners, supplies to buy once, clear step-by-step projects, a named checklist for safe prep, and common mistakes to avoid so first attempts look clean and last longer.
- Start with a tidy base: cuticle care, buff, and base coat.
- Master 3 easy designs: base color, dots, and stripes.
- Use the S.T.A.R.T. checklist for safe, repeatable results.
- Practical tips: thin coats, drying time, and fixing errors.
nail art designs for beginners: a clear 5-step approach
Choose two or three simple projects and practice them until the motor pattern becomes automatic. The primary, repeatable process for most easy at-home nail designs is: prep, base, paint, detail, finish. That structure keeps designs tidy and reduces smudges.
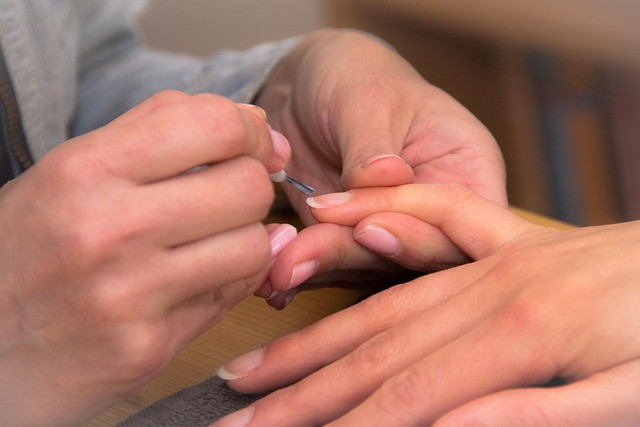
Tools, supplies, and the S.T.A.R.T. checklist
Beginner manicure tools and basic polishes set the foundation. Keep a small kit: base coat, two colored polishes, clear topcoat, nail file, buffer, cuticle pusher, cotton pads, acetone or remover, and one dotting/striping tool or a toothpick.
The S.T.A.R.T. checklist (named framework)
- Sanitize: Wash hands and sanitize tools before use.
- Trim & shape: File nails to a consistent shape and length.
- Apply base: Use a base coat to protect nails and improve polish adhesion.
- Ready the polish: Shake or roll polish, apply thin coats, let dry between layers.
- Top and finish: Seal with a topcoat and clean edges with a small brush dipped in remover.
Three simple designs with step-by-step beginner nail art instructions
1. Classic single-color with accent nail
Prep using the S.T.A.R.T. checklist. Apply base coat, then two thin coats of a chosen color. On the ring finger, paint a contrasting color or add a small geometric shape with the tip of a brush. Finish with a glossy topcoat for shine.
2. Polka dots (requires only a dotting tool or toothpick)
After a base color dries, dip a toothpick or dotting tool into a second polish and place dots evenly across the nail. Vary sizes for interest. Seal with topcoat after dots set for 1–2 minutes.
3. Stripe or French tip with striping tape or a steady hand
Use striping tape or painter's tape for crisp lines. Apply a base color; once dry, add tape where the stripe should be, paint over it with the stripe color, and remove tape immediately. Finish with topcoat.
Practical tips for better results
- Apply thin coats: thin layers dry faster and resist bubbling. Two thin coats beat one thick coat.
- Allow drying time: wait 2–3 minutes between coats; use a fast-dry topcoat if pressed for time.
- Anchor the brush: rest your wrist on a table to steady the stroke for cleaner lines.
- Use the edge-clean technique: dip a small angled brush in remover to tidy cuticles after topcoat.
- Practice on a nail wheel or a piece of paper to refine patterns before applying to nails.
Common mistakes and trade-offs
Beginners often expect perfection immediately. Common issues, trade-offs, and how to handle them:
- Too-thick polish: Makes designs blob and take longer to dry. Trade-off: thicker coats may cover in one layer, but thin coats yield neater results.
- Rushing drying time: Smudges happen when layers aren't set. Trade-off: faster-dry products save time but can look dull without a good topcoat.
- Over-ambitious designs: Complex patterns frustrate early learners. Start with dots and stripes before attempting gradients or stamping.
- Using poor-quality tools: Cheap brushes shed and make streaks. Investing in one decent brush and dotting tool improves outcomes faster than many polishes.
Real-world example: a 20-minute beginner at-home mani
Scenario: An evening event requires a quick manicure. Follow S.T.A.R.T. to sanitize, file, and base coat (5 minutes). Apply two thin coats of a neutral polish on all nails (6 minutes, including short drying). Use a contrasting shade to add dots to two accent nails (4 minutes). Finish with a fast-dry topcoat (5 minutes). Total: ~20 minutes for a durable, camera-ready look.
Safety and nail health
Keep nails and cuticles healthy by using a base coat and moisturizing cuticle oil after a manicure. If irritation or persistent changes in nail color/texture occur, check guidance from a dermatologist or an authoritative source such as the American Academy of Dermatology for nail care guidance: American Academy of Dermatology - Nail Care.
Tools to consider buying first
- Basic kit: nail file, buffer, base and topcoat, two polishes, cuticle pusher.
- Extras: dotting tool, thin striping brush, striping tape, alcohol wipes for prep.
- Optional: LED lamp only if working with gel polish at home; note gel requires proper removal to avoid damage.
Next steps and practice plan
Set a simple practice plan: Week 1—master single-color and base/topcoat routine; Week 2—practice dots and stripes; Week 3—combine two techniques and speed up drying. Track improvements by photographing nails after each session to observe steadiness and clean edges over time.
FAQ
What are the easiest nail art designs for beginners?
Dots, single-color with an accent nail, and simple stripes are the easiest nail art designs for beginners. Start with two thin coats and practice dots with a toothpick before progressing.
How long should each coat dry before adding detail?
Wait about 2–3 minutes for thin coats to become tack-free. If using thicker polish or a humid environment, allow up to 5 minutes. Testing one nail before detailing helps gauge drying time.
Can nail art be done on nails with acrylics or gel extensions?
Yes—techniques are similar, but ensure the extension surface is lightly buffed so polish adheres. For gel polish, cure under the recommended lamp and use products formulated for gel systems.
How do beginners fix chips or smudges quickly?
For small smudges, wait until tacky then gently smooth with a small brush dipped in topcoat. For chips, touch up with a thin stroke of color and seal with topcoat. Remove and redo if the imperfection is large.
How often should a beginner reapply topcoat to maintain designs?
Reapply a thin topcoat every 2–3 days to extend wear. This refreshes shine and seals edges against chipping, especially for easy at-home nail designs that are exposed to daily tasks.