Practical Farm Map Planner: Crop Rotation and Field Layout Guide
-

- March 25th, 2026
- 192 views


FREE SEO Topical Map Generator: Find Your Next Content Ideas
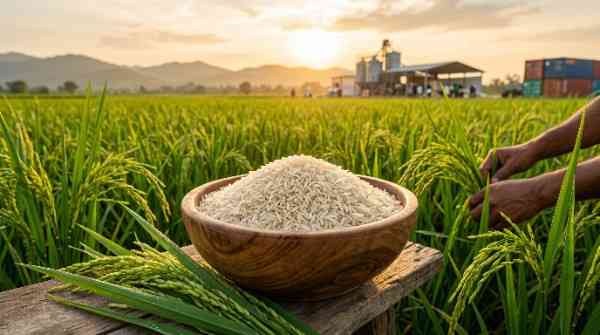
A farm map planner helps translate soil tests, field boundaries, slopes, and production goals into a practical crop rotation and field layout plan. Use a farm map planner to visualize rotations, plan access lanes, place irrigation, and reduce pest pressure across seasons.
- Purpose: turn field data into a usable map and rotation schedule.
- Core steps: collect data, draw fields, assign rotations, test, and review.
- Includes a FIELD checklist, a real example, practical tips, and common mistakes.
Farm map planner: step-by-step workflow
Start with a clear workflow for mapping and rotation scheduling. A straightforward sequence reduces rework and keeps decisions tied to measurable data.
1. Define objectives
Clarify production goals — cash crops, forage, cover crops, soil building, erosion control, or mixed objectives. Objectives determine rotation length, residues left on the field, and nutrient budgeting.
2. Gather base data
Collect these layers: property boundaries, current field boundaries, soil test results (pH, organic matter, P, K), elevation/contours, drainage features, existing irrigation lines, access roads, and previous crop history. Satellite basemaps and drone imagery help confirm field edges and identify erosion or compaction zones.
3. Draw and digitize fields
Create polygons for every management unit — fields, paddocks, strips. Assign IDs and attribute fields with soil series, area, slope class, and yield history. That structure makes rotation planning and recordkeeping repeatable.
4. Assign crop rotation blocks
Lay out rotations by management unit. Use spatial rules: keep high-demand crops on the best soils, place deep-rooted cover crops where compaction is an issue, and rotate families to disrupt pests. Mark priority zones for soil amendments or drainage fixes.
5. Create a multi-year schedule
Map a 3–5 year rotation grid. Include fallow and cover-crop windows, planting/harvest windows, and equipment constraints (e.g., minimum headland widths for turning). Store the schedule alongside the map for annual review.
Data and tools for effective farm field mapping
Essential data sources
Use farm-provided shapefiles, public cadastral maps, aerial imagery, GNSS/GPS field runs, and soil survey data from local extension or national services. For best-practice guidance on soil and conservation planning, consult authoritative sources such as the USDA NRCS.
Tool categories
Options include simple drawing tools (desktop or web map editors), farm management software with mapping modules, and GIS for advanced analysis. The right choice depends on scale, budget, and whether multi-user collaboration is required.
FIELD checklist (named framework)
Use the FIELD checklist to evaluate each management unit before assigning a rotation.
- Fields: confirm accurate boundaries and area.
- Irrigation: map water sources, delivery lines, and capacity.
- Exposure & elevation: note slope, aspect, and erosion risk.
- Land capability: soil type, drainage class, and compaction.
- Data history: yields, pest/disease records, and previous inputs.
Real-world example: 50-acre mixed grain and forage farm
A 50-acre example farm is divided into five 10-acre fields. Soil tests show two fields with higher organic matter and two with compaction. Using the farm map planner, assign:
- Field A (best soil): 3-year rotation corn → soybean → winter wheat with clover cover.
- Field B (compacted): deep-rooted cover crop year one, then barley and clover, then soybean.
- Fields C–E: alternating forage and small-grain rotations to match equipment and harvest timing.
The map also marks a low-lying area for improved drainage and adjusts lanes to avoid turning through prime ground. The multi-year schedule is saved as a layer so historical changes can be queried.
Practical tips for using a farm map planner
- Keep one canonical map file and export snapshots annually for audit trails.
- Prioritize soil tests on every management unit at least once every 3 years; use grid sampling for variable fields.
- Use crop family rotation rules (e.g., avoid consecutive Solanaceae or Brassicaceae) to reduce pest pressure.
- Record adjustments after harvest — a small map update prevents cascading errors next season.
Trade-offs and common mistakes
Trade-offs
Higher-resolution maps and frequent updates increase accuracy but require more time and data management. Simpler maps are faster but may hide within-field variation important for precision inputs.
Common mistakes
- Mixing planning scales: treating every field identically when internal variability matters.
- Ignoring logistics: rotations that look good on paper but require impractical equipment moves or harvest timing conflicts.
- Not linking maps to records: maps that are not updated after events (failures, floods, pest outbreaks) quickly become misleading.
Maintenance and review
Schedule map reviews after harvest and after major events (flooding, land purchases, infrastructure changes). Use yield maps and soil tests to adjust rotations and track improvements over time.
Practical checklist
- Annual: update boundaries, crop history, and irrigation changes.
- Every 3 years: full soil test grid or composite by management unit.
- After major work: re-survey lanes, terraces, or new drainage installations.
FAQ
What is a farm map planner and how do I start?
Begin by collecting existing maps and a recent aerial image, draw field polygons, add soil test results and slope data, then draft a simple 3-year rotation schedule tied to each polygon. Start small—map one field fully to test the workflow before scaling up.
How does a crop rotation map reduce pest and disease risk?
By rotating unrelated plant families, residues and pest populations are disrupted. Mapping rotations ensures rotations are followed spatially across the farm rather than coincidentally reused year-to-year in the same area.
What data layers should be included in a field layout planner?
Include boundaries, soil tests, elevation/contours, drainage features, irrigation, access lanes, and crop history. These layers support decisions on where to place high-demand crops or cover crops for soil repair.
How often should a farm map be updated?
Update maps annually at minimum; after any major change such as new infrastructure, field consolidation, or extreme weather events. Frequent updates keep rotation schedules and input plans accurate.
Can small-scale farms use simple tools or is GIS required?
Small farms can start with simple mapping tools and spreadsheets. GIS adds analysis capabilities for larger or more variable operations but is not required for effective rotation planning.