Safe Steps to Replace a Dryer Vent Cover Yourself in Alpharetta
-
- March 21st, 2026
- 310 views
Knowing when and how to replace a dryer vent cover matters for safety and performance. This guide explains whether it is safe to replace a dryer vent cover yourself in Alpharetta, what rules and risks to consider, and practical steps to complete the job correctly. The primary keyword appears here to match search intent: homeowners who want to replace a dryer vent cover should follow local code, safety checks, and proper materials.
Detected intent: Informational
How to replace a dryer vent cover safely in Alpharetta
Before any work, confirm that the dryer is unplugged (or gas supply turned off for gas dryers) and that the area is well ventilated. Replacing a dryer vent cover can be a safe, straightforward project when done with proper tools, a clear checklist, and attention to lint-fire prevention and weather sealing.
When it’s reasonable to replace the vent cover yourself
Simple cosmetic or damaged flap replacement
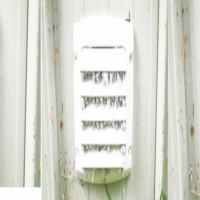
If the exterior hood flap is broken, or the flap does not seal and allows drafts or pests, a direct swap of the cover is usually a DIY-friendly fix. Typical signs that a cover needs replacement include a torn flap, heavy rust, or visible pest entry.
Minor debris and lint issues
Small lint buildup on the cover or immediately inside the termination can be cleaned before replacing the cover. For lint-fire prevention, follow dryer lint-cleaning best practices: clean the lint trap after each load and inspect the vent path yearly.
Safety checklist: VENT-REPLACE Checklist
Use this named checklist to decide readiness and guide the task.
- V — Verify power/gas is off and dryer disconnected.
- E — Examine the exterior termination and surrounding siding for damage.
- N — Note duct type (rigid metal vs. flexible foil) and condition.
- T — Test the existing flap for proper operation and seal.
- R — Remove lint and inspect 3–6 feet of accessible duct.
- E — Ensure new cover matches duct diameter and has a backdraft damper.
- P — Patch or seal gaps with approved high-temp caulk and screws.
- L — Label the date of replacement and schedule next inspection.
- A — Ask the local building department if a permit is required.
- C — Confirm no damage to gas venting or combustible materials near the outlet.
- E — Ensure the new installation meets manufacturer and code guidance.
Tools, materials, and local rules to check
Tools and parts
Basic supplies: screwdriver or drill, exterior-grade screws, high-temperature silicone or masonry caulk, replacement vent hood sized to match the duct, and a brush or vacuum for lint removal. Use rigid or semi-rigid metal ducting for best performance; avoid single-use foil tape for joints (use foil duct tape or mechanical clamps).
Local codes and permits
Confirm Alpharetta and Georgia codes for dryer termination height, distance from windows, and permitted materials—many jurisdictions follow the International Residential Code (IRC). For confirmation of dryer safety guidance from a national authority, see the National Fire Protection Association on dryer safety: NFPA dryer safety.
Step-by-step: replace a dryer vent cover (practical steps)
- Turn off power or gas and disconnect the dryer from the exhaust outlet.
- Inspect the exterior termination and clean lint from the visible duct entrance.
- Remove the old cover carefully—note how it was fastened and sealed.
- Match the new vent cover to the duct diameter and orientation; test-fit before sealing.
- Secure the new cover with exterior-rated screws and apply high-temp caulk around the flange to seal gaps.
- Reconnect the dryer, run a test load, and verify exhaust airflow at the termination and that the flap operates freely.
- Document the date and any notes for future inspections.
Common mistakes and trade-offs
Common mistakes
- Installing plastic or thin materials that warp from heat—use metal-rated hoods where required.
- Failing to inspect the duct: a new cover will not fix crushed, kinked, or blocked ducting.
- Using the wrong sealant—avoid standard silicone near dryer outlets; use high-temperature-rated products as specified.
- Ignoring local code requirements for termination distance from windows or soffits.
Trade-offs
DIY replacement saves labor costs and can be quick for simple exterior flap swaps. However, if the ductwork requires replacement with rigid metal, or the termination penetrates complex siding or masonry, hiring a qualified contractor reduces risk and ensures code compliance.
Real-world example
A single-family home in Alpharetta had an exterior vent flap stuck open and visible lint build-up. The homeowner disconnected the dryer, replaced the rusted hood with a metal flap, sealed the flange, and cleaned the first several feet of duct. After testing, dryer temperatures returned to normal and lint accumulation decreased. The project took under two hours and avoided a service call because the internal duct was intact.
Practical tips
- Measure the duct diameter before buying a replacement hood to avoid returns.
- Inspect the vent path for rodent nests—use a mirror or inspection camera if available.
- Prefer rigid or semi-rigid metal duct for long runs to reduce lint traps and fire risk.
- Schedule a full duct cleaning every 1–3 years depending on dryer usage and household lint levels.
Core cluster questions
- How often should dryer vent covers be inspected and replaced?
- What materials are code-approved for dryer vent ducts?
- How can lint buildup be safely removed from a dryer vent?
- When does dryer vent damage require a licensed contractor?
- What building permits are needed for exterior vent work in Alpharetta?
FAQ
Is it safe to replace a dryer vent cover myself in Alpharetta?
Yes, replacing a simple exterior vent cover is safe for a competent DIYer if precautions are followed: disconnect power/gas, confirm proper materials, and check local codes. If ductwork needs repair, if the dryer is gas-fired and venting is damaged, or if the termination penetrates complex siding or masonry, hire a licensed professional.
What are the signs the vent cover needs replacing?
Broken or missing flap, visible rust, pests entering the home, persistent drafts, or noticeable lint build-up at the exterior termination are clear signs a cover should be replaced.
Can replacing the cover reduce fire risk?
Replacing a damaged cover alone reduces pest entry and improves flap closure but does not eliminate fire risk if the duct is clogged. Regular lint removal and correct duct materials are essential to reduce lint-fire hazards.
Are permits required for this work in Alpharetta?
Minor cover swaps often do not require permits, but changes that involve structural openings, new duct routing, or gas appliance venting may. Contact the City of Alpharetta building department to confirm requirements.
How to choose the right replacement vent cover?
Choose a cover sized to the duct, made of durable metal for exterior durability, with an integrated damper to prevent backdrafts and pests. Verify compatibility with the dryer duct type and local code recommendations.