How to Design an Effective Jira Service Management Workflow for IT Teams
-

- September 24th, 2026
- 104 views
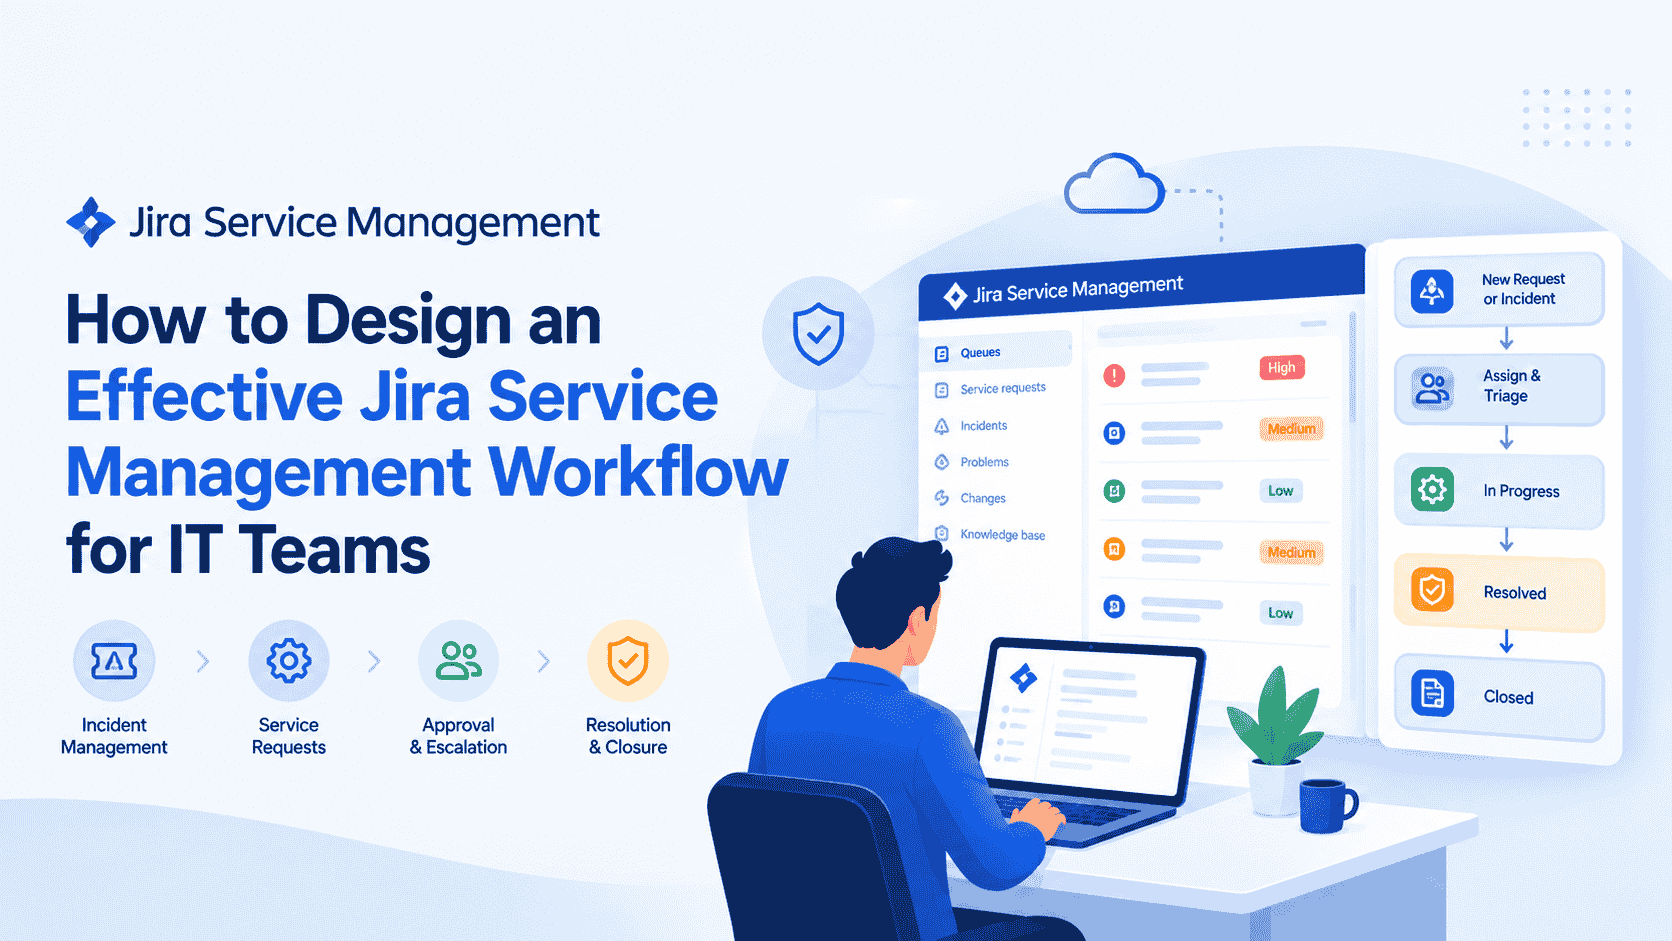
A well-designed service management workflow determines how efficiently IT teams receive, process, approve, and resolve requests. In Jira Service Management, workflows can be configured around different service processes while controlling statuses, transitions, conditions, validators, approvals, and automation.
For organizations planning or improving their service management environment, understanding Jira Service Management consulting can help align workflow configuration with operational requirements, team responsibilities, and ITSM processes.
This guide explains the core components of a Jira Service Management workflow and how IT teams can design a workflow that is structured, manageable, and adaptable.
What Is a Jira Service Management Workflow?
A Jira Service Management workflow defines the lifecycle of a request, incident, change, problem, or other service ticket.
At a basic level, a workflow determines:
- What stages a ticket passes through
- Who can move a ticket between stages
- What information is required before a transition
- Which conditions must be satisfied
- Whether approvals are required
- What actions should happen automatically
A simple incident workflow might look like:
Alert → Triage → Assignment → Investigation → Resolution → Closure
However, enterprise IT teams often need additional states and controls based on ticket type, priority, risk, approval requirements, and service ownership.
The objective should not be to create the most complicated workflow possible. Instead, the workflow should represent the actual operational process while maintaining appropriate controls.
1. Start by Mapping the IT Service Process
Before configuring statuses and transitions in Jira Service Management, document how the IT team currently handles requests.
Start by identifying:
- How requests enter the service desk
- How tickets are categorized
- Who performs the initial triage
- Which teams handle different request types
- When approvals are required
- What information is needed for implementation
- How resolution is validated
- When a ticket can be closed
For example, an incident process could be structured as:
New → Triage → In Progress → Pending → Resolved → Closed
A change-management workflow may require more control:
Draft → Assessment → Approval → Scheduled → Implementation → Validation → Closed
The workflow should reflect the process rather than forcing every service request through the same sequence.
2. Define Workflow States Carefully
Workflow states represent the different stages of a ticket's lifecycle.
Common Jira Service Management states include:
| State | Purpose |
|---|---|
| New | Request has been submitted |
| Triage | Team is assessing the request |
| In Progress | Work is actively being performed |
| Pending | Work is temporarily waiting |
| Resolved | Solution has been implemented |
| Closed | Request lifecycle is complete |
The exact statuses should depend on the service process.
For example, adding separate states such as Security Review, Manager Approval, or Change Advisory Board Review can be appropriate when those stages represent real operational controls.
However, unnecessary statuses can make workflows difficult to understand and maintain.
A useful principle is:
Create a status when the team needs to track a meaningful stage of work.
3. Design Clear Transitions
Transitions define how a ticket moves from one state to another.
For example:
New → Triage
A support agent may transition a new request into triage after reviewing the initial information.
Another transition could be:
Triage → In Progress
This indicates that the ticket has been accepted and work has started.
You can also design controlled transitions such as:
In Progress → Pending
when the team is waiting for customer information, another team, or an external dependency.
Good transitions should have clear business meaning. Avoid creating multiple transitions that perform essentially the same action because this can confuse agents.
4. Use Conditions to Control Who Can Transition Issues
Conditions determine whether a transition is available to a user.
For example, you may want only members of a specific service team to perform certain transitions.
A change-management workflow might allow:
Assessment → Approval
only when the appropriate team has completed the assessment.
Conditions can help control:
- User permissions
- Groups or roles
- Issue properties
- Request characteristics
- Workflow-specific requirements
This is especially important in enterprise environments where different teams manage different services.
For example:
Service Desk → Triage
could be broadly available to support agents, while:
Approval → Implementation
could be restricted to authorized change managers or approvers.
5. Use Validators to Protect Data Quality
Validators check whether required information is available before a transition can occur.
Suppose an IT team wants to move an incident from Investigation to Resolution.
The workflow could require:
- Resolution details
- Root-cause information
- Resolution category
- Required documentation
If the information is missing, the transition can be prevented until the required fields are completed.
This creates an important distinction:
Conditions control whether a transition can be performed, while validators check whether required information has been provided.
Using validators appropriately can reduce incomplete tickets and improve reporting quality.
6. Add Approvals Where Governance Requires Them
Not every IT request needs approval.
However, approval steps can be important for processes involving:
- Production changes
- Access requests
- Security-sensitive activities
- Infrastructure changes
- High-risk deployments
- Business-critical services
For example:
Change Request → Risk Assessment → Approval → Implementation
An approval stage creates a defined control point before the change proceeds.
The key is to match approval requirements to actual business and operational policies. Adding unnecessary approvals to low-risk requests can introduce delays without providing meaningful control.
7. Build Different Workflows for Different Processes
One of the common workflow-design mistakes is trying to use a single workflow for every ITSM process.
Incident management and change management have different objectives.
Incident Workflow
New → Triage → Investigation → Resolution → Closure
The primary objective is restoring service and resolving disruption.
Change Workflow
Request → Assessment → Approval → Implementation → Validation → Closure
The focus is controlled implementation and risk management.
Problem Workflow
Identification → Investigation → Root Cause Analysis → Resolution → Closure
The focus is identifying and addressing the underlying cause of recurring incidents.
Using process-specific workflows can make responsibilities and controls clearer.
8. Design for SLA Tracking
Service-level agreements are an important part of service management workflow design.
For example, an IT team may define different response and resolution targets based on incident priority.
A simplified model could look like:
| Priority | Example | SLA Focus |
|---|---|---|
| Critical | Major service outage | Rapid response and resolution |
| High | Significant service degradation | Short response target |
| Medium | Limited business impact | Standard target |
| Low | Minor issue | Longer target |
The workflow should support the organization's SLA requirements rather than working against them.
For example, moving a ticket into a Pending state may represent waiting for customer information. The organization should determine how that state interacts with its SLA policies.
Monitoring SLA performance can also help identify workflow bottlenecks.
9. Use Automation to Reduce Manual Steps
Once the workflow structure is established, automation can reduce repetitive work.
Examples include:
- Automatically assigning requests
- Sending notifications
- Updating fields
- Escalating high-priority incidents
- Creating linked tasks
- Triggering actions after approvals
- Updating stakeholders when status changes
For example:
Critical Incident Created → Assign to Incident Team → Notify Stakeholders → Start SLA Tracking
Automation should support the workflow rather than replace good workflow design.
If the underlying process is unclear, adding more automation can make the system harder to troubleshoot.
10. Connect Workflow Design With Request Types
Jira Service Management allows teams to organize customer-facing requests through request types.
For example, an IT service portal could include:
- Report an Incident
- Request Software
- Request Access
- Report a Security Issue
- Request Hardware
- Request a Service
Each request type can collect information relevant to that particular process.
For example, a Software Access Request may require:
- Software name
- Business justification
- Requested user
- Manager approval
An Incident may instead require:
- Affected service
- Impact
- Urgency
- Description of the issue
Connecting request types with appropriate workflows helps ensure that the service process begins with the right information.
11. Consider Escalation Paths
Critical incidents may require escalation when predefined conditions are met.
A basic escalation model could be:
Critical Incident → Initial Triage → SLA Threshold → Escalation → Senior Support → Resolution
Escalation rules can be based on factors such as:
- Priority
- SLA status
- Time elapsed
- Service impact
- Business criticality
The escalation process should clearly identify who takes ownership at each stage.
Without clear ownership, escalation can simply move a ticket between teams without improving resolution speed.
12. Keep the Workflow Easy for Agents to Understand
A technically powerful workflow can still fail if agents struggle to use it.
When designing the workflow, consider:
- Are statuses easy to understand?
- Are transitions clearly named?
- Are unnecessary steps removed?
- Are required fields relevant?
- Are approval stages obvious?
- Can agents identify the next action quickly?
For example, use clear transition names such as:
Start Investigation
instead of ambiguous options such as:
Update Status
The workflow should communicate what action the agent is expected to take.
13. Test the Workflow Before Production
Testing should be part of the workflow design process.
Create test scenarios for different situations.
Scenario 1: Standard Incident
New → Triage → Investigation → Resolution → Closure
Scenario 2: Critical Incident
New → Triage → Escalation → Investigation → Resolution → Closure
Scenario 3: Waiting for Customer
Investigation → Pending → In Progress → Resolution
Scenario 4: Reopened Incident
Closed/Resolved → Reopened → Investigation → Resolution
Testing these paths helps identify broken transitions, missing validators, incorrect permissions, and automation issues before the workflow is introduced to production users.
14. Review Workflow Performance After Implementation
Workflow design should not end after deployment.
IT teams should periodically review:
- SLA performance
- Average resolution time
- Ticket aging
- Reopened tickets
- Escalation frequency
- Approval delays
- Queue volumes
- Automation failures
- Agent feedback
For example, if a large percentage of requests remain in Pending Approval, the approval process may require investigation.
Similarly, if tickets frequently move backward between Triage and In Progress, the team may need to review categorization or assignment rules.
Operational data can therefore reveal where the workflow needs improvement.
15. A Practical Enterprise JSM Workflow Model
A mature IT service management workflow could combine the components discussed above:
Request Created
↓
Triage
↓
Priority & Impact Assessment
↓
Assignment
↓
Investigation / Fulfillment
↓
Approval — If Required
↓
Implementation / Resolution
↓
Validation
↓
Closure
Supporting controls can operate throughout the workflow:
- Conditions control transition access.
- Validators ensure required information.
- Approvals provide governance.
- SLAs track service targets.
- Automation reduces repetitive actions.
- Escalations address priority or SLA risks.
This approach provides a structured foundation while allowing individual ITSM processes to have their own specialized workflow paths.
Conclusion
Designing an effective Jira Service Management workflow requires more than creating a sequence of statuses. IT teams need to consider transitions, conditions, validators, approvals, SLAs, automation, escalation paths, request types, and the specific requirements of each ITSM process.
A well-structured workflow can provide clearer ownership, better data quality, stronger process control, and improved visibility across service operations. The most effective approach is to start with the actual business process, configure only the controls that provide value, test realistic scenarios, and continuously optimize the workflow using operational data.
For organizations looking to improve workflow architecture, automation, integrations, and broader ITSM processes, Jira Service Management consulting services can support the planning, configuration, implementation, and optimization of JSM environments.
https://www.empyra.com/jira-service-management-consulting?utm_source=Off-page-SEO&utm_medium=Blog-posting-indibloghub&utm_campaign=Subhrajit