How Does a Material Laser Cutter Work for Different Project Types?
-
- May 12th, 2026
- 3,712 views

FREE SEO Topical Map Generator: Find Your Next Content Ideas
Anyone who has ever seen a laser cutter working knows it's kind of magic. But it is really science, heat, and careful settings. In the UK, people use material laser cutters for school projects, small businesses, signs, models, crafts, and even clothing samples.
In this blog, I will explain how it works in an easy way, and how the same machine can behave differently depending on what you are making.
What is a material laser cutter and what is inside it?
A material laser cutter is a small beam of light to heat a material in a very small line. That heat can cut right through, or it can engrave the top layer to make a mark.
Most laser cutters have these main parts:
Laser source (makes the laser beam)
Mirrors and lens (aim and focus the beam into a small dot)
Bed/table (where your sheet of material sits)
Motion system (moves the head, or moves the bed, to follow your design)
Controller and software (tells it where to go)
Air assist (blows air to reduce flame and smoke)
Extraction (pulls fumes away, usually with a vent or filter)
Different machines use different laser types (like CO₂ or fibre). That matters a lot for what materials you can cut.
How does a material laser cutter work step by step?
Here is the simple step-by-step idea:
You make a design file
Usually it is a vector file (lines) for cutting, and an image or filled shapes for engraving.The machine focuses the beam
The lens turns the laser into a very small, hot point. A smaller point gives cleaner lines.Heat does the work
For cutting, the beam heats the material until it melts, burns, or vaporises along the line.
For engraving, it only removes the top layer (or changes the surface).
Speed and power control the result
If the head moves slower, the laser stays longer in one place, so it burns deeper. If it moves faster, the mark is lighter.
Air and extraction keep it safer and cleaner
Air assist can reduce flare-ups, and extraction helps remove smoke and fumes.
So the laser does not “slice” like a knife. It uses controlled heat on a very precise path.
Settings that change for different project types
Even with the same machine, you cannot use one setting for everything. The main settings people adjust are:
Power (how strong the laser is)
Speed (how fast it moves)
Passes (how many times it goes over the line)
Focus height (distance from lens to material)
Air assist level
Line width / kerf (tiny amount removed by the laser)
Now let’s look at common project types.
Wood projects (crafts, signs, models)
Wood is popular because it cuts well and engraves nicely.
Cutting wood often makes dark edges because it is basically controlled burning.
Engraving wood can make great detail for logos, maps, names, or patterns.
Tips that help:
Masking tape can reduce smoke marks on the top surface.
Plywood can be tricky because glue layers vary, so you may need a test square first.
Common UK uses: personalised gifts, shop signs, model buildings, school design projects.
Fabric projects and the “fabric laser cut” idea
Fabric is softer, so it behaves differently. A fabric laser cut can seal the edge on some synthetic fabrics, which helps stop fraying. But natural fabrics may still fray, and some fabrics can scorch.
Good practice:
Use lower power and higher speed than you would for wood.
Keep fabric flat so the focus stays correct.
Always think about fumes and fire risk—fabric can ignite if settings are wrong.
Common uses: small pattern pieces, appliqué shapes, costume parts, sample runs for clothing.
Acrylic projects, including “laser engraving acrylic”
Acrylic is a big favourite for clean-looking projects like signs and display pieces. Cutting acrylic can leave a smooth edge if settings are right.
With laser engraving acrylic, you can make frosted-looking text and pictures, especially on clear acrylic. That is why it is used for awards, LED edge-lit signs, and neat labels.
Helpful notes:
Cast acrylic often engraves more cleanly than some other types.
Acrylic fumes must be extracted properly.
You may need protective masking to reduce marks.
Common uses in the UK: business signage, table numbers for events, keyrings, product tags.
Paper and card projects (stencils, invitations, packaging)
Paper cuts very easily, so you need a gentle approach.
Too much power can cause burning or even small flames.
A fast speed and low power is usually better.
Common uses: greeting cards, layered art, stencils, light packaging prototypes.
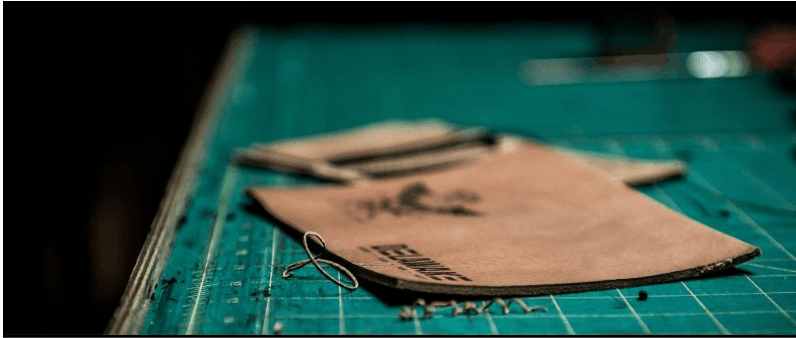
Leather and rubber projects (patches, stamps)
Leather can engrave well for logos and textures. Cutting depends on thickness and type.
Rubber is sometimes used for stamp making, but you must use correct rubber made for laser work, and you must have proper extraction.
Always test first because smell and smoke can be strong.
Metal projects (when you need a different laser)
Many people think all laser cutters can cut metal, but that is not always true. A lot of hobby and workshop machines are CO₂ lasers, which are great for wood and acrylic, but metal cutting often needs a fibre laser (and higher power).
Some machines can mark certain coated metals, but real cutting is a different level.
If your project is metal parts, check the machine type and the safe, correct setup before you start.
Getting your design file ready (so your cut comes out right)
A laser cutter follows your file exactly, so tidy files matter.
Simple checklist:
Use vectors for cutting lines
Keep cut lines as hairline/thin (as your software suggests)
Keep engraving areas as filled shapes or images
Put different actions on different colours/layers (cut, score, engrave)
Add small test shapes to check size and fit
If a piece must slot into another, remember the laser removes a tiny width (kerf). That can change tight fits.
Safety notes (important in the UK)
Laser cutting is not a “set it and walk away” tool.
Basic safety rules:
Never leave it running alone
Use proper fume extraction
Keep a fire extinguisher nearby (and know how to use it)
Do not cut unknown plastics (some can release harmful fumes)
Keep the lens and mirrors clean so the beam stays controlled
If you are working in a shared space, follow the site rules and any UK workshop guidance for ventilation and training.
Quick FAQs
Can one machine cut and engrave?
Yes. Cutting and engraving are just different settings and file actions.
Why do edges go brown on wood?
Because the laser heat burns the surface. Masking and better extraction can reduce marks.
Do I need lots of power for everything?
No. Thin card needs very little power. Too much power can ruin the job.
What should I test first?
Do a small power/speed test grid on the same material. It saves time and waste.
Final thoughts
A material laser cutter works by focusing light into heat, then controlling that heat with speed, power, and focus. Once you understand that, different project types make more sense: wood likes steady cutting, fabric needs care to avoid scorching, and acrylic can look super clean with the right settings.
If you are unsure, start with small tests, keep things safe, and match the settings to the material. That is the easiest way to get neat results every time.