 Link Insertions on Real Blogs – Quick Wins for Better Rankings!
Written by Albert Taylor » Updated on: June 17th, 2025

The transition between two cloud-based services, like Office 365 and G Suite, is usually performed by small and large organizations. The migration from Microsoft 365 to Google Workspace emerges when the organization wants to fulfil the demands of its business work. This blog will share how users can complete their Office 365 migration to G Suite. We will share two methods to complete this task.
Your search for the solution to perform the migration of Office 365 data to G Suite will be over here. So, kindly read this blog till the end and complete this migration task effectively.
If users want to migrate Office 365 to G Suite mailboxes, there are two methods that can help them. First is the manual, and another is the professional software. The manual solution offers various ways to complete this migration task. Users do not need any third-party software to use the manual solutions for the migration from Microsoft 365 to Google Workspace mailboxes. Here, we will share how users can use the IMAP solution to accomplish this task. Also, we will elaborate on the third-party tool Shoviv Software offers to do this migration process.
In this method, we will use the Microsoft 365 admin centre to complete the migration from Microsoft 365 to Google Workspace emails. Users can follow the below procedure to complete this task manually.
• Go to the Office 365 Admin Center and log in with your account.
• Navigate to the Setup option and choose migration from the Featured Collection tab.

• Now, you have to tap the Emails under the Migration option.
• After that, choose the Import my email messages in the Email Source.
• Then, you will be redirected to the Select Your Data Service page. Here, you will see several options; choose the Other email sources option to continue, as there is no direct option to migrate Office 365 to G Suite mailboxes.

• Now, you need to provide the required details for establishing an IMAP connection.
• Then, check whether the connection is verified or not by clicking the Save button. After that, all the users will be added to the Email Migration Status Page.

• At last, click the Start Migration option to move the Office 365 data to G Suite.
By using these steps, users can complete the migration from Microsoft 365 to Google Workspace emails. In case this method does not work for you, then you can move to the professional third-party tool to complete this task. Let us check how professional software works that Shoviv offers.
The Shoviv Microsoft 365 to Google Workspace Migration Tool is the simplest way to transfer emails to G Suite. It allows users to process various mailboxes in a single click without size restrictions. Moreover, this tool offers multiple user-centric features to ease the migration task for users. It retains the hierarchy of the folder and the integrity of emails during the migration process. Users can easily select the desired items from their Office 365 mailboxes using its filter option.
The migration from Microsoft 365 to Google Workspace emails will become easy, as it comes with a simple user interface. Users will also be enabled to use its scheduler option to set the migration periodically. Now, we will give you the stepwise procedure of this software to migrate Office 365 to G Suite mailboxes.
• Install and open the Shoviv Office 365 to G Suite Migration Tool.
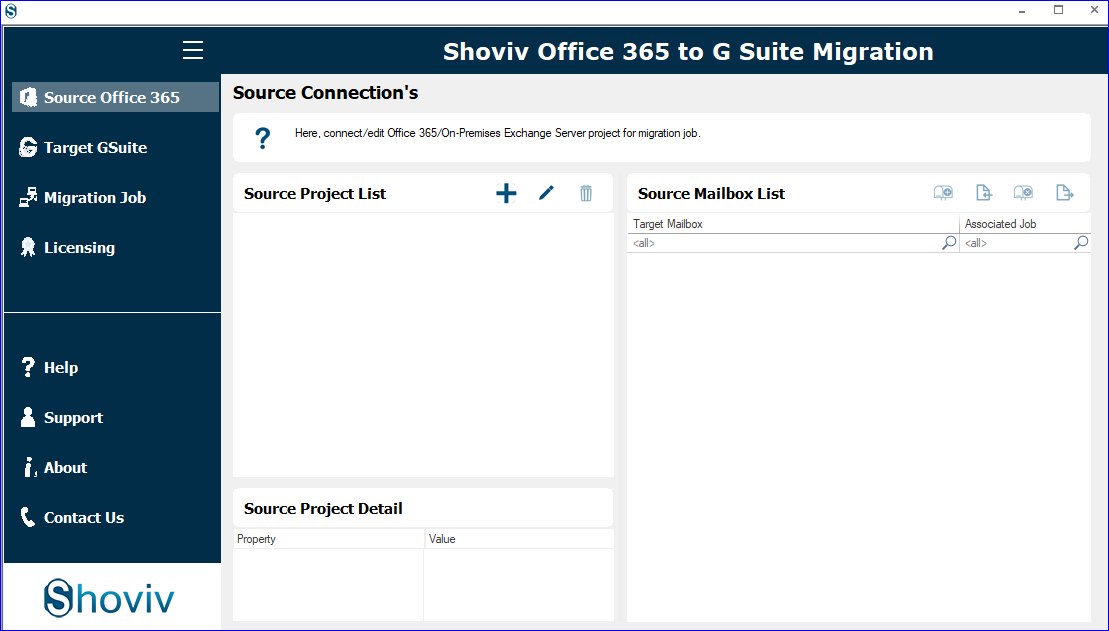
• After that, click the Source Office 365. Enter the project name, select the Exchange Server name and other details to connect. Then, hit the OK button.
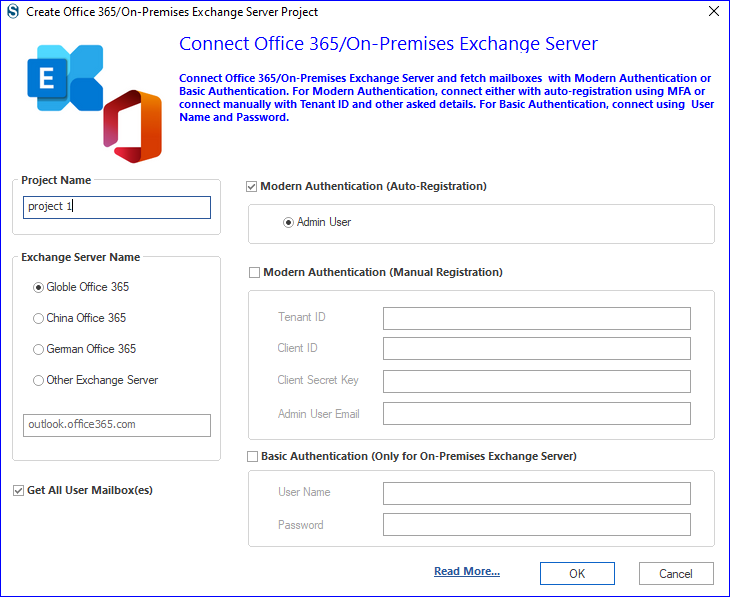
• You will be redirected to the Microsoft login page; enter your email address and accept the permission.

• Then, click the Target G Suite. Provide the project name, enter your email address, service account ID and P 12 file path. After that, hit the Connect button.
• Now, tap the Migration Job and select the mailbox type you want to migrate from the opening wizard.

• Afterwards, enter the Job name, select mailboxes, add the source and target and tap the Next button.

• Then, you have to map the source mailboxes to the target and continue with the Next button.

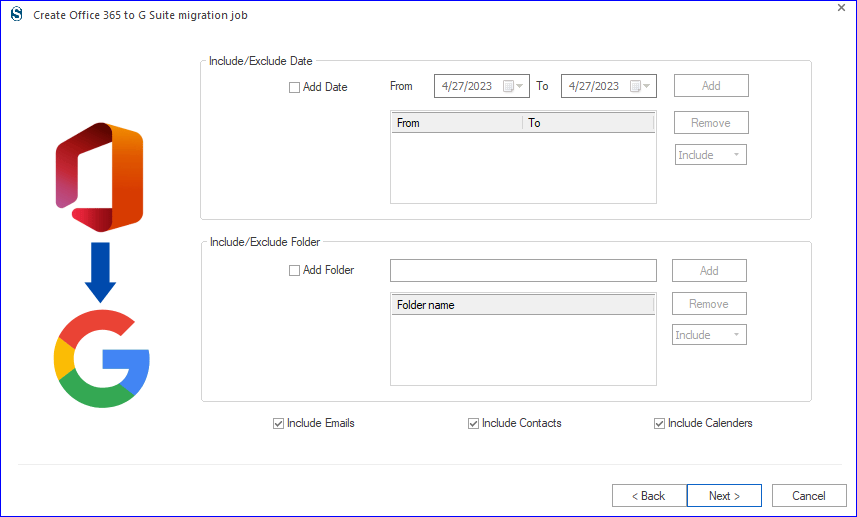
• Include or exclude items using the date, item type and folder basis and hit the Next to move forward.
• Now, on the Settings page, enter the mailbox thread count and other details.

• Choose the Job Schedule option if you want to set the migration task periodically and hit the OK button.

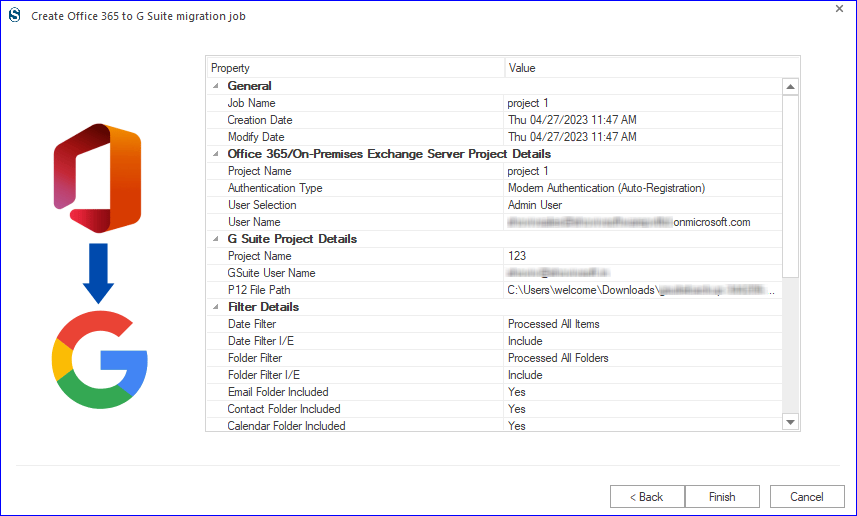
• At last, check all the details for the migration from Microsoft 365 to Google Workspace emails and hit the Finish button.
This blog has delivered brief information on the working procedure of manual and professional methods. Users should complete the migration from Microsoft 365 to Google Workspace using the Shoviv professional tool. This software is simple to use; it will automatically complete the migration by just following a few easy steps. Users can also check its free demo version to learn more about its facilities.
Note: IndiBlogHub features both user-submitted and editorial content. We do not verify third-party contributions. Read our Disclaimer and Privacy Policyfor details.
Sponsored Ad Partners


![]()


Copyright © 2019-2025 IndiBlogHub.com. All rights reserved. Hosted on DigitalOcean for fast, reliable performance.


